Gluten Free Apple Cake
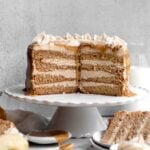
This Gluten Free Apple Cake has layers of soft cinnamon apple cider cake surrounded by luscious apple cider cinnamon buttercream topped with an apple cider caramel drip. It’s autumn on a fork! Apple cider isn’t in season where you live? Don't worry! You can use a natural style apple juice instead! Oh and of course, this fall dessert is gluten free, nut free, egg free and can easily be vegan!
Servings: 12 Slices
Calories: 856kcal
Ingredients
- 2 ½ cups apple cider or natural apple juice
For the Apple Cider Caramel
- ¼ cup reduced apple cider
- 1 cup light brown sugar
- ½ cup unsalted butter or vegan baking stick
- ¼ cup heavy cream
For the Apple Cake
- 2 ¼ cups multipurpose gluten free flour (I use Cup4Cup gluten free multipurpose flour which contains xanthan gum)
- 1 cup granulated sugar
- 1 ½ teaspoons baking powder
- ½ teaspoon baking soda
- ½ teaspoon kosher salt
- 2 teaspoons ground cinnamon
- ½ cup reduced apple juice start with 2 ½ cups and boil down
- 1 cup milk
- ½ cup light brown sugar , packed
- ½ cup vegetable oil
- 2 teaspoons pure vanilla extract
For the Cider Frosting
- 1 cup unsalted butter or vegan baking sticks, room temperature
- ¾ cup light brown sugar , packed
- 6 cups confectioners’ sugar
- 1 teaspoon ground cinnamon
- ¼ cup reduced apple cider
- 1 teaspoon pure vanilla extract
- 3 tablespoons water
Instructions
Reduce the Apple Cider/Apple Juice
- Pour the apple cider or juice into a medium pan set over medium low heat. Let the cider simmer for about 25-35 min. You should be left with about 1 ¼ cups of cider. (You don't want less than 1 cup). Set aside.
Make the Apple Caramel
- In a medium saucepan, whisk together ¼ cup reduced apple cider, 1 cup light brown sugar, ½ cup unsalted butter and ¼ cup heavy cream.Cook everything over medium heat, whisking constantly. Cook until the mixture starts to boil. Once boil, continue boiling for 2 minutes, whisking constantly. Remove from heat and set aside to cool. Let sit at room temperature for about 30 minutes then chill in fridge until ready for the cake.
Make the Gluten Free Apple Cake
- Preheat the oven to 350 degrees Fahrenheit and grease and line two 8 inch cake pans with parchment paper. Set aside.
- In a large bowl whisk together the 2 ¼ cups multipurpose gluten free flour, 1 cup granulated sugar, 1 ½ teaspoons baking powder, ½ teaspoon baking soda, ½ teaspoon kosher salt and 2 teaspoons ground cinnamon. Set aside.
- In a medium bowl, whisk together ½ cup of the cooled reduced cider, 1 cup milk, ½ cup light brown sugar, ½ cup vegetable oil and 2 teaspoons pure vanilla extract.
- Slowly add the cider mixture into the flour mixture and use a spatula to combine as it gets thick.
- Divide the batter evenly into two greased and parchment lined 8 inch cake pans and smooth the tops with a butter knife.
- Bake the cakes in the center rack at 350 degrees Fahrenheit for 35 minutes until slightly springy when carefully touched.
- Remove cakes from oven and let the cakes cool almost completely in the pan for 15 mins before trying to remove. Then remove from pans and let cool completely on a wire cooling rack.
- Once cool, slice both cakes in half horizontally. Now you have 4 thin layers of cake.If your cakes have dome tops, you can take a thin layer off the tops of the cake with a knife, to make a flat surface.
Make the Apple Cider Buttercream
- While the cake is baking, make the frosting:With the paddle attachment of an electric mixer, or using a large bowl and a hand mixer, beat the 1 cup room temperature butter or vegan baking stick with ¾ cup light brown sugar, until creamy. About 1-2 minutes.
- Slowly beat in the 6 cups confectioners’ sugar, 1 teaspoon ground cinnamon, ¼ cup reduced apple cider and 1 teaspoon pure vanilla extract until combined.Slowly beat in the 3 tablespoons water a little at a time until you get the desired consistency. You may not need to use it all.
Assemble the Cake
- Divide the frosting into 5 equal servings.
- Place one layer of cake on a cake plate/stand. Scoop ⅕ (about 1 cup) of frosting on top of the layer and use an icing spatula to spread it around.
- Place another layer of cake on top; repeat this same process. Do this with 3 layers of cake.
- Once you get to the last layer of cake, place it bottom (or flat) side up so the top of the cake is nice and flat. Use an icing spatula or a butter knife to frost the top and a thin layer on the sides of the cake.You should only use a fifth of the frosting on the top and sides combined; this is a semi-naked cake.
Decorate the Cake
- Take the cake out of the fridge. Pour the caramel on top of the cake and use an icing spatula to push the caramel to the edge to let it naturally drip down.To get the swirl I did on top of the cake, while the caramel is wet, carefully put some buttercream on a paper towel and swirl it into the wet caramel.Pop the cake back in the fridge so the caramel hardens. About 10 minutes.If the caramel is too thick and not pourable, microwave it in 5 second increments until it is able to be poured.
- If desired, put the remaining ⅕th of cider buttercream into a piping bag. Create swirls going all the way around the top rim of the cake.If you have frosting leftover, save it in a bowl covered in plastic wrap in the fridge for a few days.
- Let the cake sit out on the counter for about 15-20 min prior to serving.
Video
Notes
Vegan: Use a dairy-free gluten free flour, vegan sugar, vegan baking sticks, non-dairy milk and vegan heavy cream.
Gluten Free Flour- If you also have nut allergies, make sure to use a brand that’s made in a nut free facility. I really love to use Cup4Cup Multipurpose Flour because it’s free of the top 9 allergens. It also contains xanthan gum which really helps give baked goods their bounce and prevents them from falling apart. Since all multipurpose gf flours are not the same, if you use a different gluten free flour, please understand the results will most likely be different.
All Purpose Flour: I cannot test this due to celiac disease, but use 2 ¼ cups packed AP flour (378 grams) and only ¾ cups of milk in the cake batter.
Storing: Once the cake is cut into, it’s best to cut the entire cake into slices, wrap each slice in foil and store in a zip top bag in the fridge. Eat extra slices within 2 days.
When ready to eat, let the slices sit on the counter, in the foil for about an hour or until the cake is room temperature and soft.
Freezing: If not eating all the extra slices within 2 days, take the slices wrapped in foil and place in the zip top bag and freeze them. You can keep the slices frozen for up to 30 days.
When ready to eat, put the slices in the fridge the night before or leave them out on the counter for 2 hours prior to eating or until the cake is room temperature and soft.
Nutrition: The info below is a generated estimate and is not guaranteed to be accurate.
Nutrition
Calories: 856kcal | Carbohydrates: 137g | Protein: 3g | Fat: 35g | Saturated Fat: 11g | Polyunsaturated Fat: 10g | Monounsaturated Fat: 12g | Trans Fat: 1g | Cholesterol: 28mg | Sodium: 397mg | Potassium: 126mg | Fiber: 3g | Sugar: 119g | Vitamin A: 1018IU | Vitamin C: 1mg | Calcium: 122mg | Iron: 1mg