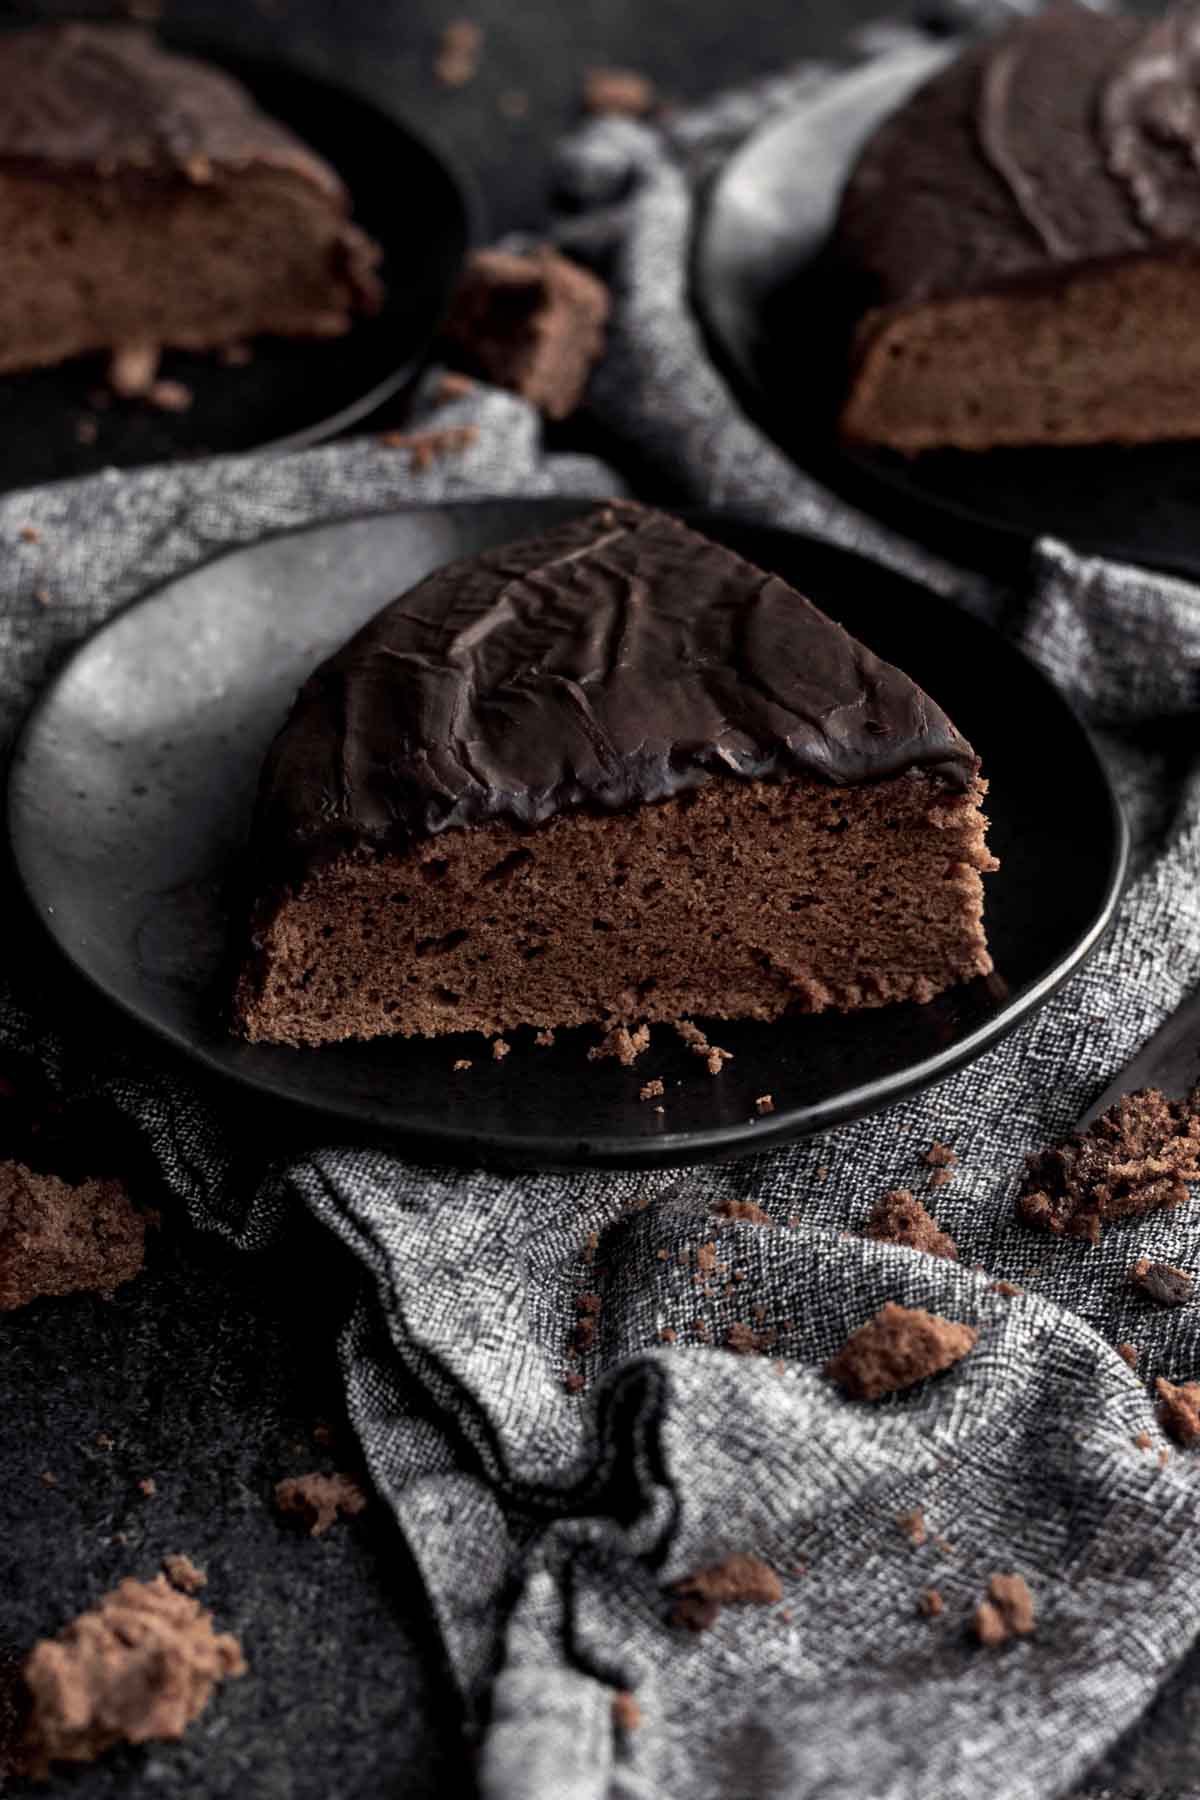
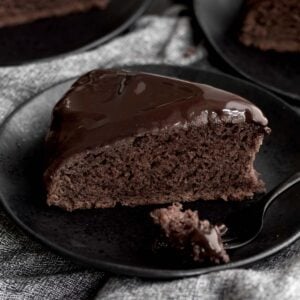
This Chocolate Tea Cake is so light and fluffy with a mild chocolate flavor. The chocolate glaze topping adds that lovely sweetness because the cake itself is not overly sweet. Usually I’m all about richness and decadence, but this cake is a great option if you’re not feeling something super heavy. It’s of course, gluten free, nut free, egg free and can easily be vegan.

This chocolate tea cake is so airy, everyone will be asking how it is egg free! Not only is it delicious, but it only takes an hour to make from start to finish! It's perfect for breakfast, afternoon tea/coffee and dessert!
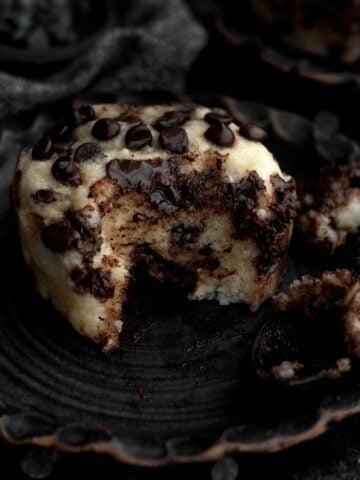
For more simple cake recipes, try out my Vegan Flourless Chocolate Cake, Irish Tea Cake, Cinnamon Tea Cake and my Eggless Vanilla Cake.
Jump to:
Reasons To Love This Cake
- Allergy Friendly- This cake is gluten free, nut free, egg free and can easily be dairy free (vegan)!
- Soft & Fluffy- This cake is so light, airy and delicious!
- Sweet- It has the perfect amount of sweetness thanks to the chocolate glaze!
Ingredient Notes
- Gluten Free Flour- If you also have nut allergies, make sure to use a brand that’s made in a nut free facility. I really love to use this gluten free flour because it’s nut safe but it does contain dairy. It also contains xanthan gum which really helps give baked goods their bounce.
- Cornstarch and Water- This is an eggless cake, so this mixture helps bind everything together.
- Milk- If there are no dairy allergies or if you’re not vegan, you can use regular whole milk. For non dairy, use a non dairy milk of your choosing.
- Butter/Vegan Baking Sticks- Make sure to use room temperature, not melted in the cake batter.
- Cocoa Powders- I like to use two types but if you only want to use one, use Dutch or Natural Unsweetened.
- Chocolate Chips- For the glaze, make sure to use allergy friendly chocolate chips if you want this vegan.
See my recipe card below for a complete list of the ingredients with measurements.
Substitutions and Variations
How to Make this Vegan
- Use a gluten free flour that’s free from dairy.
- Make sure the brand of sugar you use is vegan.
- Use vegan baking sticks instead of butter in the frosting.
- Only use a non dairy milk of choice.
- Only use vegan chocolate chips. I love these allergy friendly chocolate chips.
How to Make this recipe with All Purpose Flour
- Use 1 ½ plus 1 tablespoon packed AP flour (252 grams plus 1 tablespoon).
- Make sure to use ½ cup milk.
This recipe has not been tested with these substitutions and/or variations due to celiac disease and food allergies. If you change any of the ingredients, please let us know how the recipe turned out in the comments below!
How to Make Chocolate Tea Cake
Here are the step by step instructions to make this cake!
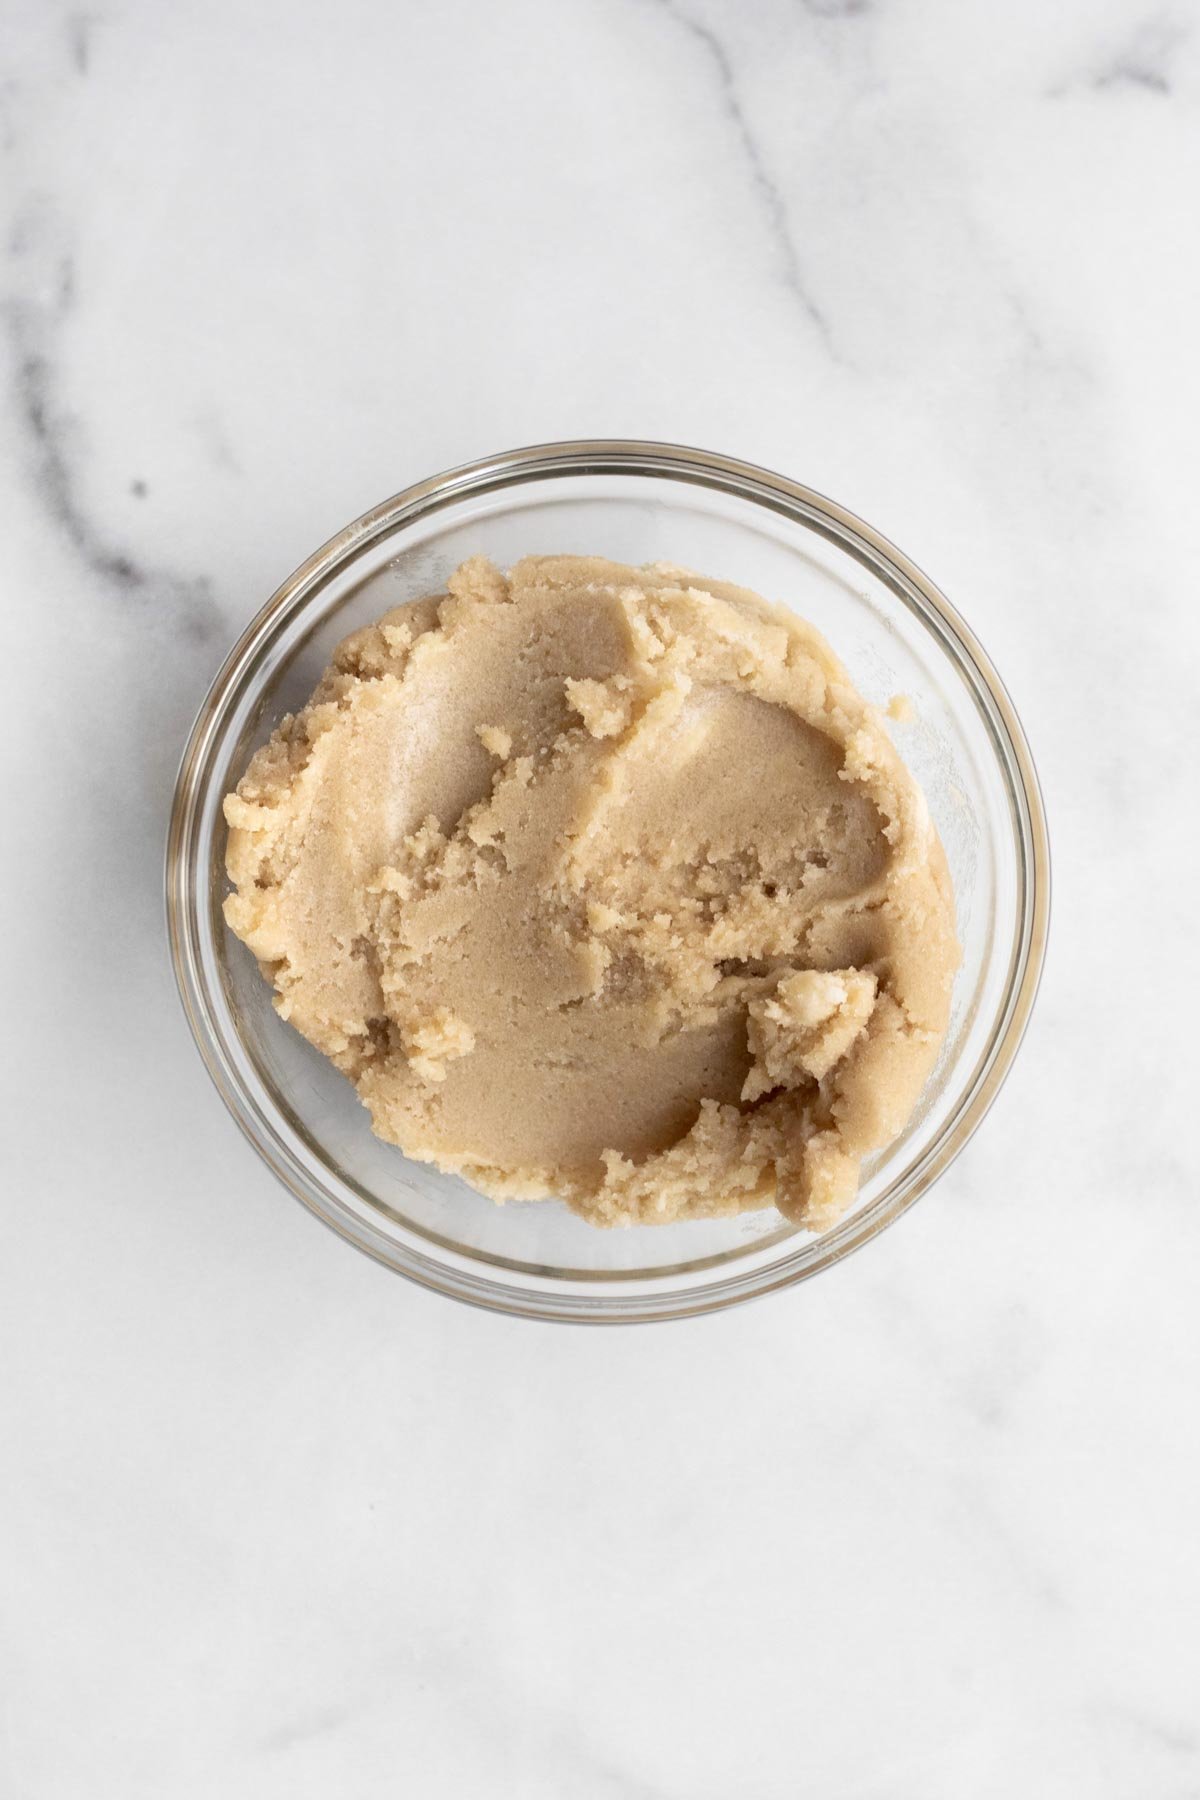
Step 1: Cream the Butter/Vegan Baking Stick and Sugars
In a large bowl of an electric mixer fitted with the paddle attachment, beat the butter or vegan baking stick and both sugars until everything is soft and creamy. About 2-3 minutes.
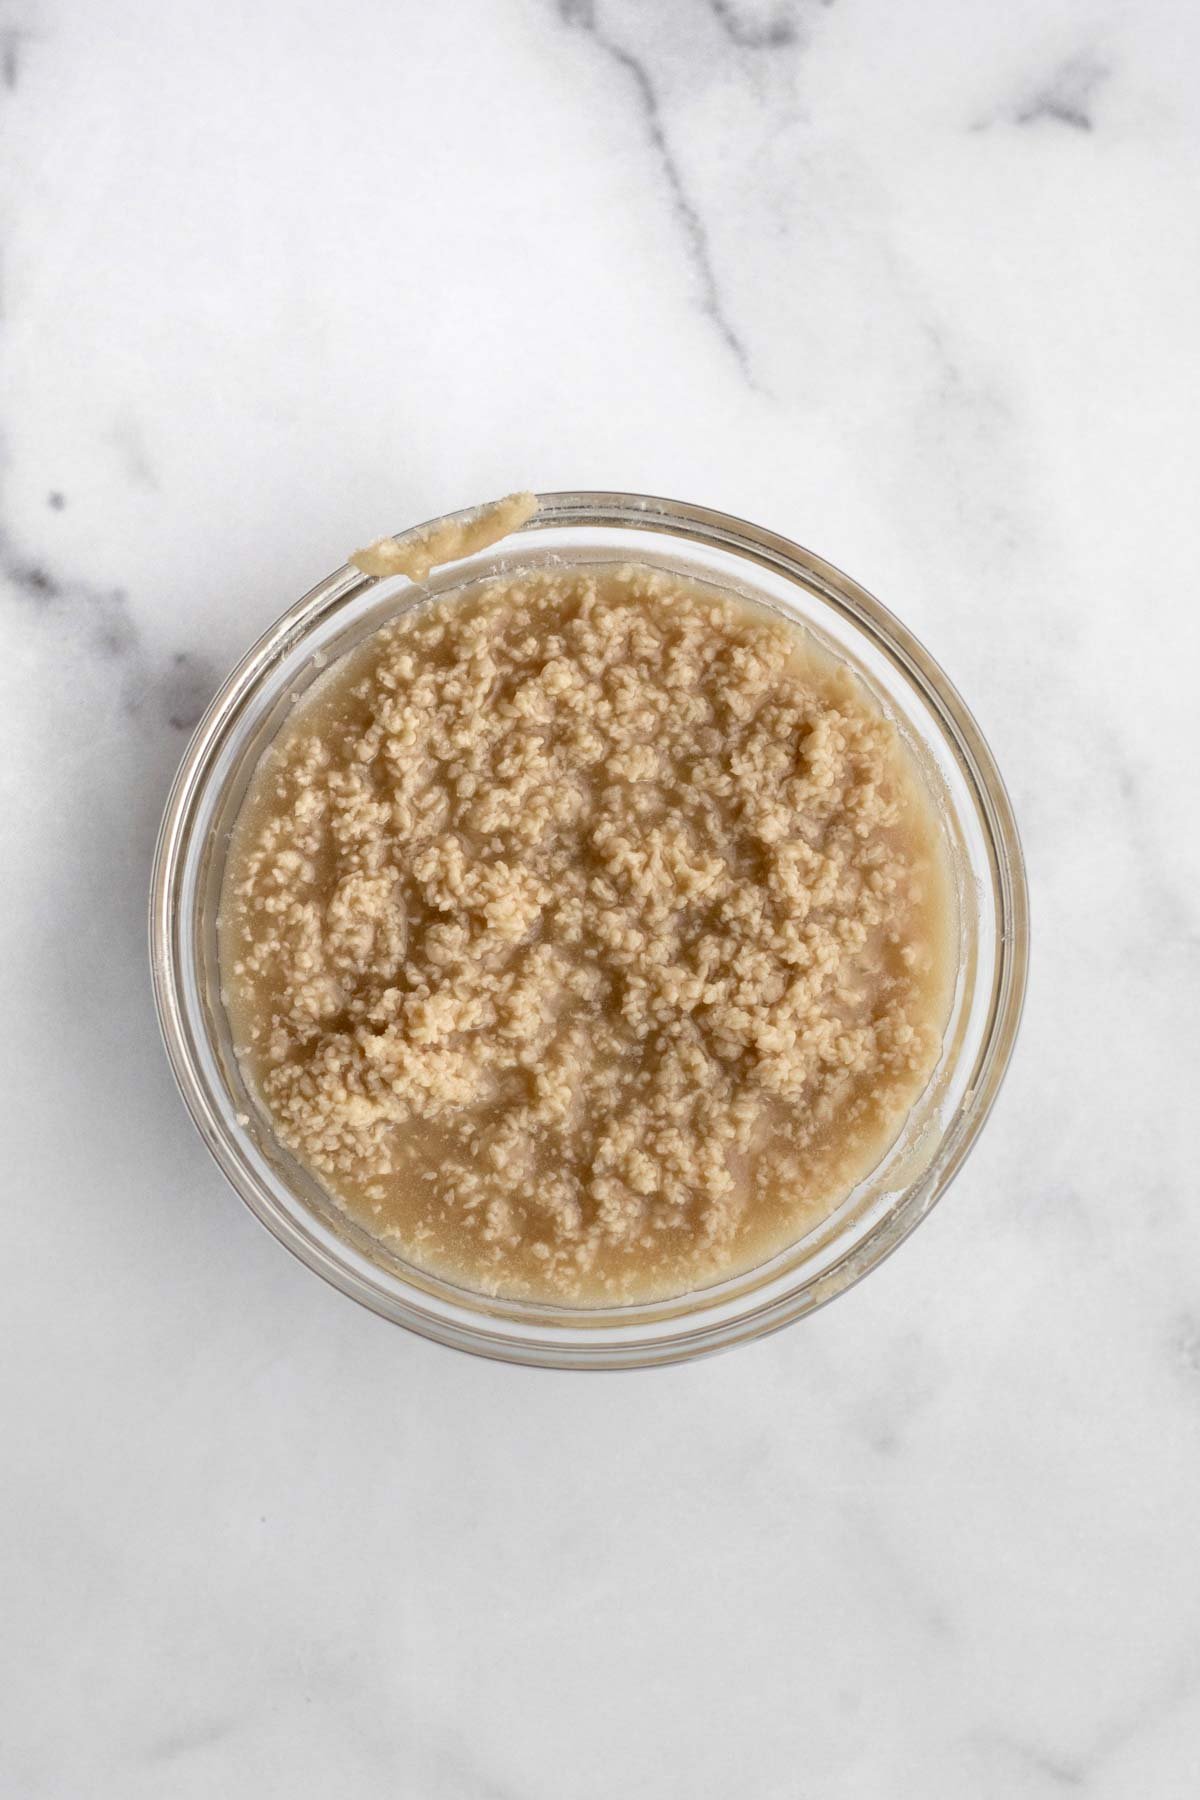
Step 2: Make the Cornstarch Water
In a small bowl, using a spoon, mix together the cornstarch and water until thin and watery. It will be thick and tacky at first.

Step 3: Mix in the Cornstarch Water and Vanilla
With the mixer on low, pour half the cornstarch water mixture into the bowl. Mix until combined.
Pour in the second half and once again mix until combined and mix in the vanilla.
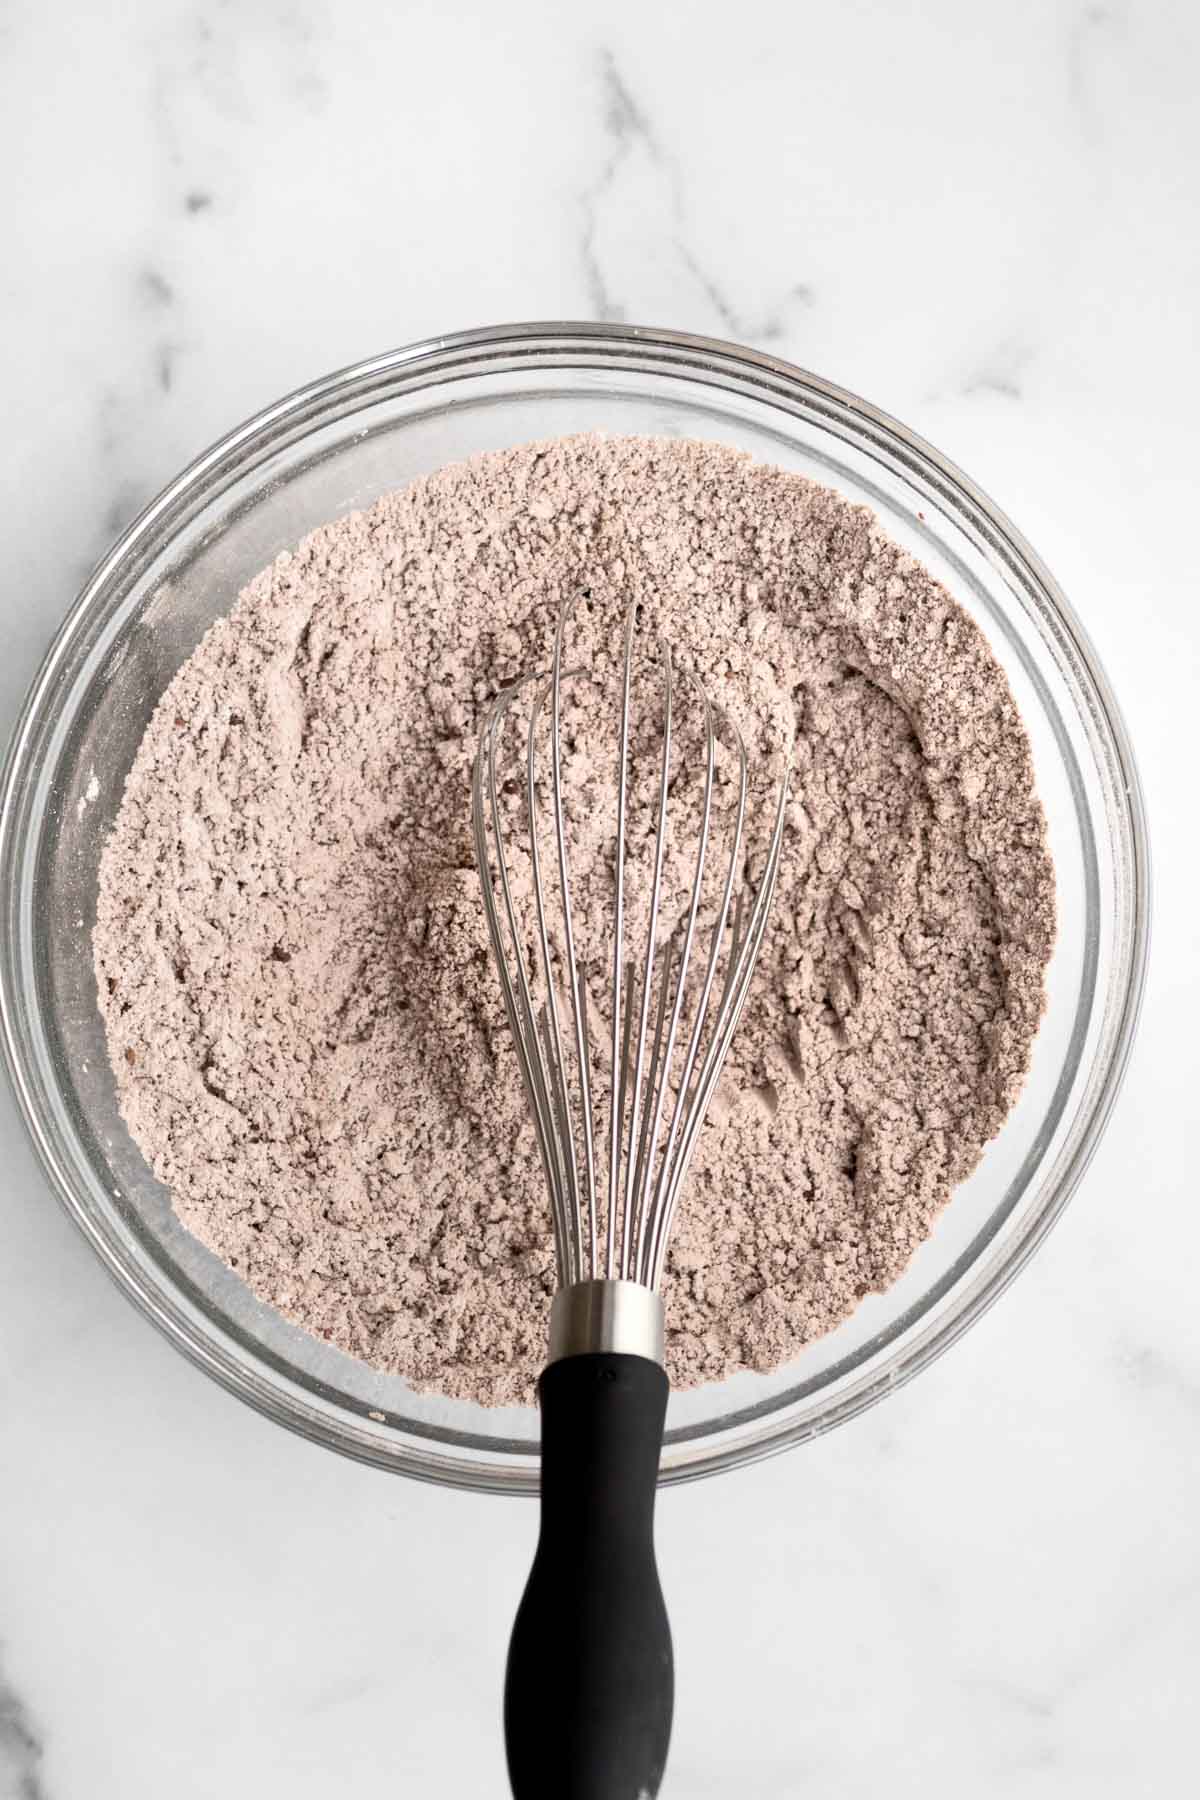
Step 4: Mix the Dry Ingredients
In a large bowl, whisk together the gluten free flour, cocoa powders, baking powder and salt.
Step 5: Add In the Dry Ingredients and Milk
Starting and ending with the gluten free flour mixture, with the mixer on low, pour in some of the flour mixture then some milk then some flour mixture.
Make sure you start and end with the flour mixture.
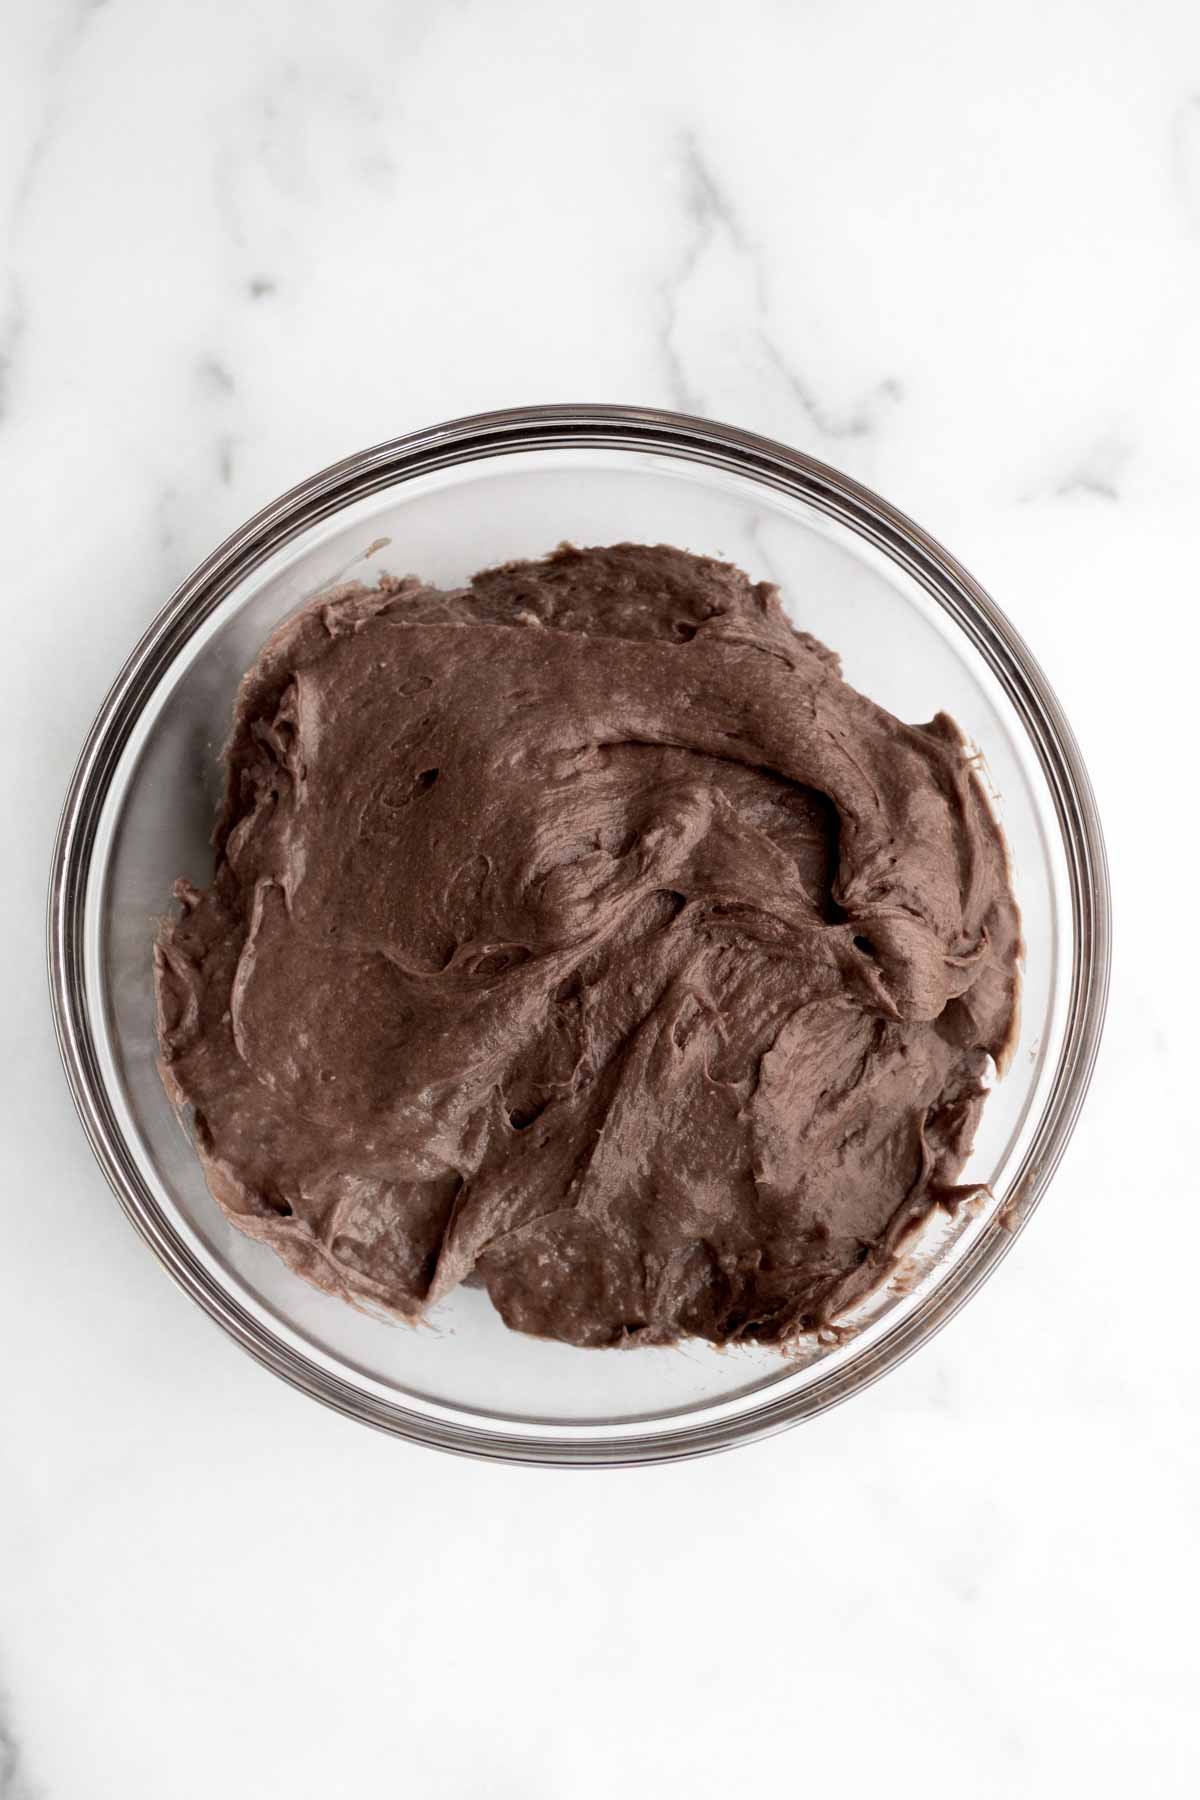
Step 6: Add Batter to the Cake Pan
Once it is combined, turn off the mixer and use a spatula to scrape the sides of the bowl and do a final mix.
You don’t want to over mix this. Just make sure everything is fully combined.
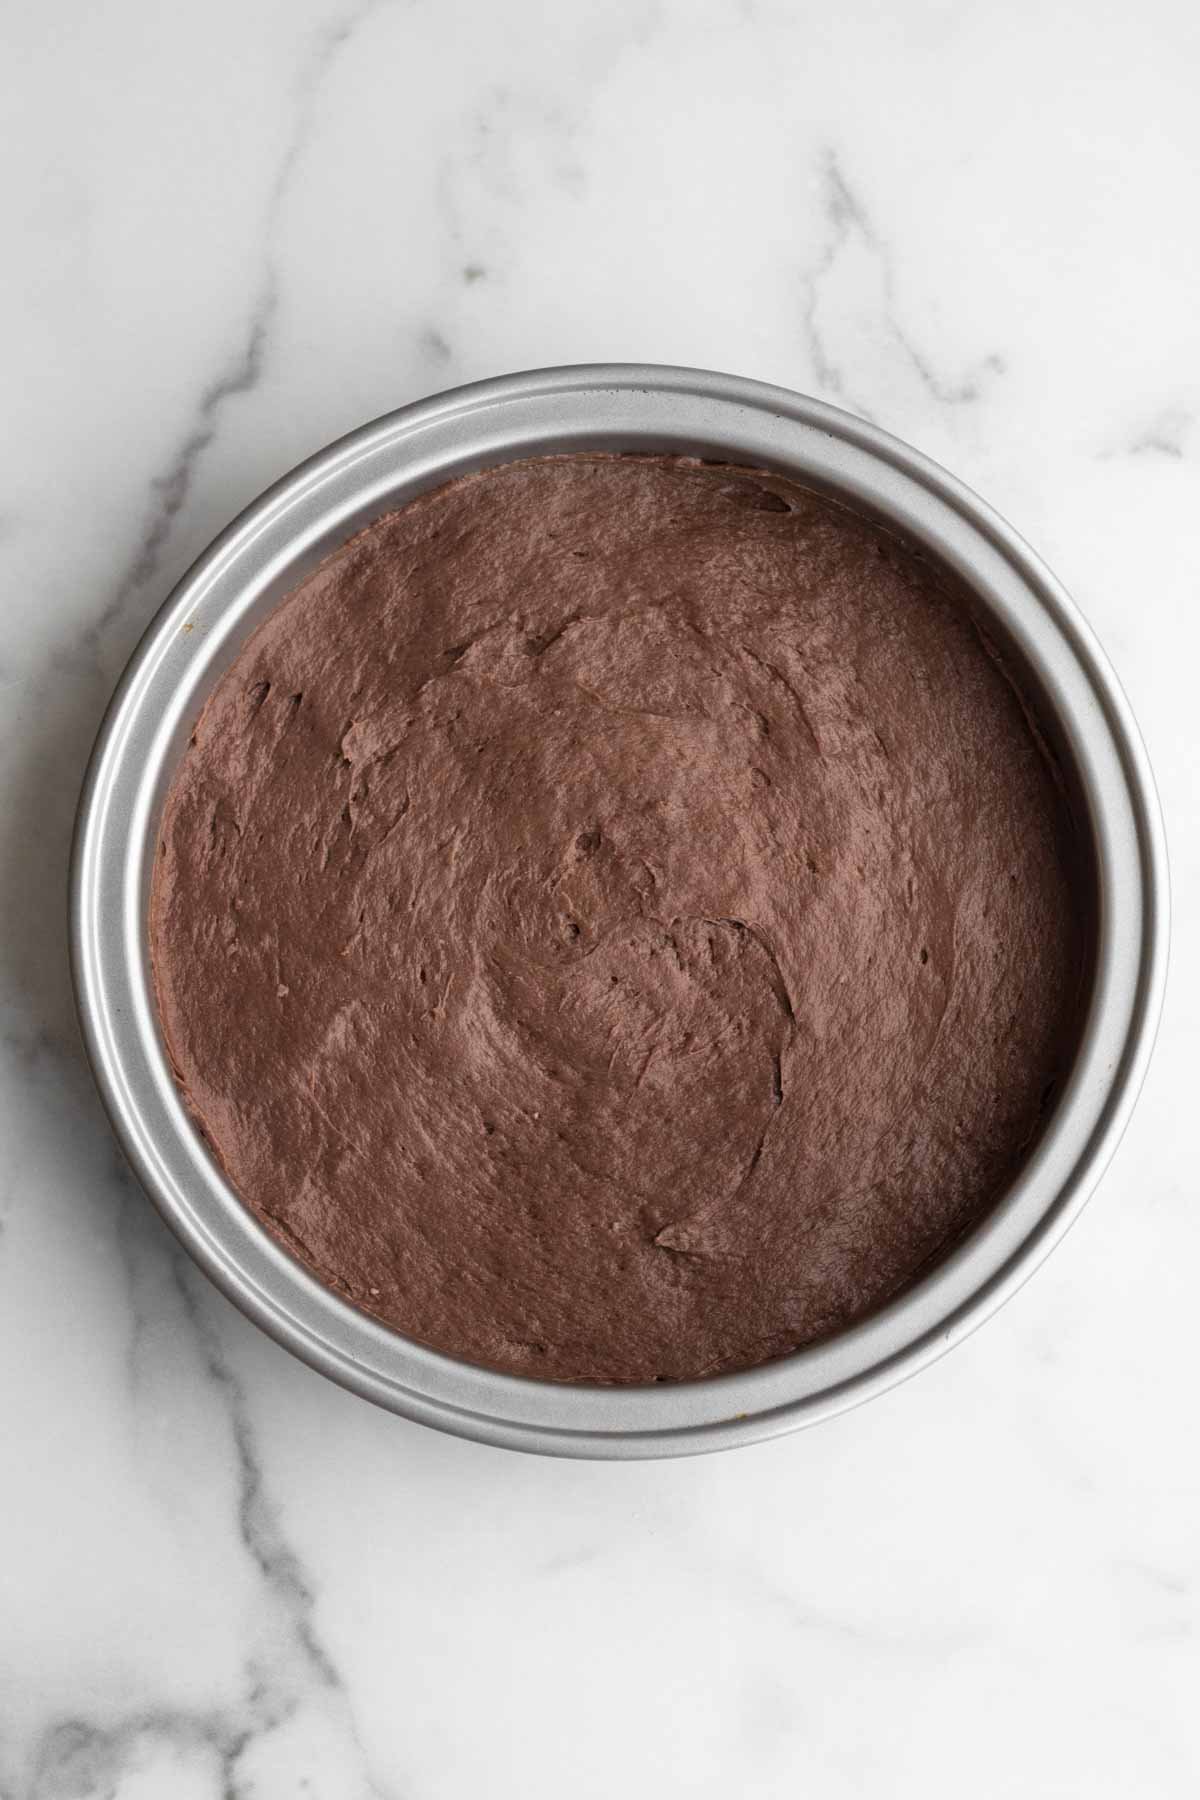
Use the spatula to scoop the batter into the parchment lined and greased 9 inch cake pan. The batter will be super thick and sticky.
Use the back of a spoon or a butter knife to smooth the top of the cake.
Step 7: Bake
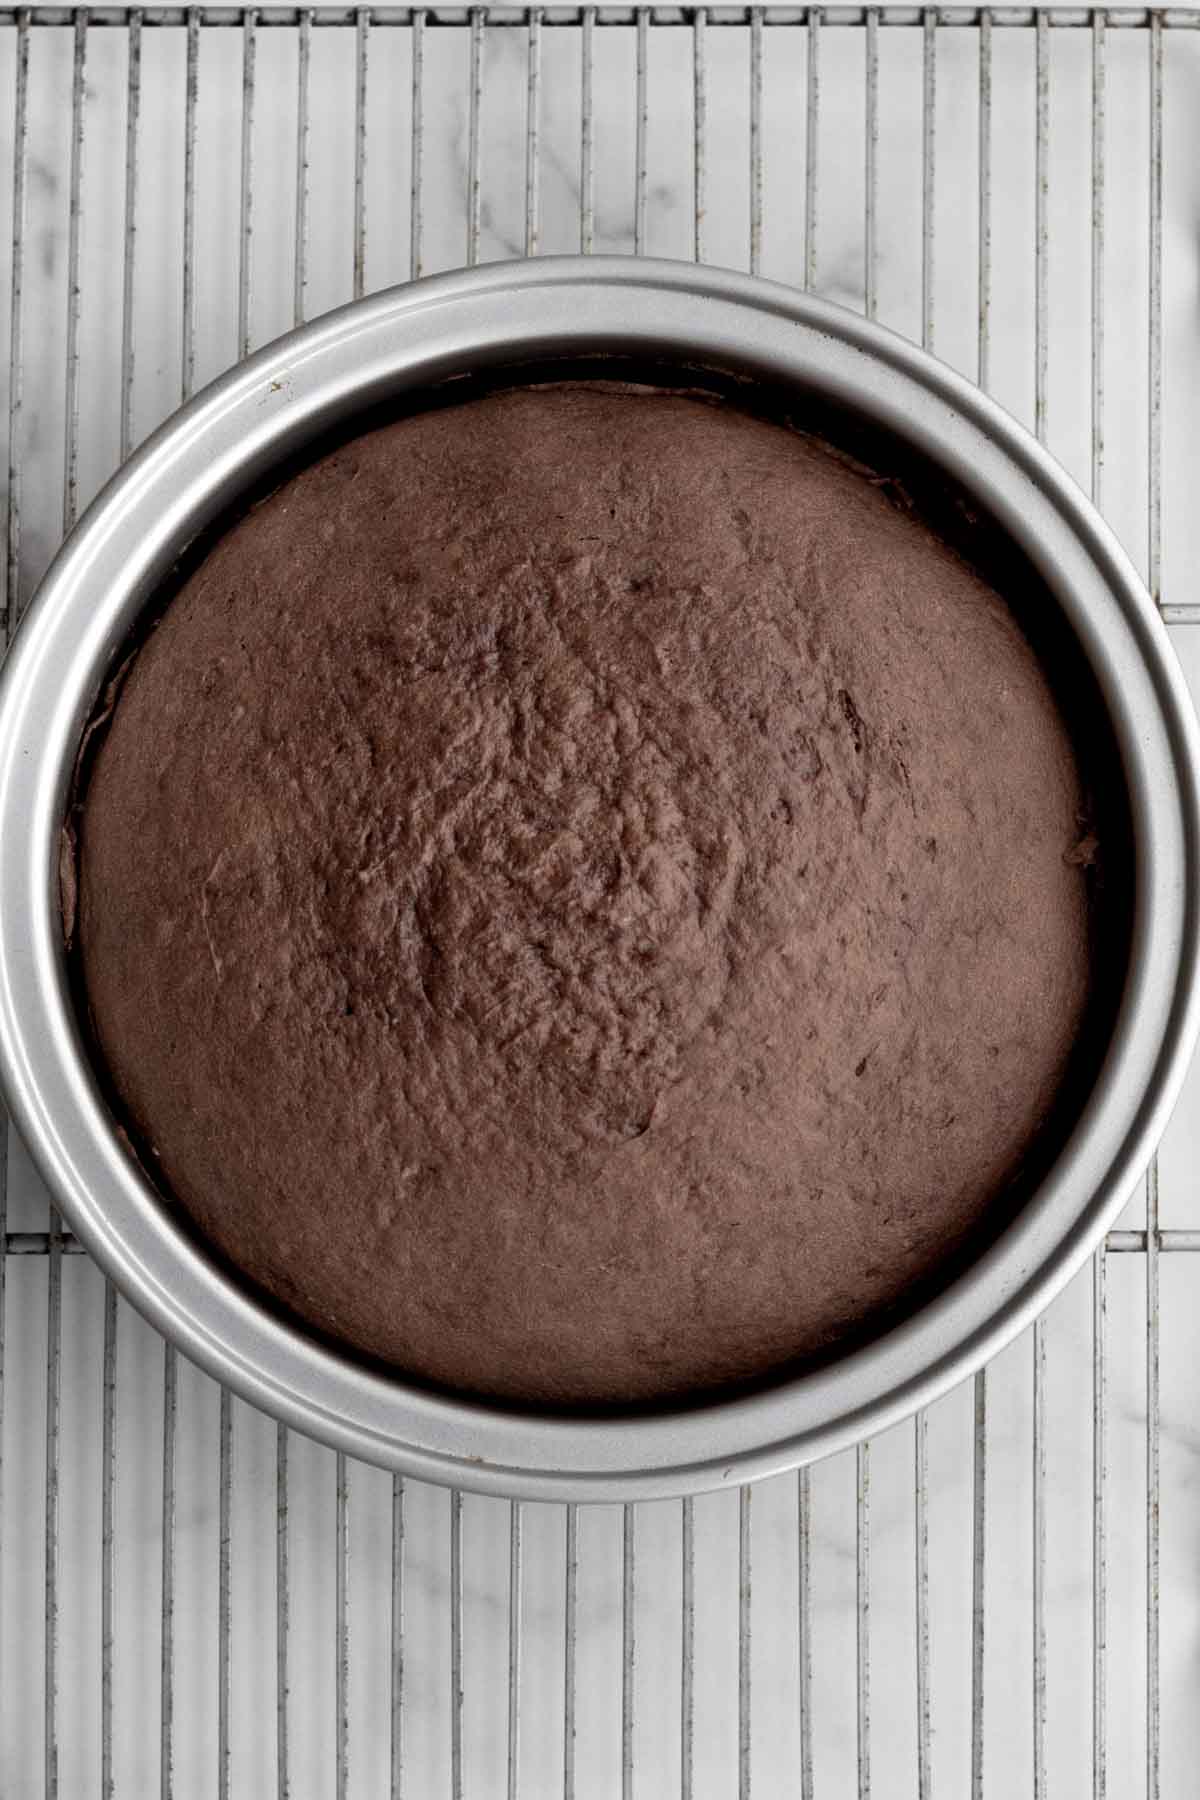
Pop the cake in the center rack in the oven and bake for 40 min. The cake should be risen and springy when carefully touched.
If you gently poke the cake and a dent forms, it's not done baking. You can also insert a toothpick and make sure it comes out clean.
Step 8: Cool
Let the cake cool in the pan for at least 5 minutes before taking it out. If you try to take it out too soon, it will stick and break apart into a giant mess.
Once 5 minutes is up, use a small spatula or butter knife to loosen it from the pan.
Place the cake on a cooling rack with a baking sheet or wax paper underneath. The next part is a bit messy.
Step 9: Make The Glaze
While the cake cools, make the glaze.
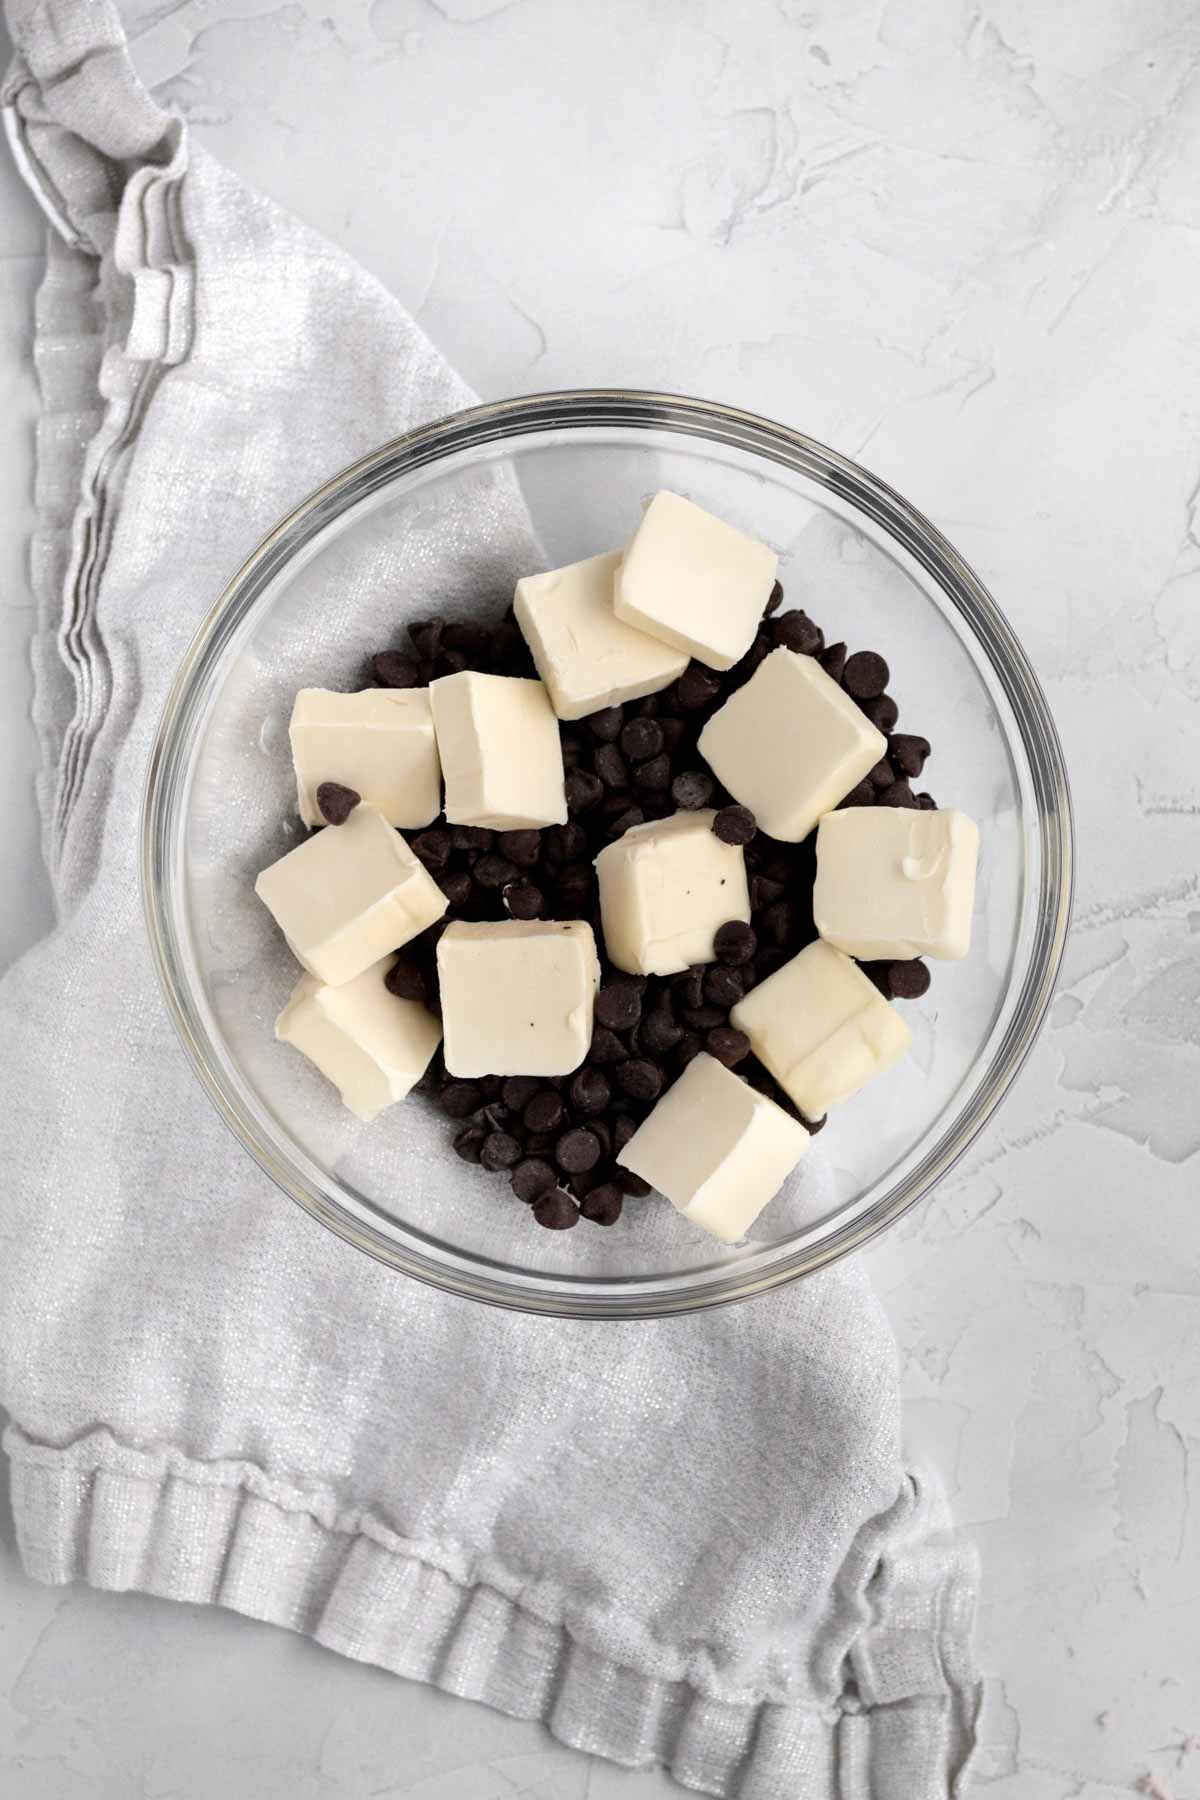
Combine the chocolate chips and butter/vegan baking stick together in a heat safe bowl. Microwave them in 15 second increments, stirring after each time, until the chips have melted.
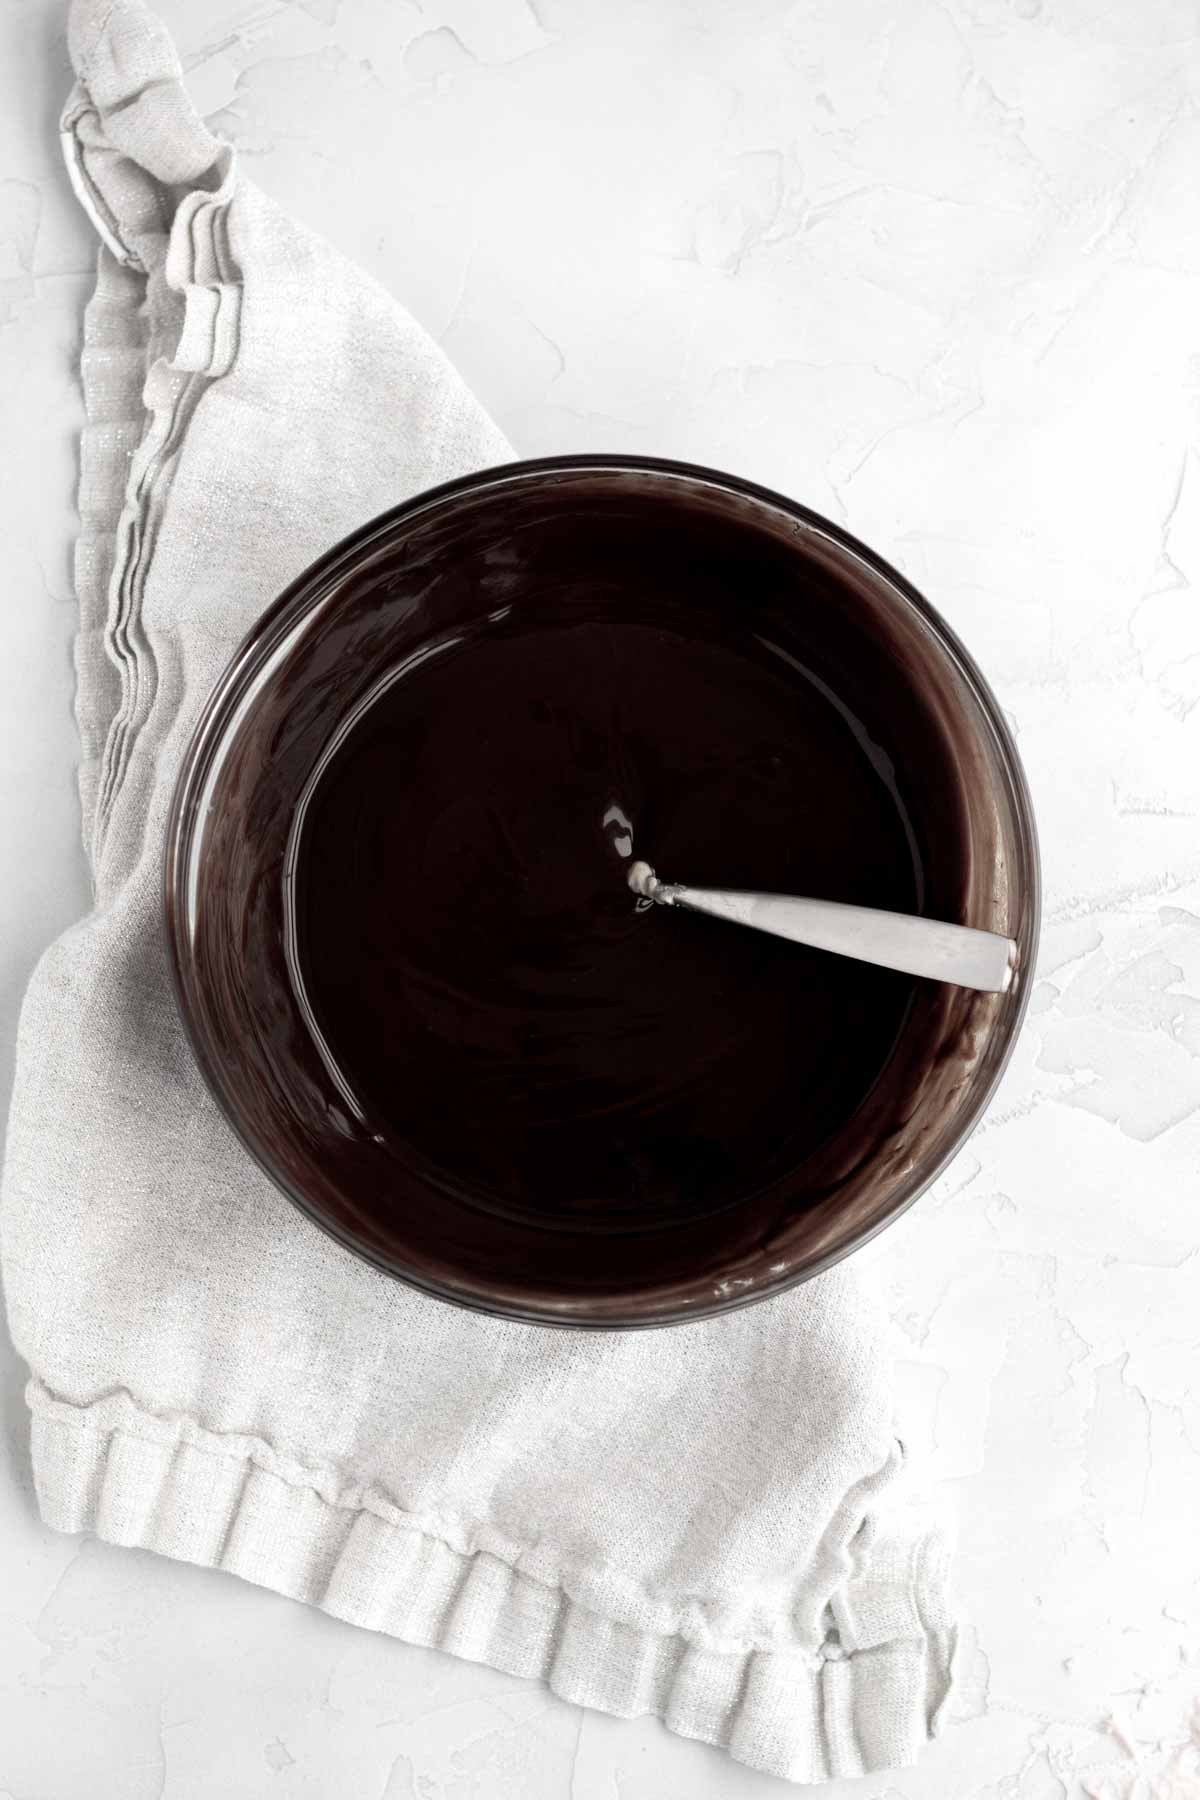
Whisk until everything is combined and smooth.
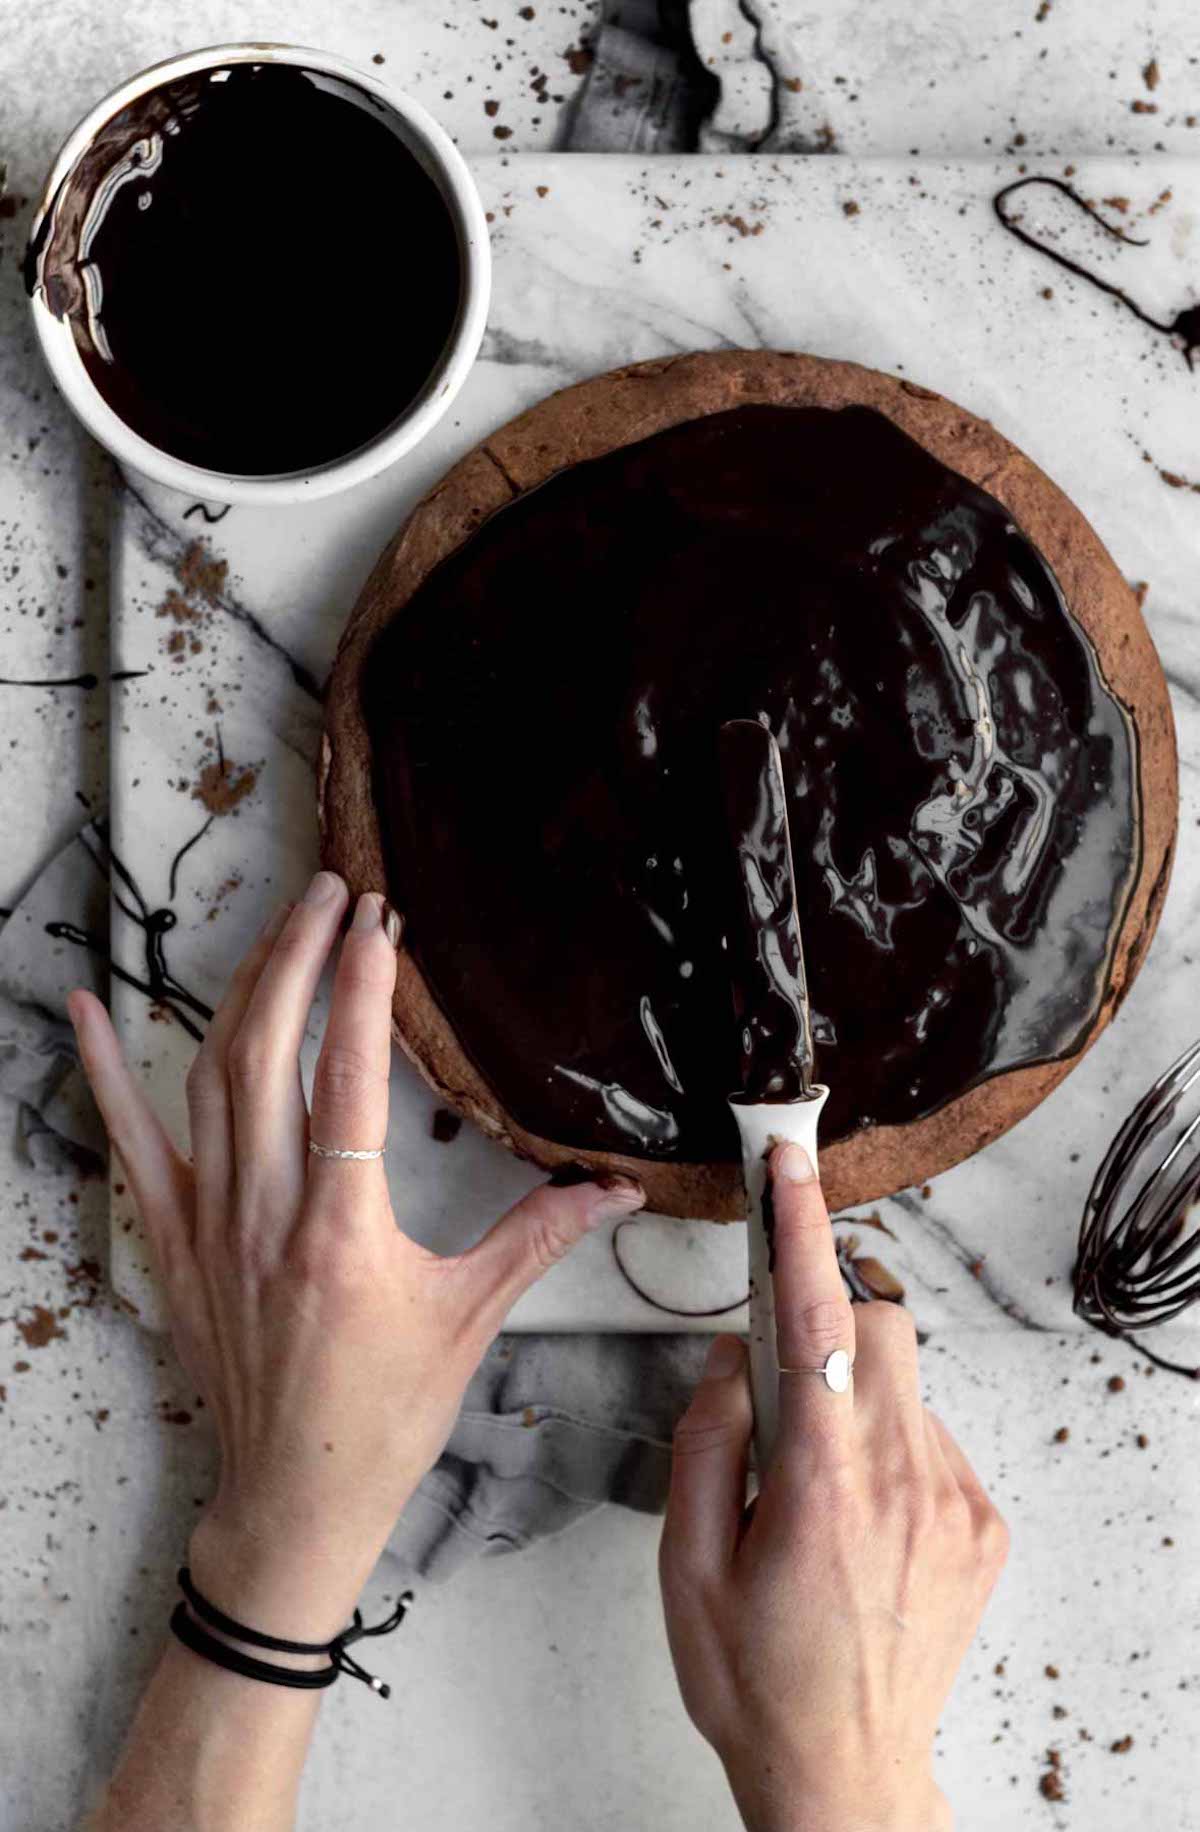
Step 10: Add the Chocolate Glaze
Pour the glaze over the cake and use a butter knife or icing spatula to frost the top of the cake and the sides.
It will pour down the sides of the cake, hence the wax paper underneath.
Expert Baking Tips
- Use 2 Types of Cocoa Powder- The 2 types of cocoa powders give the cake that richer flavor. If you only have one type on hand, use natural unsweetened or dutch...just know the color will not be as dark as mine. Do not use dark alone; it will make your cake too dry and bitter.
- Smooth the Batter- Many gluten free batters have a way of staying exactly as they are placed, when baked. When the batter is in the cake pan, gently smooth the top with a butter knife prior to baking.
- Use Room Temperature Butter/Vegan Baking Stick- Do not use melted butter. You want to cream the sugars and the butter together into a soft fluffy consistency. If you use melted butter, you will not be able to cream them together properly and the cake will not be as fluffy.
- Melt the Chocolate and Butter Slowly- If you rush this process and try to even heat the chocolate in 20 second increments (instead of 15 second increments), you can overheat the chocolate. If that happens it will seize up and basically not be usable.
Recipe FAQs
Most gluten free baked goods are best made the same day, and this cake is no exception.
It still tastes good on day 2, if rewarmed in the microwave, but it really is best fresh.
This recipe uses a 9 inch cake pan.
No! I think the cake tastes best with it but you can cover the cake with my chocolate fudge frosting or even a layer of powdered sugar!
You want it to cool a little but no, it doesn't need to be completely cool.
For Storing: Once the cake is cut into, it’s best to cut the entire cake into slices, wrap each slice in foil and store in a zip top bag in the fridge or in an airtight container in the fridge. This is if you will be eating all the slices the next day.
When ready to eat, let the slices sit on the counter, in the foil for about an hour or until the cake is room temperature and soft.
Then warm each slice in the microwave for a few seconds so it regains that squishy soft texture. Be careful not to burn yourself on the hot chocolate topping.
For Freezing: If not eating all the extra slices the next day, take the slices wrapped in foil and in the zip top bag and freeze them. You can keep the slices frozen for up to 30 days.
When ready to eat, put the slices in the fridge the night before or leave them out on the counter for 2 hours prior to eating or until the cake is room temperature and soft. Then warm each slice in the microwave for a few seconds so it regains that squishy soft texture. Be careful not to burn yourself on the hot chocolate topping.
Other Easy Cake Recipes You'll Love

Did you try this recipe? Please leave me a ⭐ review below!
Don’t forget to tag me on Instagram @laneandgreyfare and follow along on Pinterest, Facebook and YouTube! Enjoy!!!
📖 Recipe
Chocolate Tea Cake
Ingredients
For the Cake
- ½ cup unsalted butter or vegan baking stick, room temperature
- ½ cup light brown sugar , packed
- ½ cup granulated sugar
- 4 heaping tablespoons cornstarch mixed with 6 tablespoons of water
- 1 ½ teaspoons pure vanilla extract
- 1 ½ cups gluten free flour plus 1 tablespoon (I use a 1:1 gf flour with xanthan gum)
- 3 tablespoons cocoa powder (I use 1 tablespoon dark and 2 tablespoons dutch or natural unsweetened)
- 2 teaspoons baking powder
- ½ teaspoon kosher salt
- ¾ cup milk
For the Glaze
- ¾ cup semi sweet chocolate chips
- 6 tablespoons unsalted butter or vegan baking stick
Instructions
- Preheat your oven to 350 degrees Fahrenheit and grease a 9 inch cake pan with vegetable oil. Line the bottom with parchment paper and lightly grease the parchment paper as well. Set aside.
- In a large bowl of an electric mixer fitted with the paddle attachment or using a hand held mixer, beat the softened butter or vegan baking stick and sugars until they are light and fluffy. About 2-3 minutes.
- In a small bowl, mix together your cornstarch and water until it is thin and watery. It will be thick and tacky at first.
- With the mixer on low, pour half the cornstarch water mixture into the bowl. Mix until combined. Pour in the second half and once again mix until combined and mix in the vanilla.
- In a large bowl, whisk together the gluten free flour, cocoa powder, baking powder and salt.
- Starting and ending with the gluten free flour mixture, with the mixer on low, pour in some flour then some milk then some flour.
- Once it is combined, turn off the mixer and use a spatula to scrape the sides of the bowl and do a final mix. You don’t want to over mix this. Just make sure everything is fully combined.
- Use the spatula to scoop the batter into the cake pan. It will be super thick and sticky. Use the back of a spoon or a butter knife to smooth the top of the cake.
- Pop the cake in the center rack in the oven and bake for 40 min. The cake should be risen and springy when carefully touched. If you gently poke the cake and a dent forms, it's not done baking. You can also insert a toothpick and make sure it comes out clean.
- Let the cake cool in the pan for at least 5 minutes before taking it out. If you try to take it out too soon, it will stick and break apart into a giant mess.Once 5 minutes is up, use a small spatula or butter knife to loosen it from the pan. Place the cake on a cooling rack with a baking sheet or wax paper underneath. The next part is a bit messy.
- In a medium heat safe bowl, heat the chocolate chips and butter in the microwave in 15 second increments, stirring after each time. Repeat this until the chips are melted and the chocolate is smooth.
- Using a spatula, pour some glaze into the top of the cake and use a butter knife or icing spatula to smooth it all around. I even frost the size of the cake.
Gail Grandgent says
I'n not clear about when to combine the butter sugar cornstarch water mix with the flour mix. Before or after the milk ?
Thank you
Lee says
Hi Gail! If you go to the recipe card, it explains exactly what to do. You are going to alternate the flour mix and the milk. So into the wet ingredients first you pour some flour mixture then some milk then some flour. You want to start and end with the flour. Hope this helps!
Terry says
Can’t wait to try this. It looks so light. Thanks
Lee says
Hope you love it!
MB says
Great Recipe! Can I use AP flour for it instead of gluten free?
Lee says
Hi! You can make it with regular but sadly I cannot test it due to celiac disease. However I did make many of my recipes before my daughter was diagnosed, with regular AP flour.
john says
A light cake that is perfect for tea time.