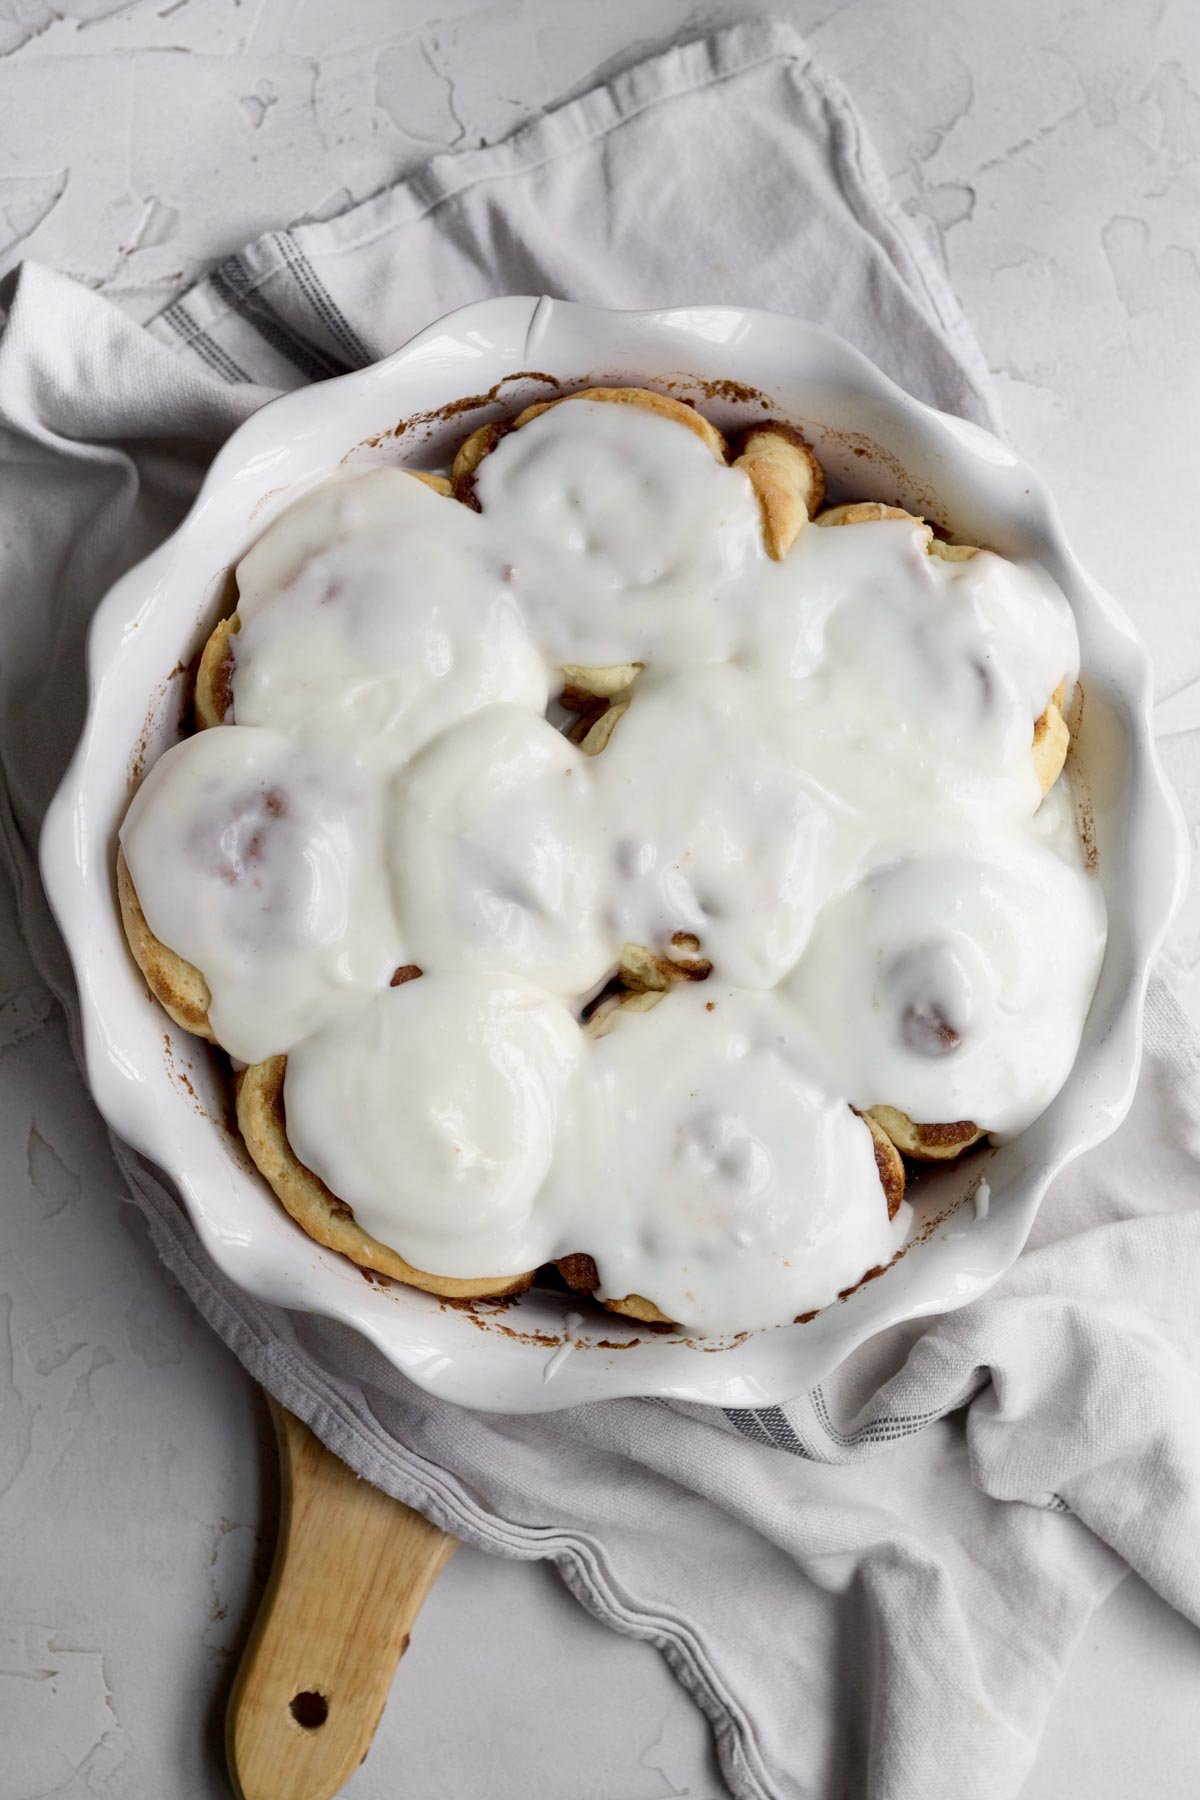
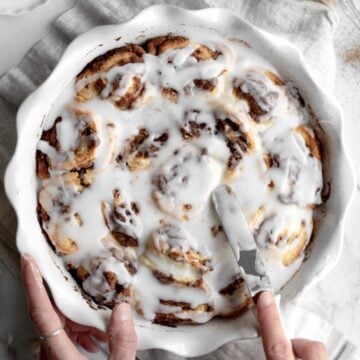
These easy No Yeast Cinnamon Rolls are thick and gooey, soft and fluffy and full of cinnamon flavor. Since there is no yeast, there is zero rising time! You'll be enjoying this delicious recipe in about 45 minutes! You would never know they're also gluten free, egg free, nut free and can easily be made vegan! The perfect cozy breakfast for all those early morning cinnamon cravings!
These No Yeast Cinnamon Rolls are insanely delicious and only take 24 min to cook! They couldn't be easier (since they have no yeast) and the result is absolutely amazing. Best yet, they're naturally egg free so no egg replacer is needed! If you love cinnamon for breakfast, make sure to check out our Easy No Egg French Toast, our Coffee Cake Muffins and our Sour Cream Coffee Cake!
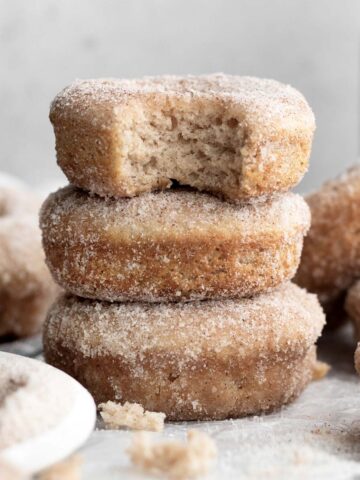
For more easy gluten free cinnamon rolls, check out my Chocolate and Cinnamon Rolls, my Chocolate Cinnamon Rolls, Cinnamon Rolls with "Oreos" and Blueberry Cinnamon Rolls.
Reasons To Love These No Yeast Cinnamon Rolls
- Allergy Friendly- These cinnamon rolls are gluten free, nut free, egg free and can easily be dairy free (vegan)!
- Light and Fluffy- These rolls are so super soft and delicious!
- Cinnamon- They are full of cinnamon flavor like in my Gluten Free Snickerdoodles!
- Cream Cheese Icing- They're covered in a delicious easy cream cheese icing that makes them sweet and gooey!
- Easy to Make- No yeast is needed and no electric mixer is needed either!
Ingredient Notes
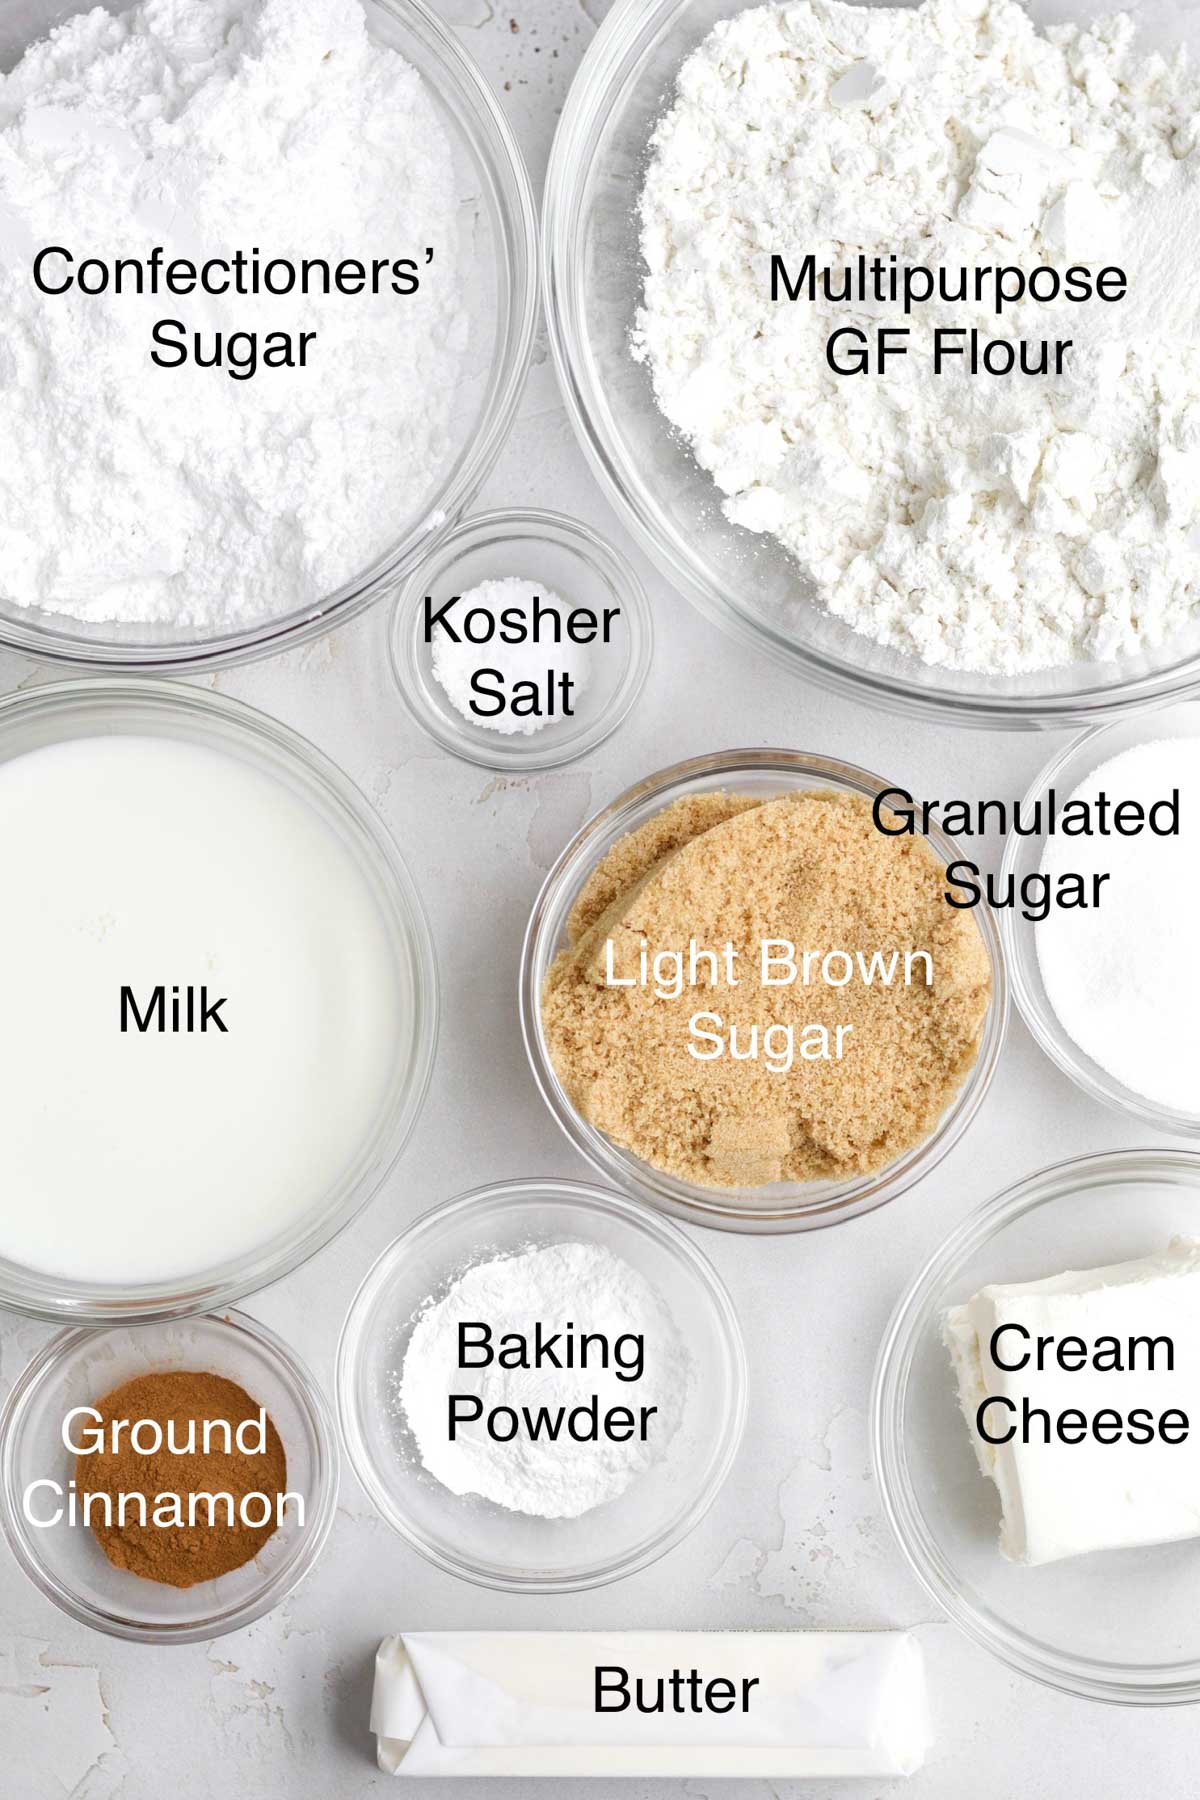
- Gluten Free Flour- If you also have nut allergies, make sure to use a brand that’s made in a nut free facility. I really love to use this gluten free flour because it’s free of the top 9 allergens. It also contains xanthan gum which really helps give baked goods their bounce and prevents them from falling apart.
- Granulated Sugar- Used in the dough instead of brown sugar to keep the rolls nice and light.
- Baking Powder- We use 4 teaspoons in this recipe to make the rolls puff up nicely!
- Butter/Vegan Baking Stick- Make sure to use softened and not melted.
- Light Brown Sugar- Used for the filling to create that magical flavor with the cinnamon like with my Sour Cream Coffee Cake!
- Cinnamon- Wouldn't be cinnamon rolls without this key ingredient!
- Milk- If there are no dairy allergies or if you’re not vegan, you can use regular whole milk. For non-dairy, use a dairy-free milk of your choosing.
- Confectioners' Sugar- Essential in icing recipes, this gives the cream cheese icing its sweetness!
- Cream Cheese- For vegan, use a dairy-free block cream cheese.
- Water- This frosting uses water instead of milk!
See my recipe card below for a complete list of the ingredients with measurements.
Substitutions and Variations
How to Make these into Vegan Cinnamon Rolls
- Use a gluten free flour that’s free from dairy.
- Make sure the brands of sugars you use are vegan.
- Use vegan baking sticks instead of butter.
- Only use a non-dairy milk of choice.
- Buy a dairy-free cream cheese.
For All Purpose Flour
- Use 2 cups packed AP Flour (336 grams).
- Only use ¾ cup of milk.
Gluten Free Cinnamon Rolls with Vanilla Icing
- Use 2 cups of Confectioners's sugar and ¼ cup of room temperature water.
- Mix together and pour over warm cinnamon rolls.
This recipe has not been tested with some of these substitutions and/or variations due to celiac disease and food allergies. If you change any of the ingredients, please let us know how the recipe turned out in the comments below!
How to Make No Yeast Cinnamon Rolls
Here are the step by step instructions for how to make these easy cinnamon rolls!
Step 1: Make The Filling and Sprinkle some in the Pan
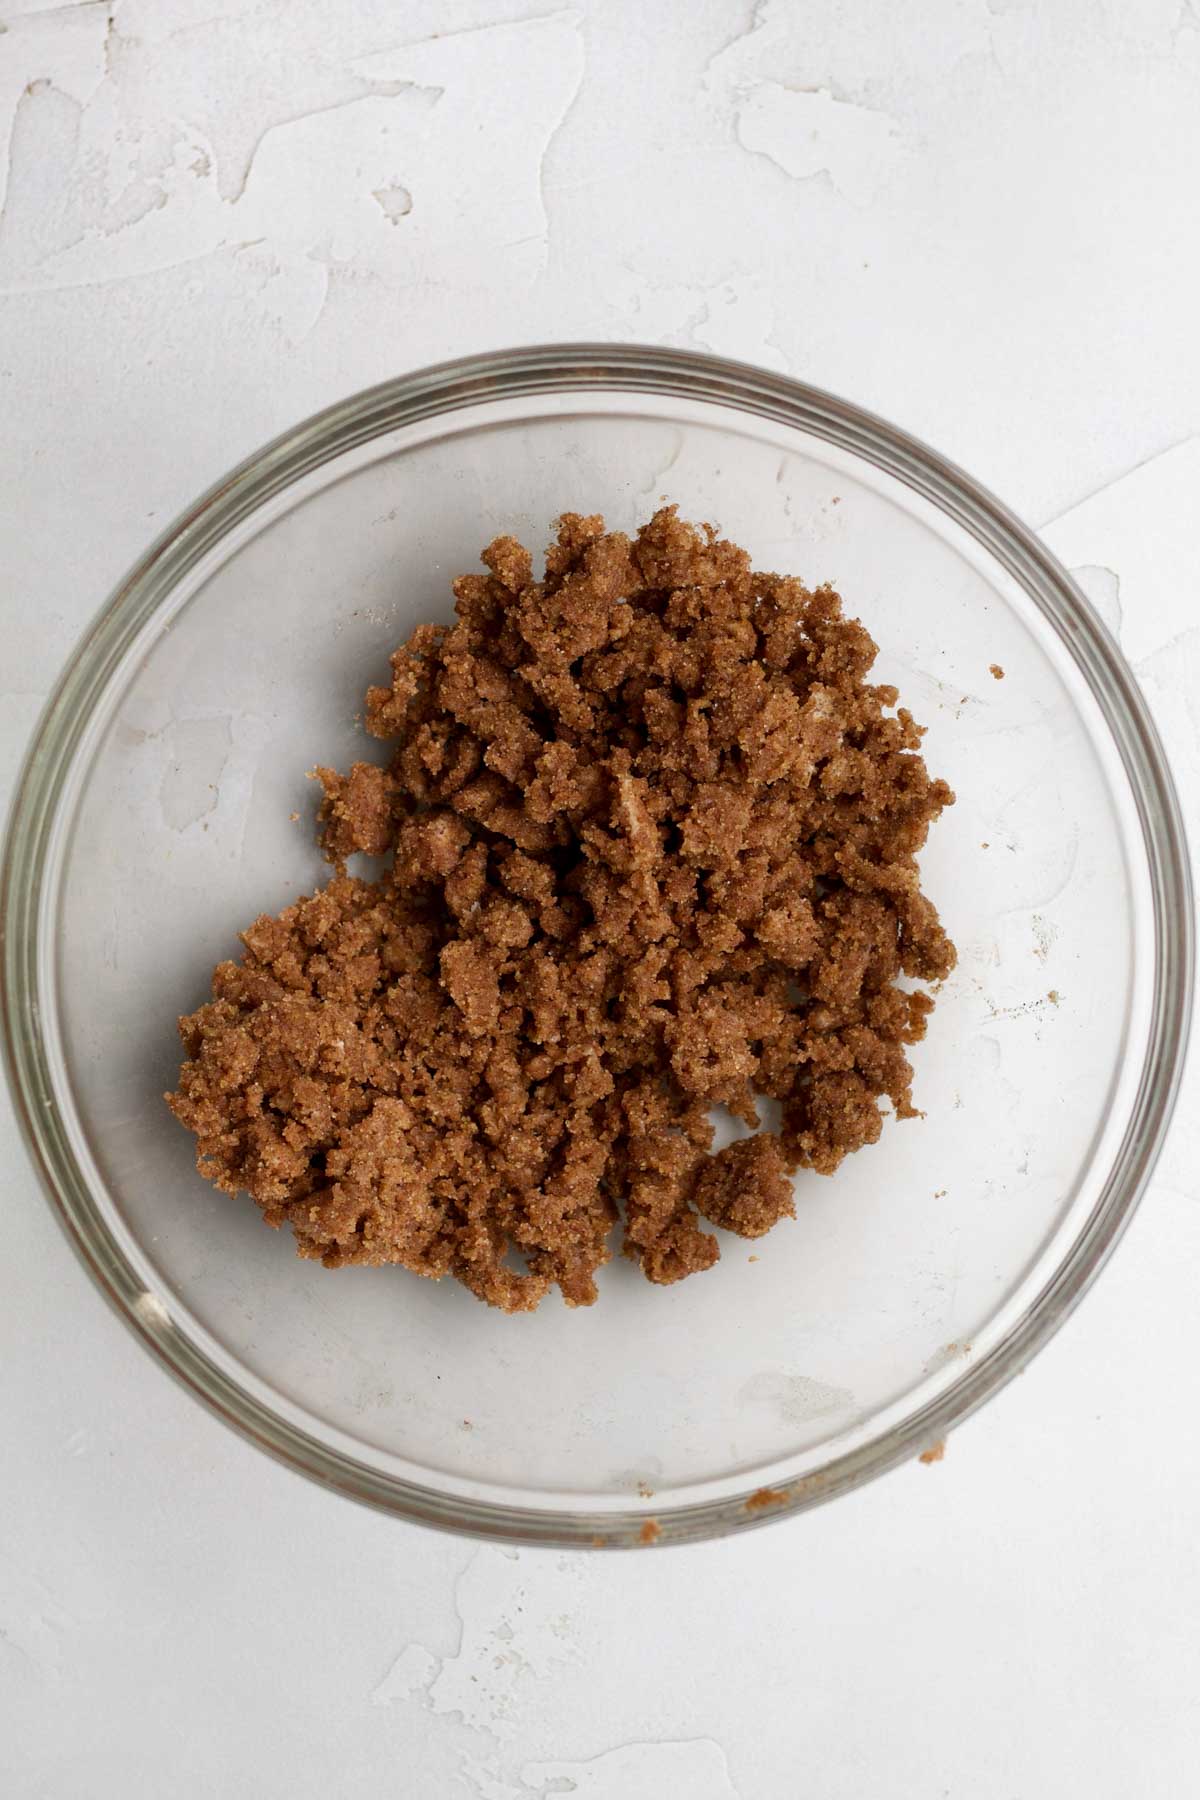
Whisk together the light brown sugar and cinnamon. Rip in pea-sized pieces of the soft butter. Work everything together with clean hands until you have a crumbly texture.
Once crumbly, sprinkle 1-2 tablespoons of filling into the bottom of the pan. Set the rest aside.
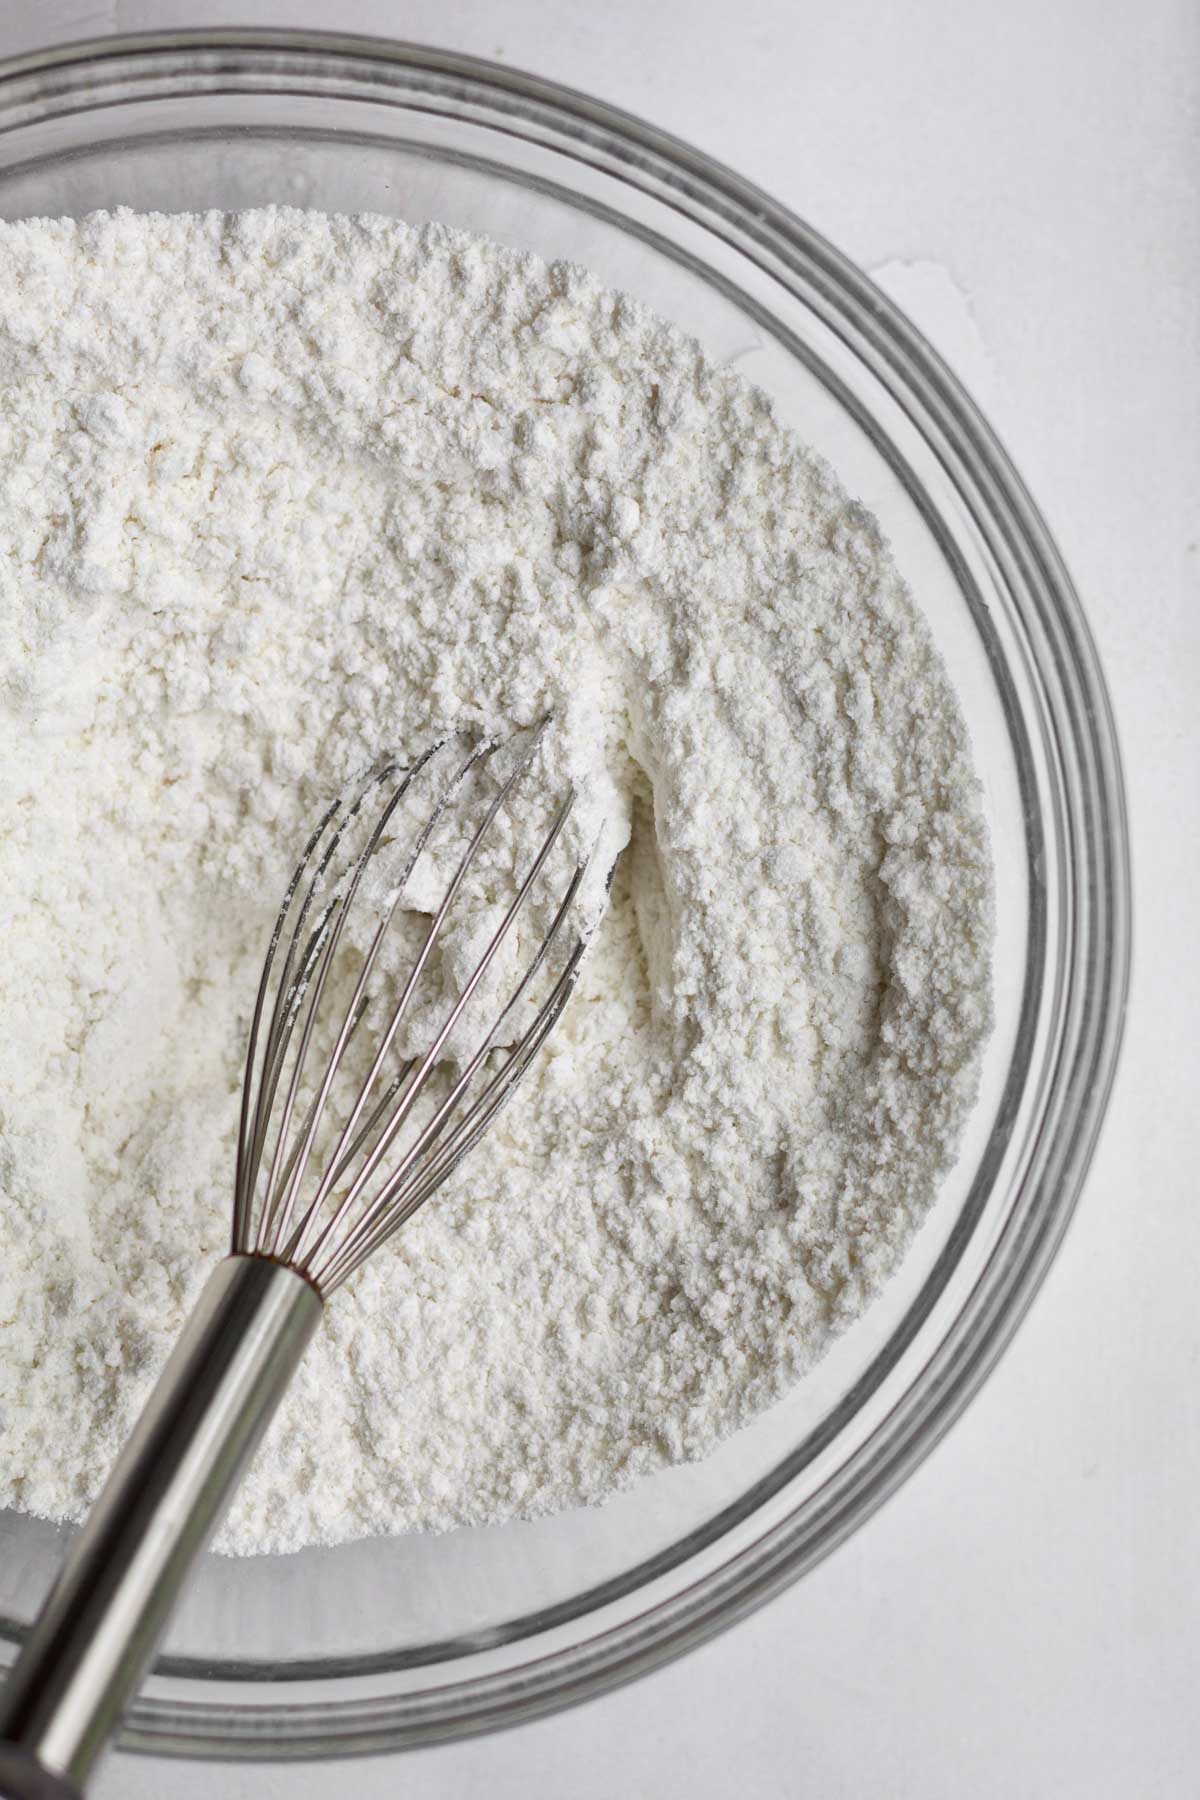
Step 2: Whisk Together The Dry Ingredients
In a large bowl, whisk together the gluten free flour, granulated sugar, baking powder and salt.
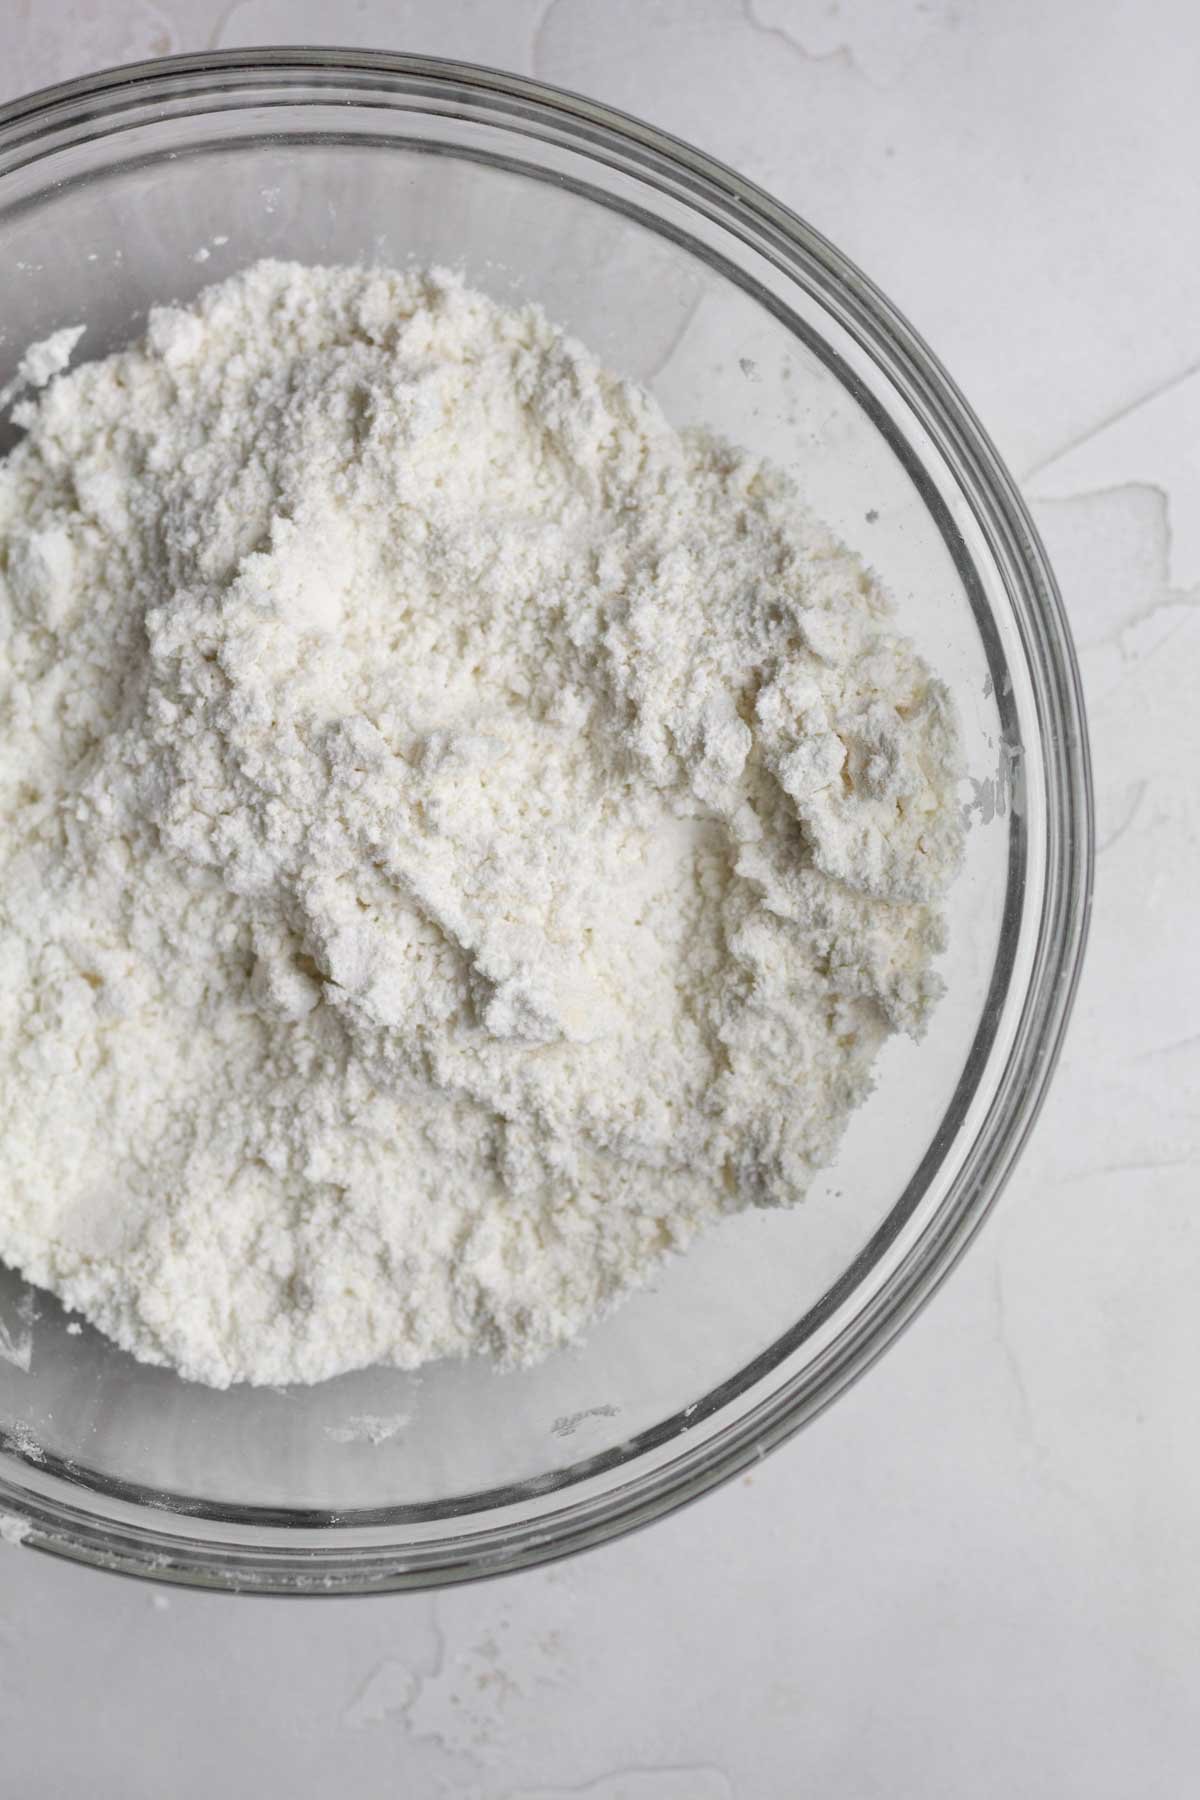
Step 3: Add the Butter into the Dry Ingredients
Use clean hands to rip pea-sized pieces of soft butter into the dry ingredients and then work them all together.
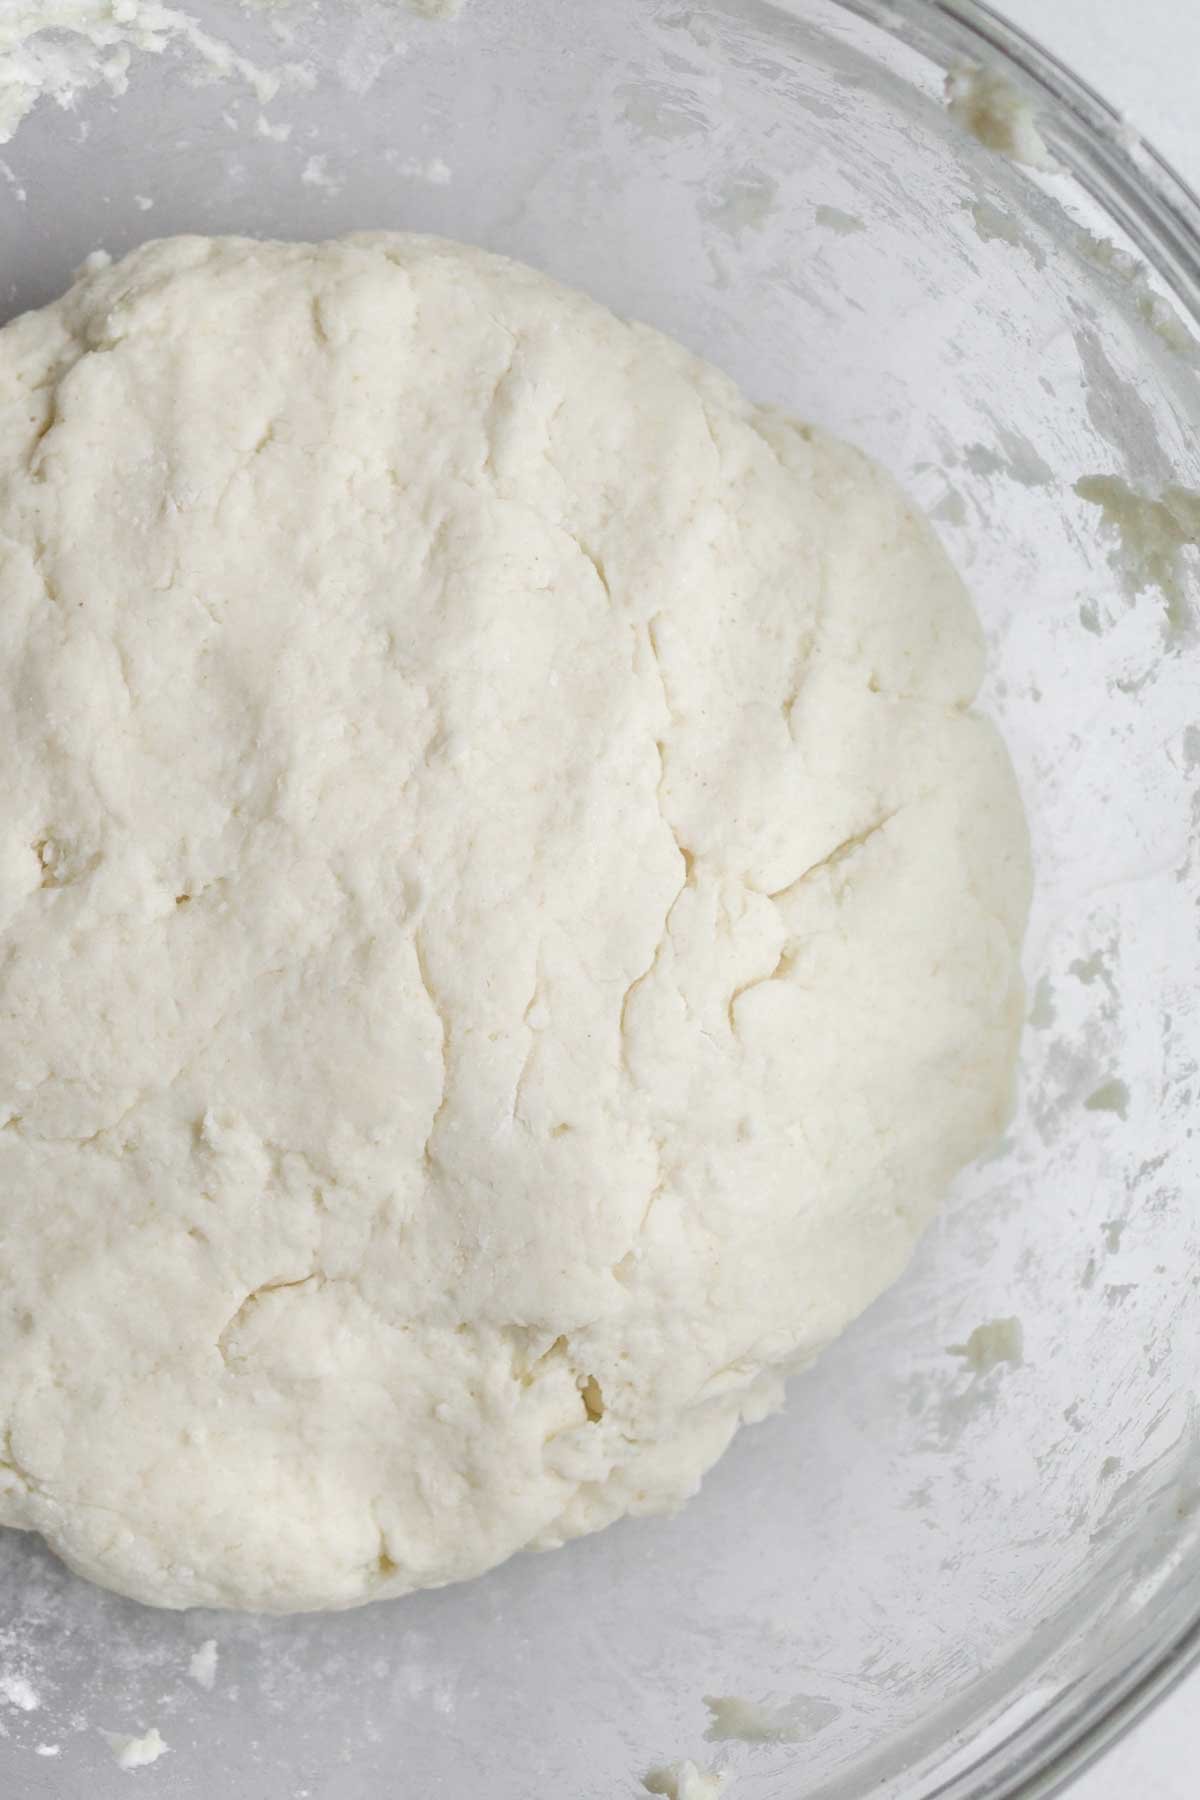
Step 4: Add in the Milk
Use a spatula to mix the milk in and then form into a dough.

Step 5: Roll Out The Dough
Lightly flour a clean work surface, your hands and your rolling spatula.
Knead the dough a few times just so it comes together.
If it seems super sticky dust with some more gluten free flour so it is easier to work with.
Then roll the dough out into a rectangular shape. If you notice it sticking as you roll, then sprinkle some more gluten free flour on it.
You want it to be about ¼ inch in thickness.
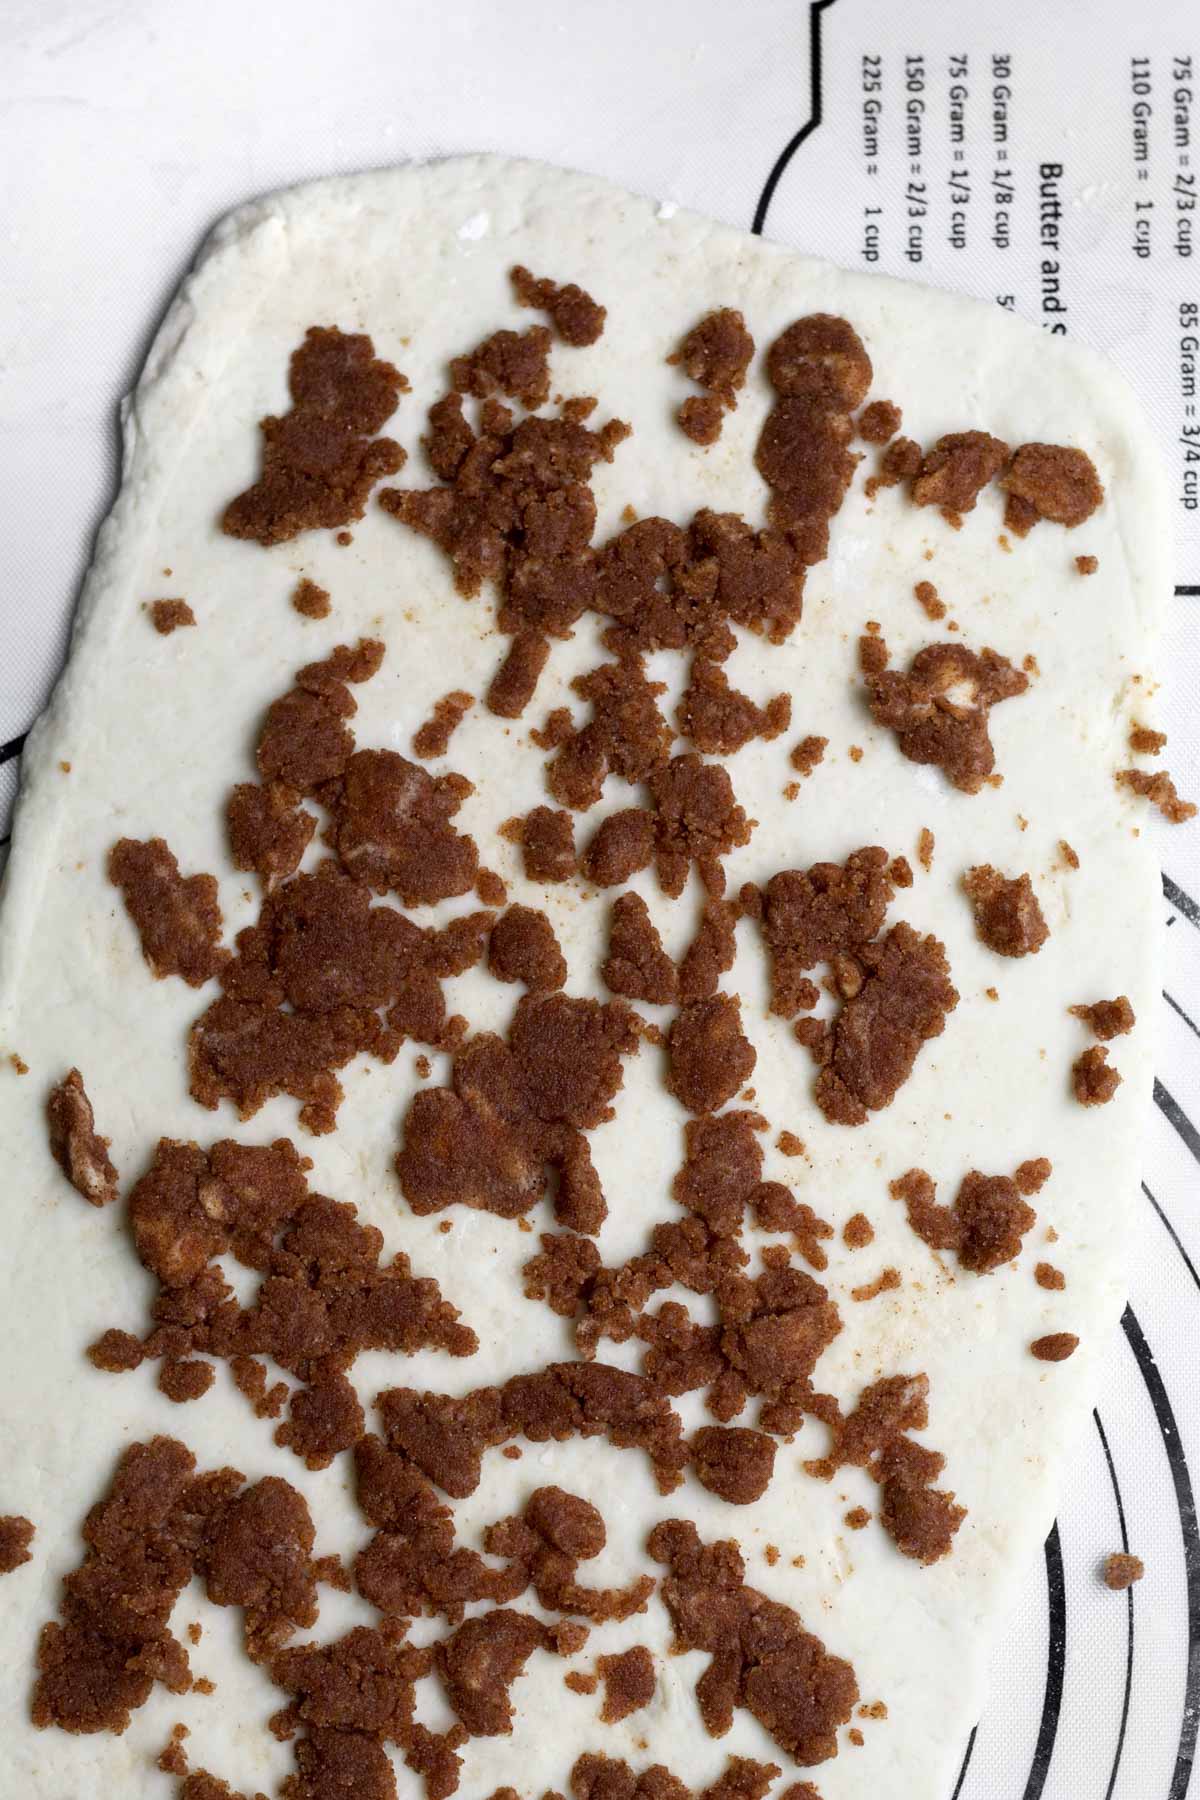
Step 6: Sprinkle The Filling
Sprinkle all the filling (minus 1 tablespoon) onto the dough. Then use clean hands gently pat the filling down into the dough.
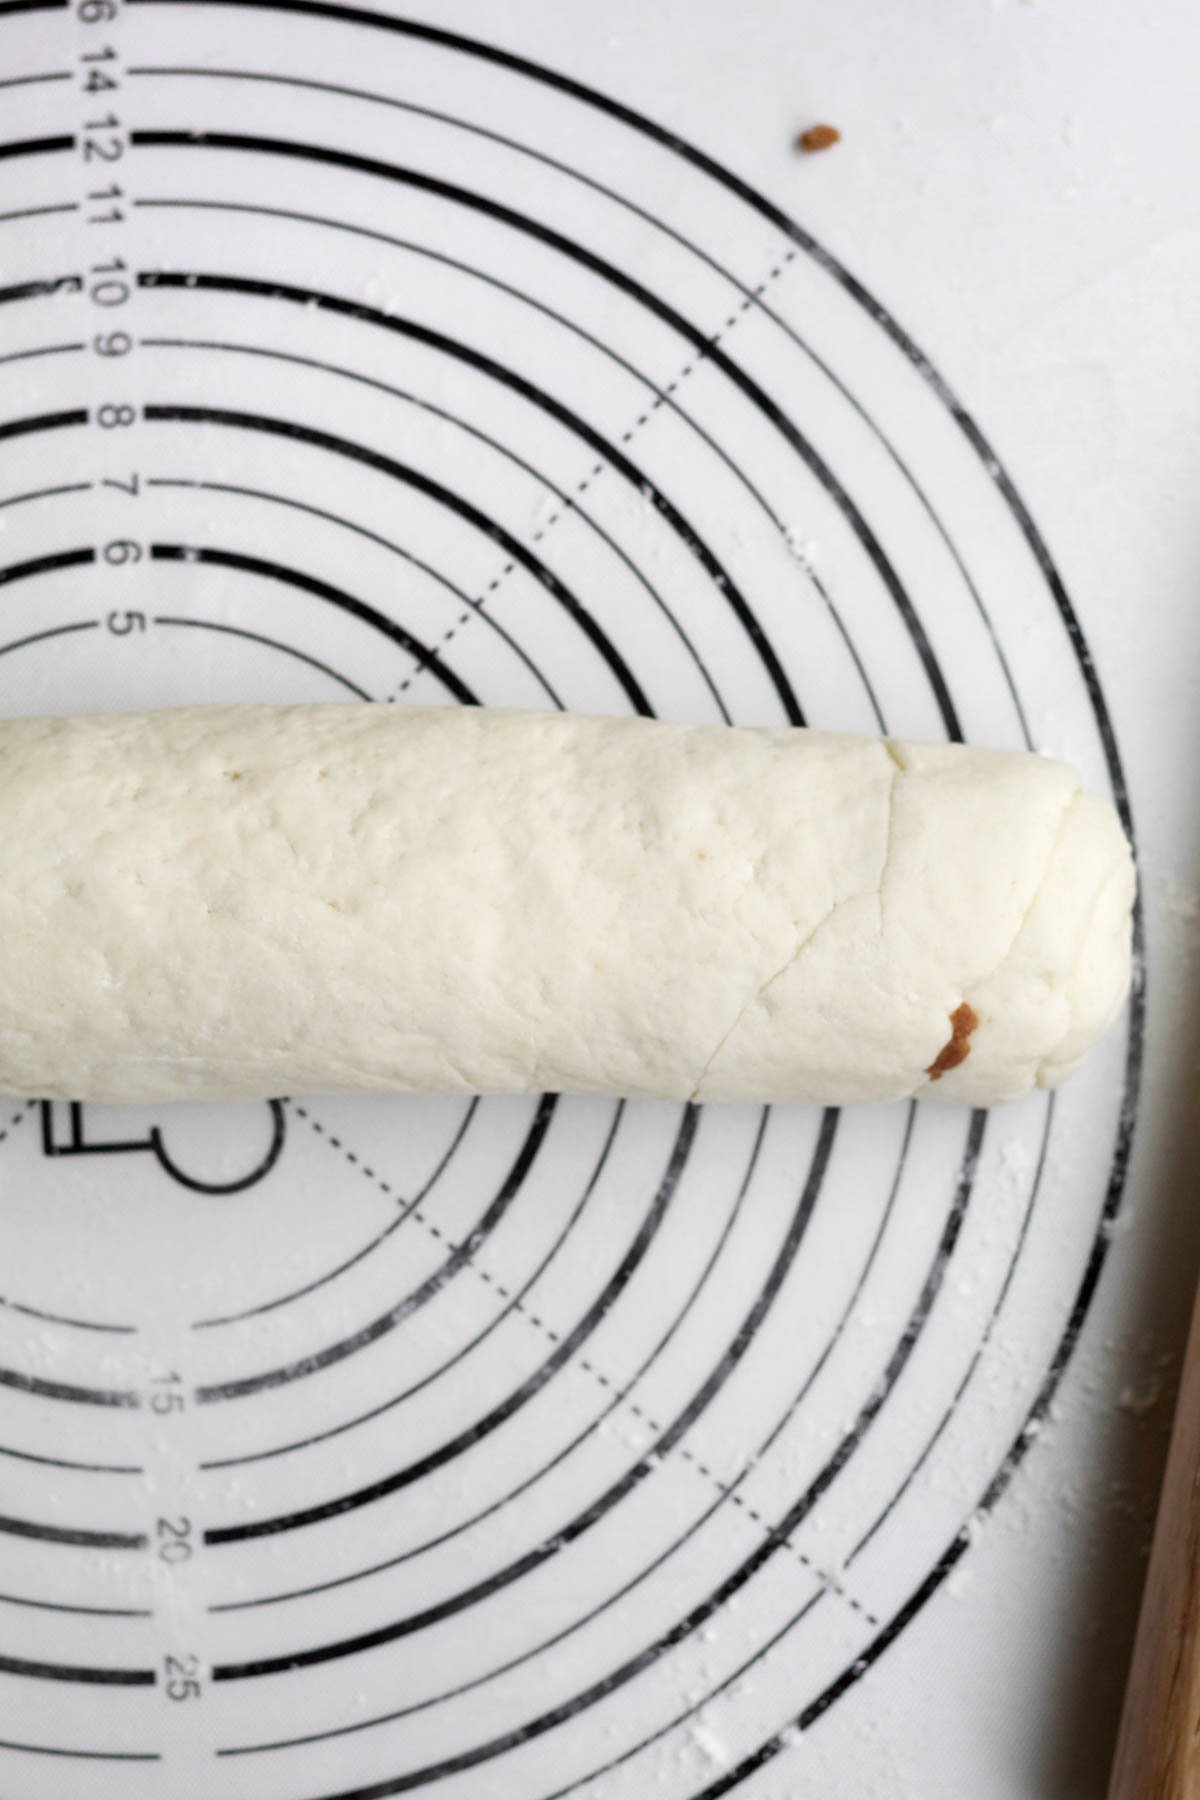
Step 7: Roll The Dough Into a Log
Roll the dough away from you into a tight log.
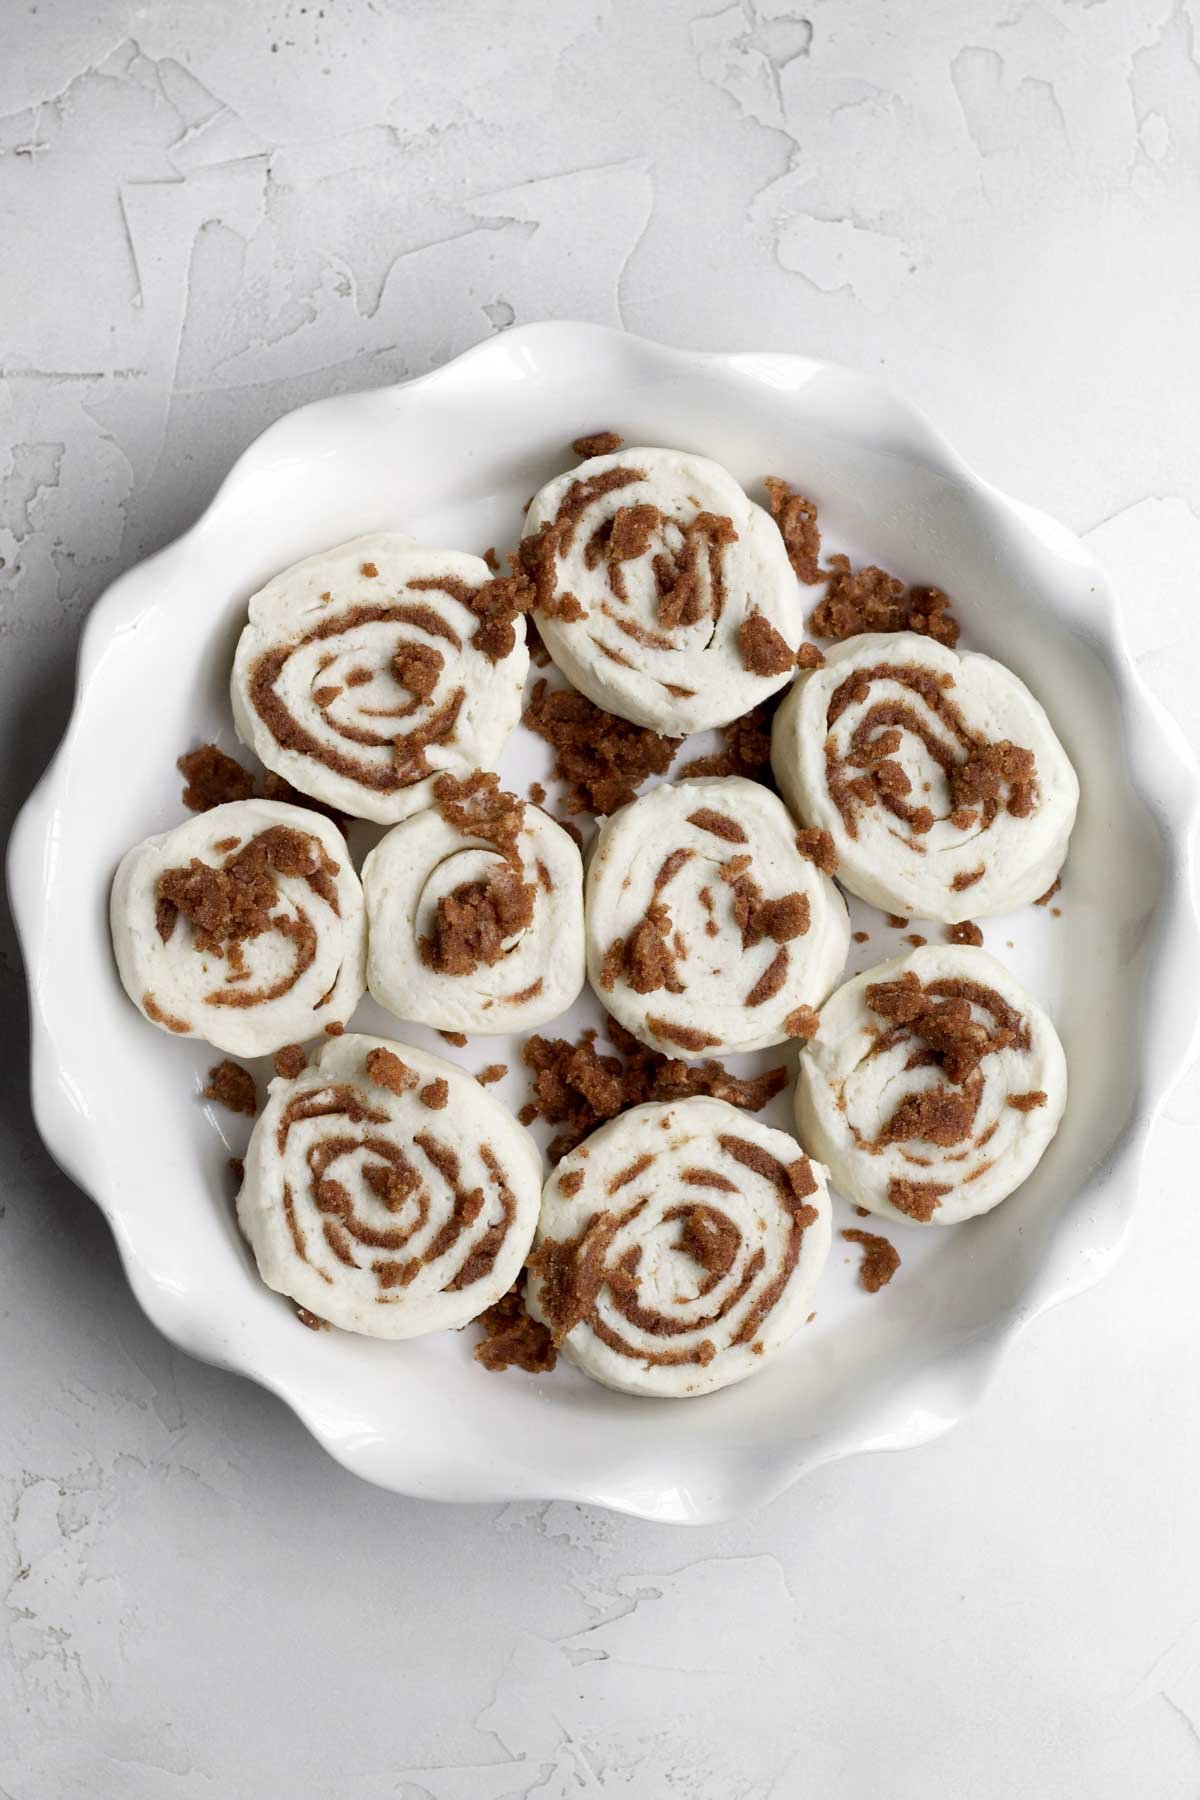
Step 8: Slice and Place The Rolls In the Baking Dish
Using a sharp knife, cut the log into 9 thick slices. Then place the rolls swirl side up into the baking dish.
The rolls will be touching one another.
Sprinkle the extra tablespoon of filling on top of the rolls.
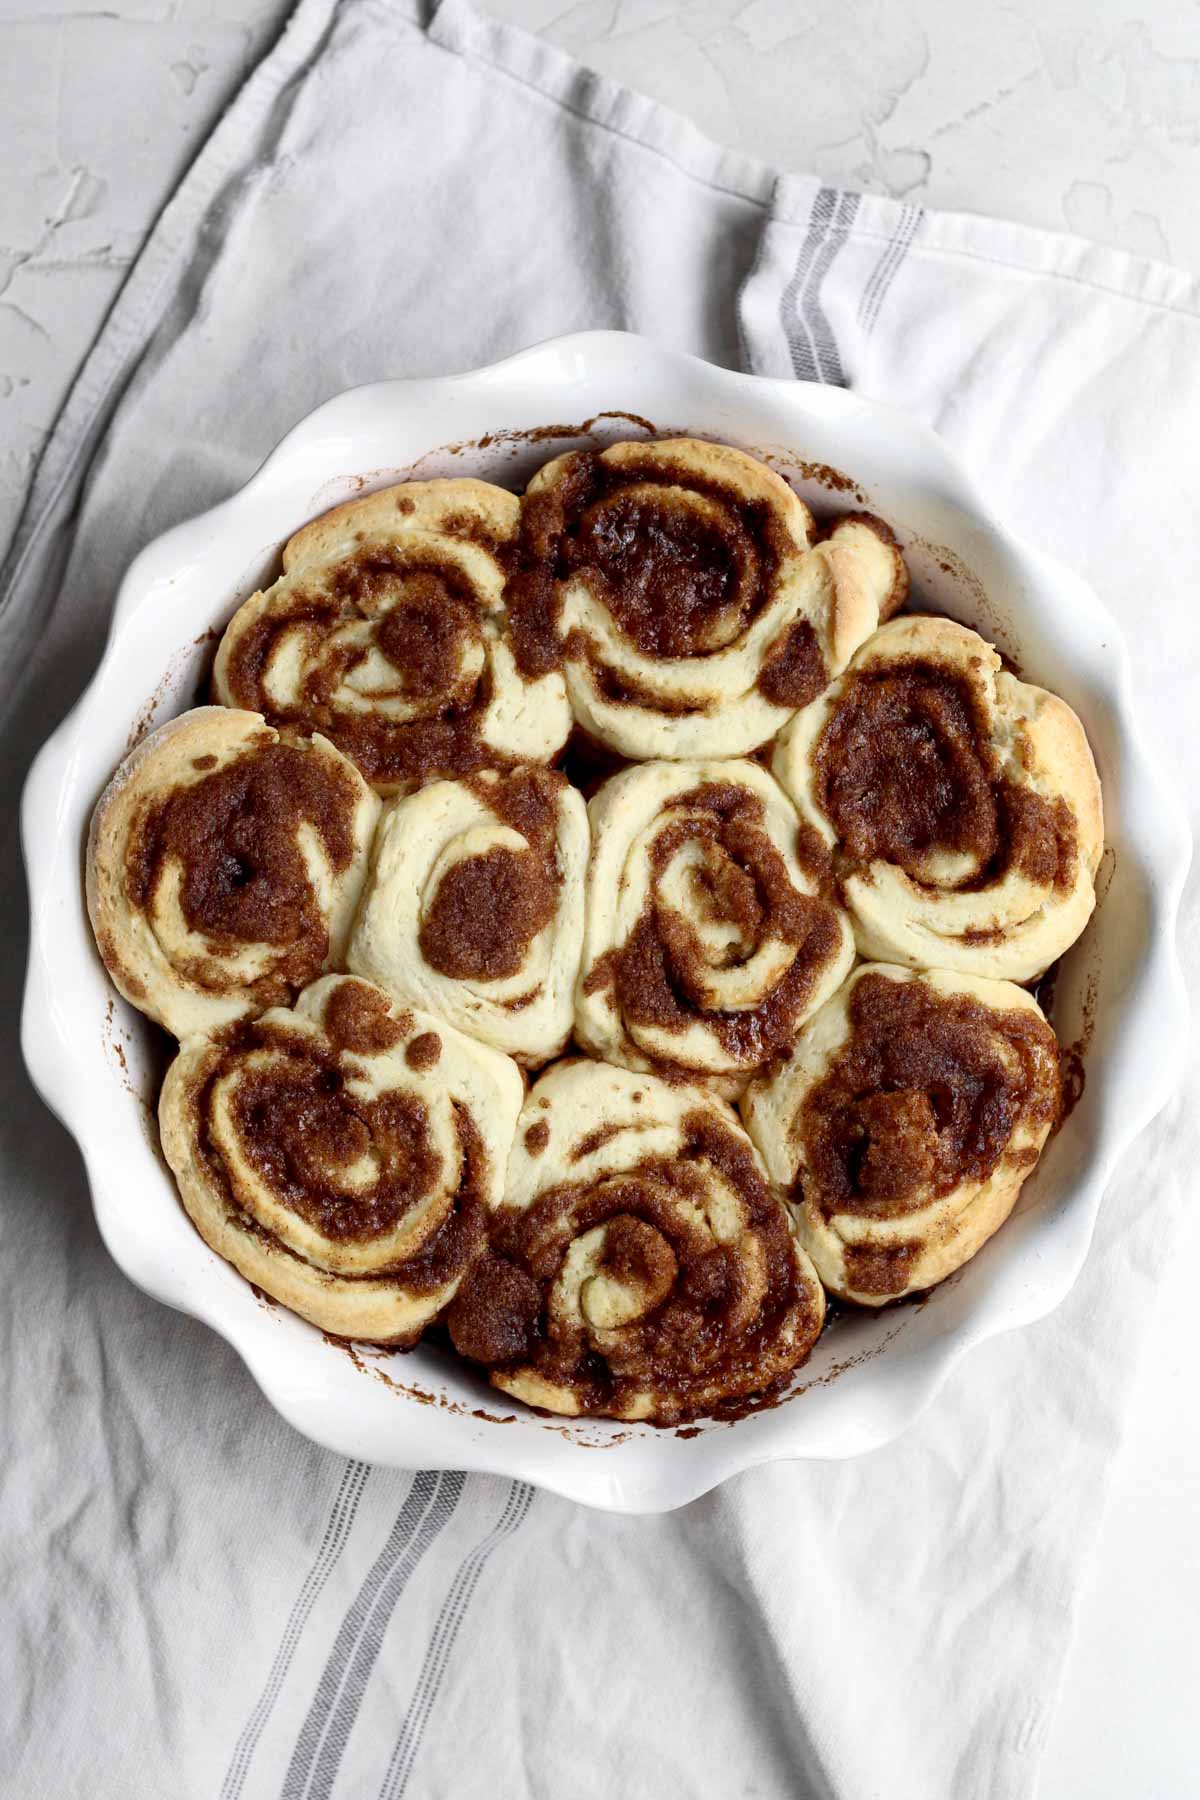
Step 9: Bake
Bake the cinnamon rolls at 375 degrees Fahrenheit for 24 minutes or until golden on the edges.
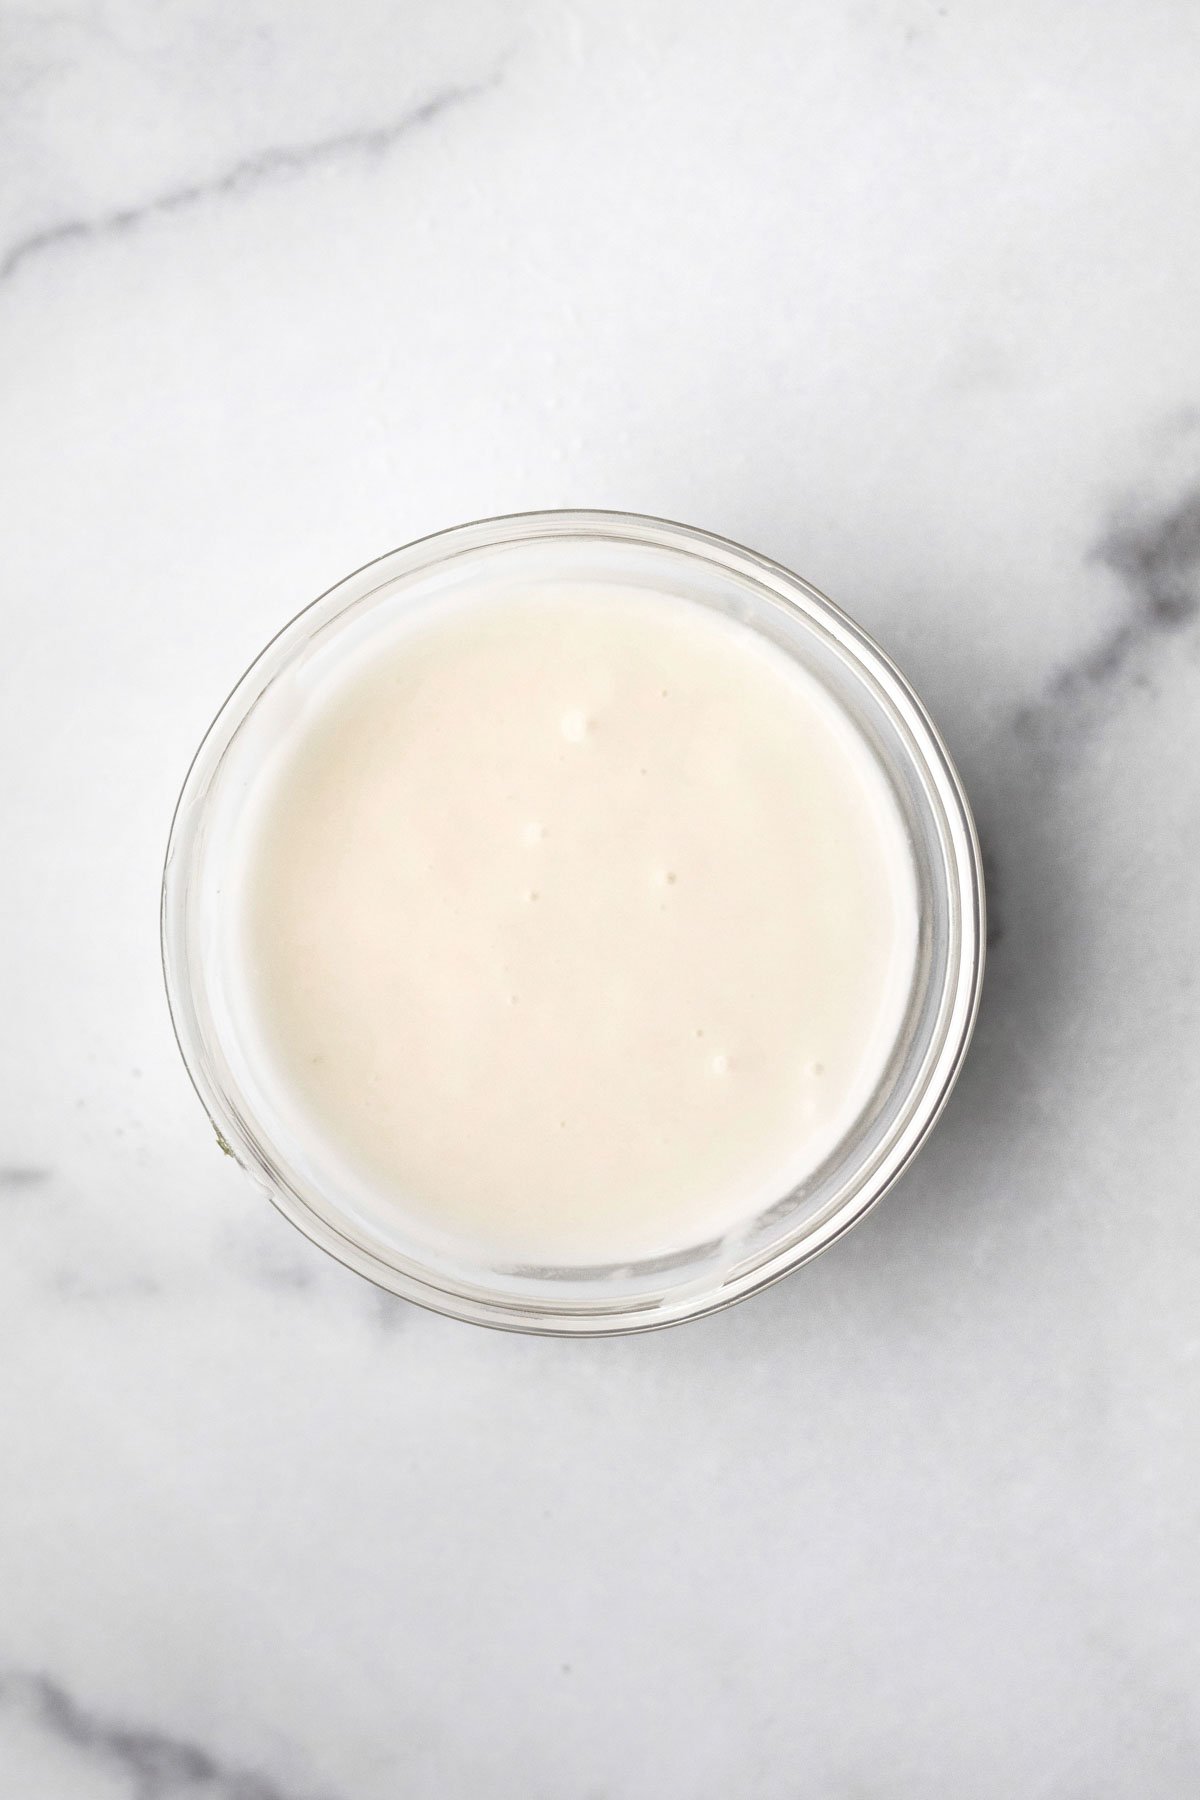
Step 10: Make The Easy Cream Cheese Icing
After that, use a spatula to combine the confectioners' sugar and cream cheese.
Once combined, slowly whisk in the water a little at a time until you get the desired consistency. You may not need all the water.
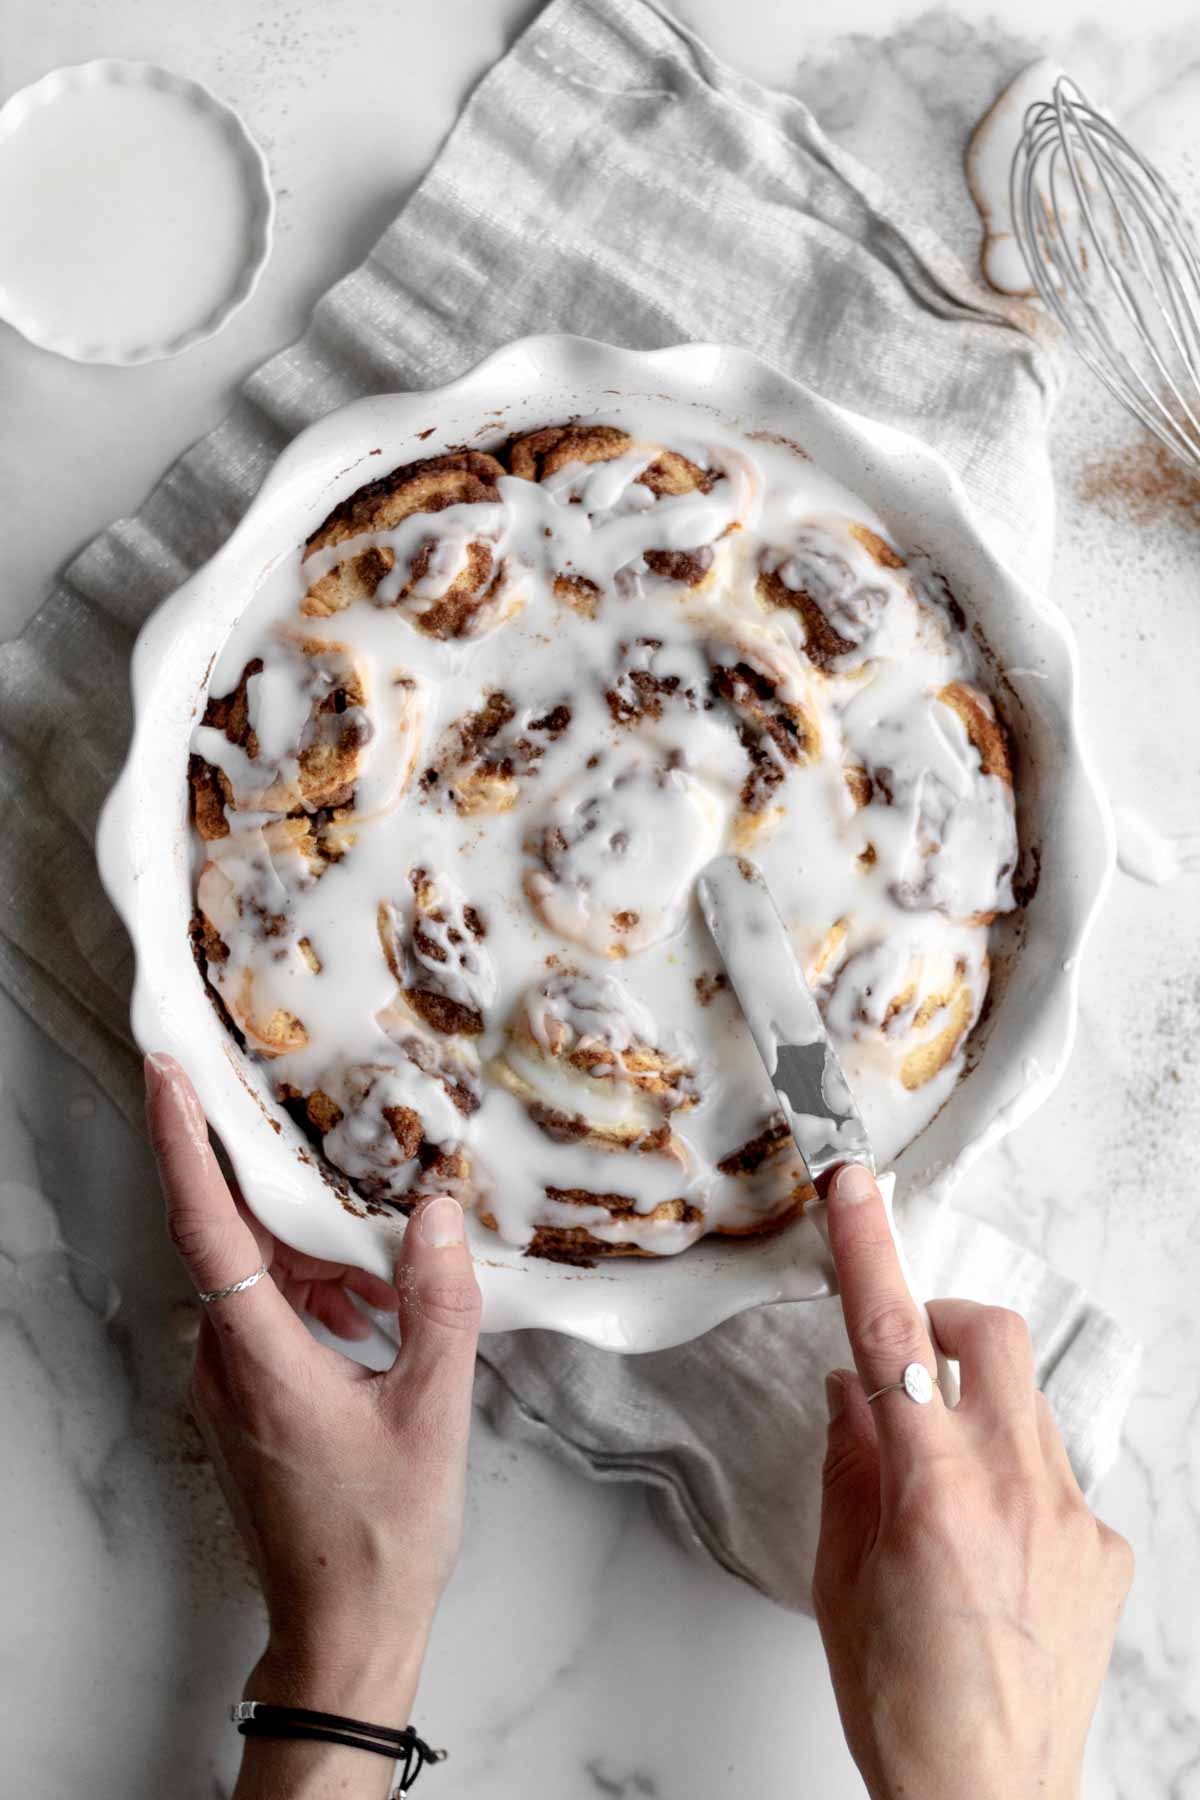
Step 11: Add the Cream Cheese Icing
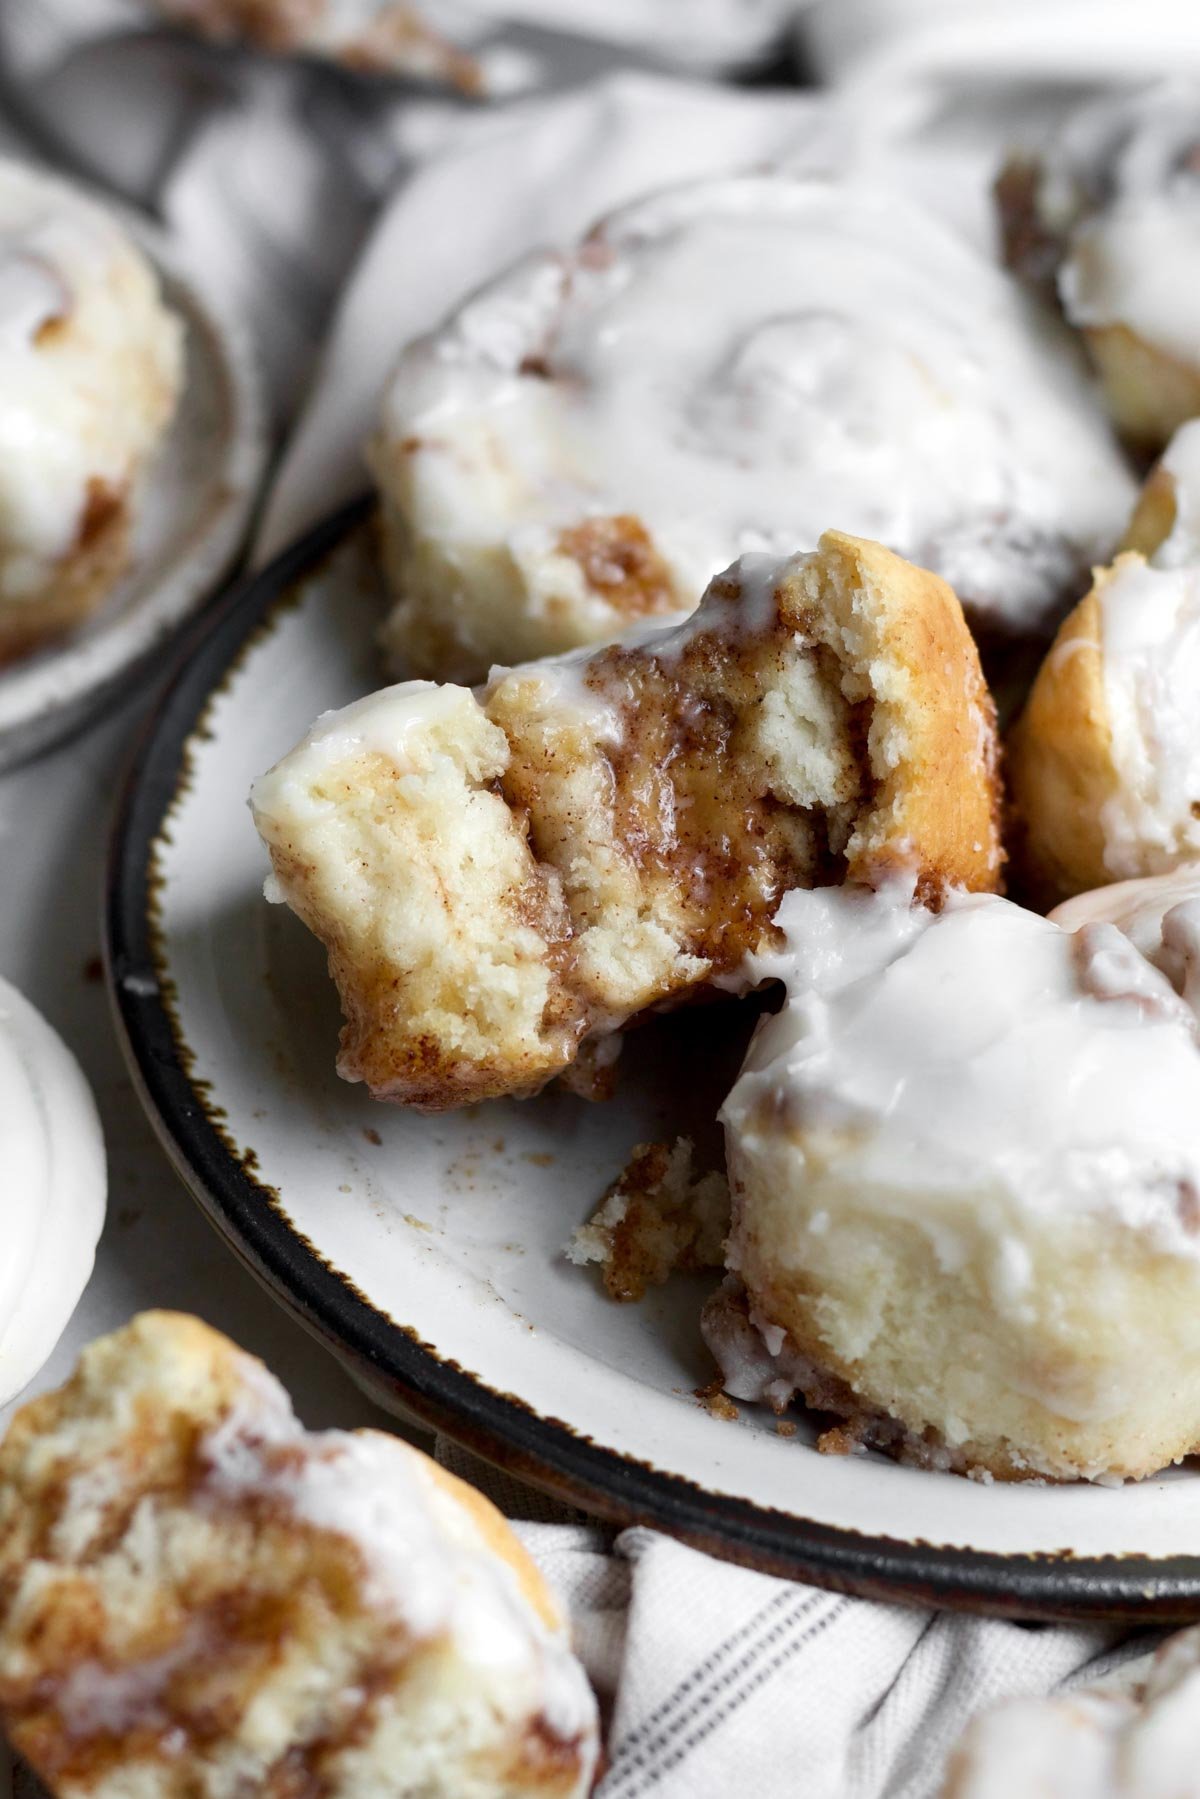
Lastly, use an icing spatula to frost the warm cinnamon rolls with the cream cheese icing.
Expert Baking Tips
- Use Packed Cups of Flour- Normally in baking we do not use packed cups however, when working with gluten free, I've found using packed cups works best to help the baked goods keep their shape. For this recipe make sure to use packed cups or please read the gram amount.
- Dust with Flour- If you notice the dough is way too sticky to roll out, don't add more flour to the dough. Simply dust the dough with flour until it is workable. This ensures the dough stays soft and doesn't get dense.
- Making The Icing- If the icing appears too watery, then add more confectioners’ sugar 1 tablespoon at a time. If it appears too thick, add more water ¼ teaspoon at a time. You want the glaze thin enough to coat but thick enough to solidify on the cinnamon buns.
Recipe FAQs
I believe that Cinnamon Rolls taste best served the same day.
No because this recipe is strictly for no yeast.
This recipe can make 9-12 rolls, depending on how large you cut them.
I usually make 9 because I like my rolls larger.
Yes! I have listed another icing recipe in "substitutions and variations" above in the blog post. It's for a vanilla icing.
Storing: Once the icing has hardened, store the individual rolls in an airtight container or aluminum foil in the fridge for up to 2 days.
For best results, reheat each roll in the microwave for about 10-20 seconds prior to eating.
If wrapped in foil, please remove the foil prior to microwaving. Be careful not to burn your mouth on hot icing and filling.

More Cinnamon Recipes You'll Love
Did you try this recipe? Please leave me a ⭐ review below!
Don’t forget to tag me on Instagram @laneandgreyfare and follow along on Pinterest, Facebook and YouTube! Enjoy!!!
📖 Recipe
No Yeast Cinnamon Rolls
Ingredients
For the Filling
- ⅔ cup light brown sugar , packed
- 1 tablespoon ground cinnamon
- ¼ cup unsalted butter or vegan baking stick, softened
For the Cinnamon Rolls
- 2 cups multipurpose gluten free flour (I use a gluten free multipurpose flour with xanthan gum already in it)
- ¼ cup granulated sugar
- 4 teaspoons baking powder
- ¾ teaspoon kosher salt
- ¼ cup unsalted butter or vegan baking stick, softened
- 1 cup milk
For the Cream Cheese Icing
- 2 cups confectioners' sugar
- 4 ounces cream cheese , room temperature
- 2.5 tablespoons water , room temperature
Instructions
- Preheat your oven to 375 degrees Fahrenheit. With vegetable oil, grease a 9 inch round or square baking dish.
For the Filling
- Whisk together the ⅔ cup light brown sugar and 1 tablespoon ground cinnamon. Rip in pea-sized pieces of the ¼ cup soft butter. Work everything together with clean hands until you have a crumbly texture.
- Once crumbly, sprinkle 1-2 tablespoons of filling into the bottom of the baking dish. Set the rest aside.
For the Cinnamon Rolls
- In a large bowl, whisk together the 2 cups multipurpose gluten free flour, ¼ cup granulated sugar, 4 teaspoons baking powder and ¾ teaspoon kosher salt.
- Use clean hands to rip pea-sized pieces of the ¼ cup soft butter into the dry ingredients and then work them all together.
- Use a spatula to mix the 1 cup milk in and then form the mixture into a dough.
- Lightly flour a clean work surface, your hands and your rolling spatula.Knead the dough a few times just so it comes together.If it seems super sticky dust with some more gluten free flour so it is easier to work with.
- Then roll the dough out into a rectangular shape. You want the dough rectangle to be about ¼ inch in thickness.If you notice it still sticking as you roll, then sprinkle some more gluten free flour on it.
- Take a tablespoon of filling and set aside.Sprinkle all the remaining filling onto the dough. Then use clean hands gently pat the filling down into the dough.
- Roll the dough away from you into a tight log. Using a sharp knife, cut the log into 9 thick slices. Then place the rolls swirl side up into the baking dish.The rolls will be touching one another.Sprinkle the extra tablespoon of filling on top of the rolls.
- Bake the cinnamon rolls at 375 degrees Fahrenheit for 24 minutes or until golden on the edges.
For the Cream Cheese Icing
- Use a spatula to combine the 2 cups confectioners' sugar and 4 ounces cream cheese.Once combined, slowly whisk in the 2.5 tablespoons water a little at a time until you get the desired consistency. You may not need all the water.
- Lastly, use an icing spatula to frost the warm cinnamon rolls with the cream cheese icing
Sar says
Thank you Lee for this super delicious cinnamon roll recipe! You made it possible for me to make my birthday girl's breakfast wish come true! We have added this to our "favorites" recipes! Thank you!
Lee says
Oh my gosh this is the sweetest comment. Thank you so so much! My girl always asks them for her bday bfast too! Hope she had a wonderful day!
Cassie says
I just wanted to let you know that you have made a massive impact in our lives. my son has Crohn's and he cannot digest gluten or eggs. I still cannot believe that I get to make him cinnamon rolls for Christmas morning. Every one of your recipes have been winners! thank you so much!
Lee says
This is the kindest message ever. Thank you so much! As a mama with kids that cannot have gluten or eggs either...this means the world to me. Thank you!
Elaine Adamo says
This recipe sounds amazing can’t wait to try
Jan says
Made in an air fryer but lowered the temp to 260F and it came out perfect. This recipe was so quick and easy and was delicious, thank you!!
Lee says
Great idea!!! So glad it worked out!
Tiffany says
Excellent! They are soft and delicious. I haven’t had cinnamon buns in years because of my necessary gluten-feee diet. They were always my must favourite treat, and now I can enjoy them again!
Thank you so much for sharing great gluten free recipes!
Lee says
Thanks, Tiffany!!! SO glad!
Meha says
You’ve saved me soo much time making these without yeast! They turned out so good.
Lee says
So glad!