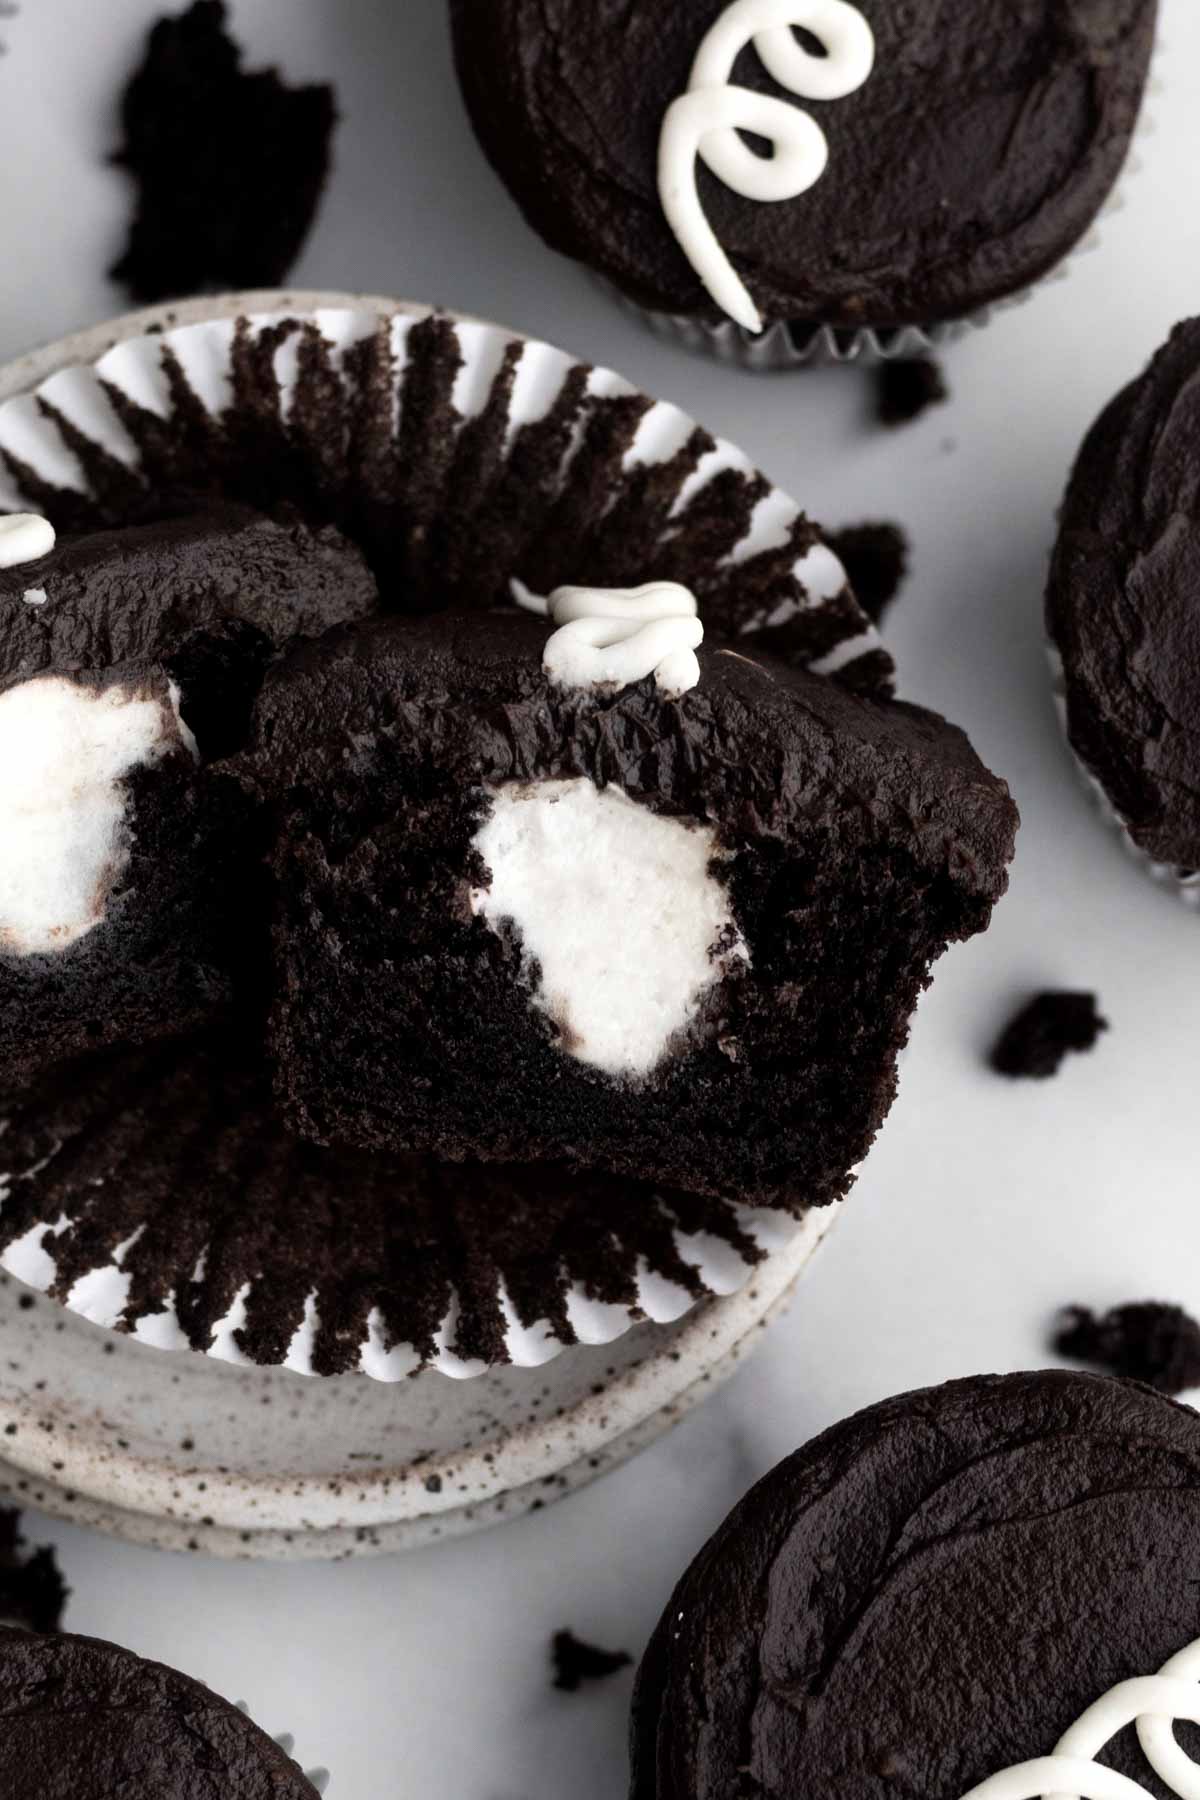
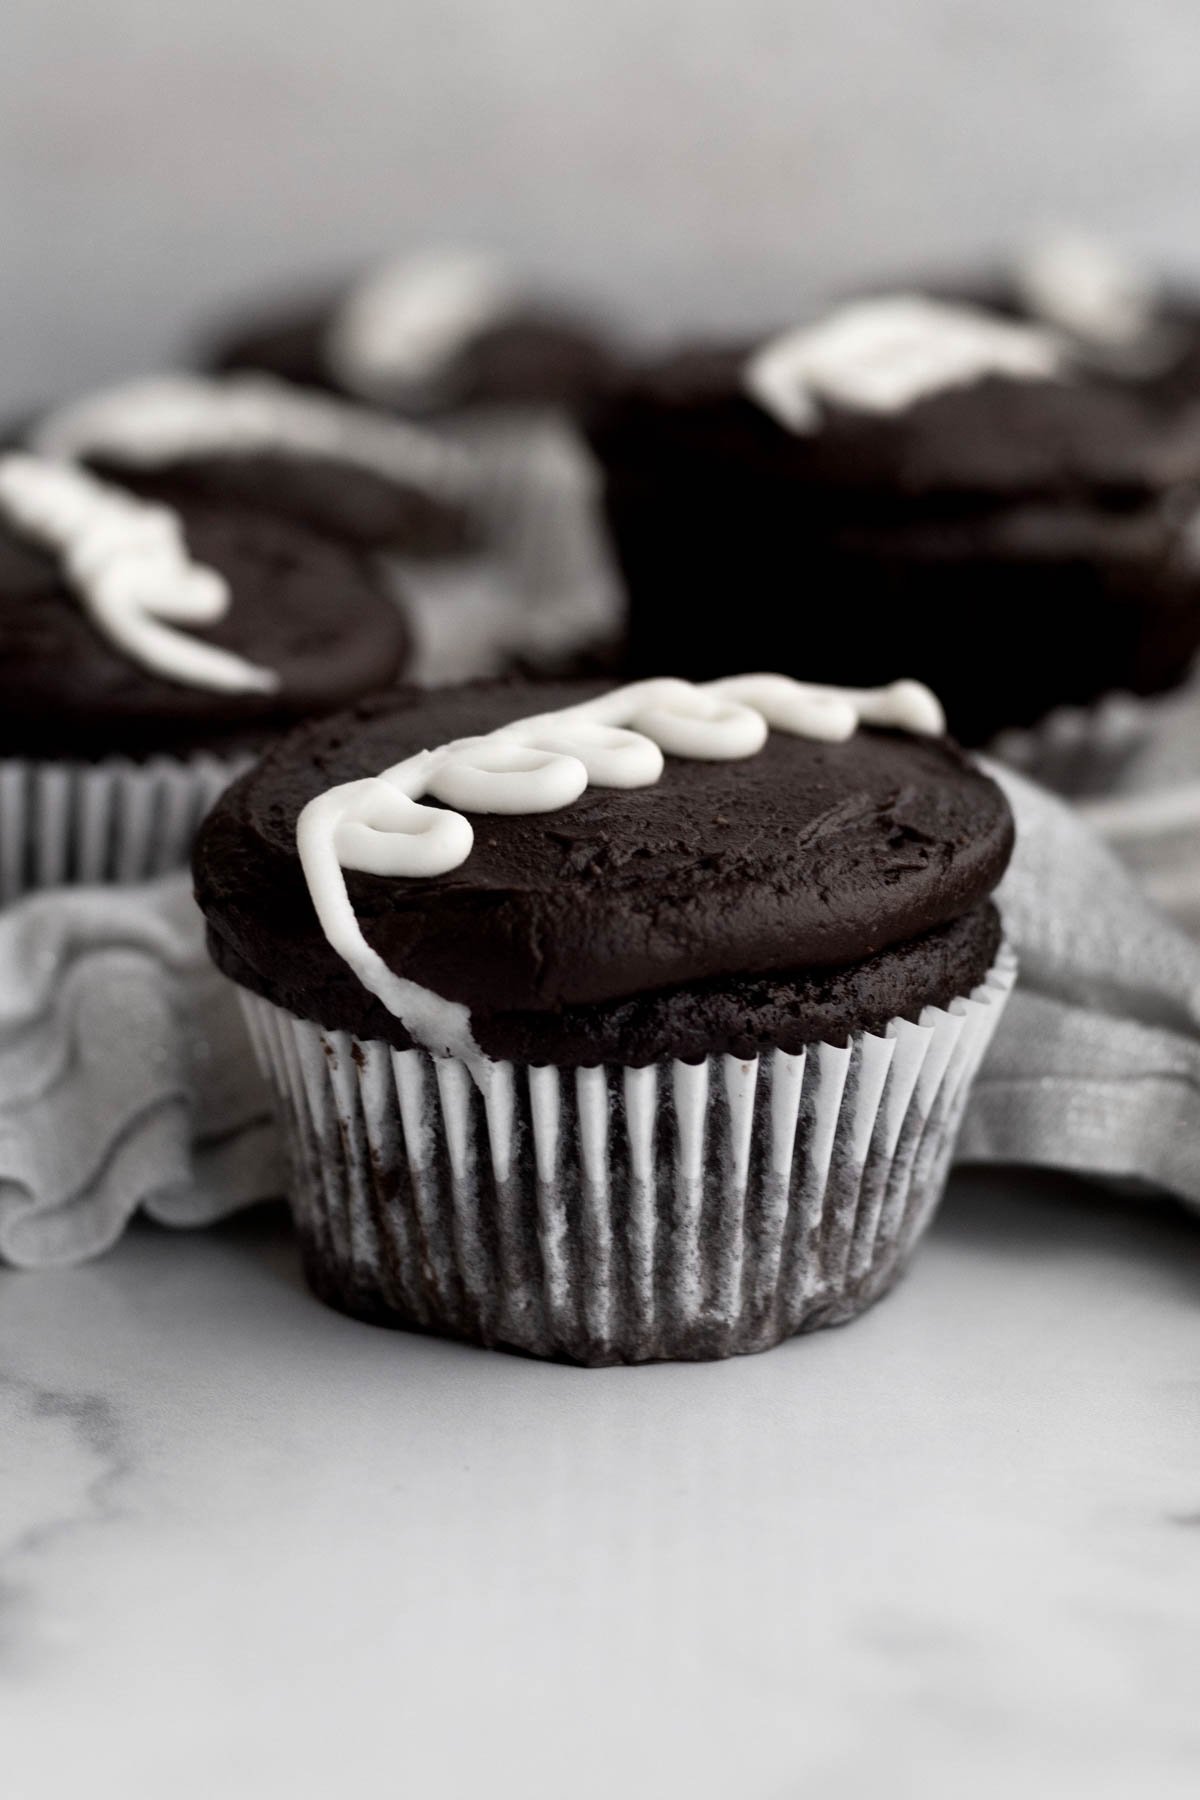
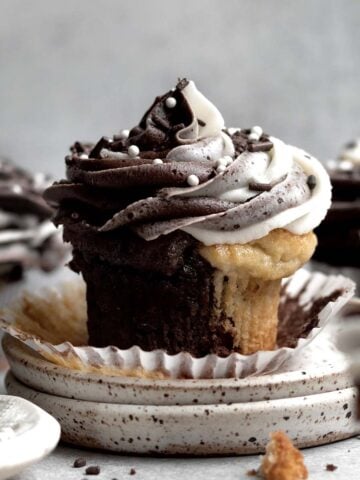
This recipe for Homemade Hostess Chocolate Cupcakes is so incredibly delicious...you won't even miss the originals! They are rich chocolate cupcakes, filled with a fluffy vanilla buttercream, topped with a chocolate fudge frosting and decorated with more vanilla frosting. Best yet, they're gluten free, nut free, eggless and can easily be vegan!
Hostess Chocolate Cupcakes were definitely one of my favorites when I was little. My kids don't have to be sad anymore that they can never try the originals because these homemade ones are allergy friendly while still being soft, rich and delicious!
For more chocolate cakes and cupcakes, try my Chocolate Fudge Cupcakes, my Eggless Chocolate Cupcakes, my Triple Layer Cake and my Chocolate Tea Cake.
Reasons to Love These Homemade Hostess Cupcakes
- Allergy Friendly- These cupcakes are gluten free, nut free, egg free and can easily be dairy free (vegan)!
- Soft & Fluffy- The cake of these cupcakes is super soft, decadent and delicious.
- Cream Filling- They have a fluffy vanilla buttercream in the middle!
- Easy to Make- The batter mixes up in just one large bowl with a whisk like my Small Batch Chocolate Cupcakes!
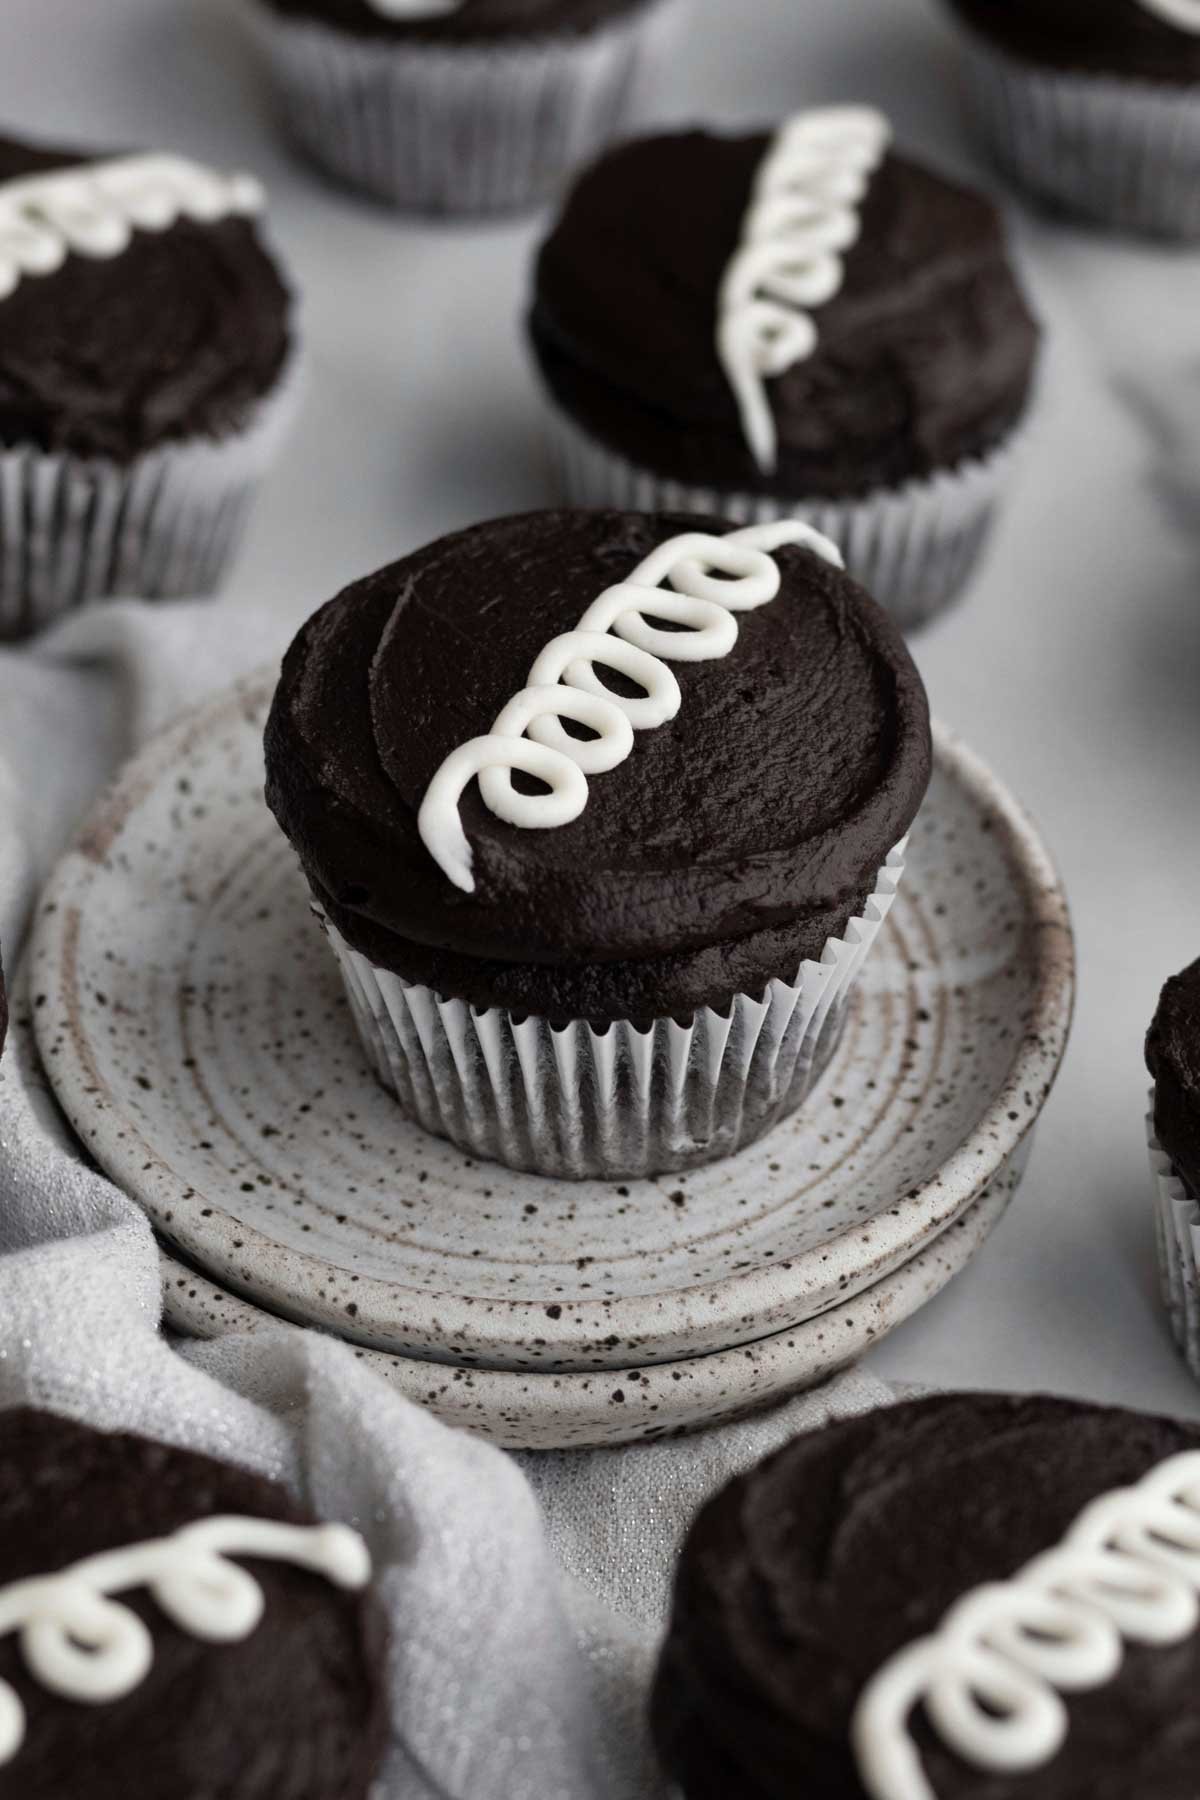
- Look like Hostess Cupcakes- They look just like those hostess cupcakes in the stores only these are safe!
Ingredient Notes
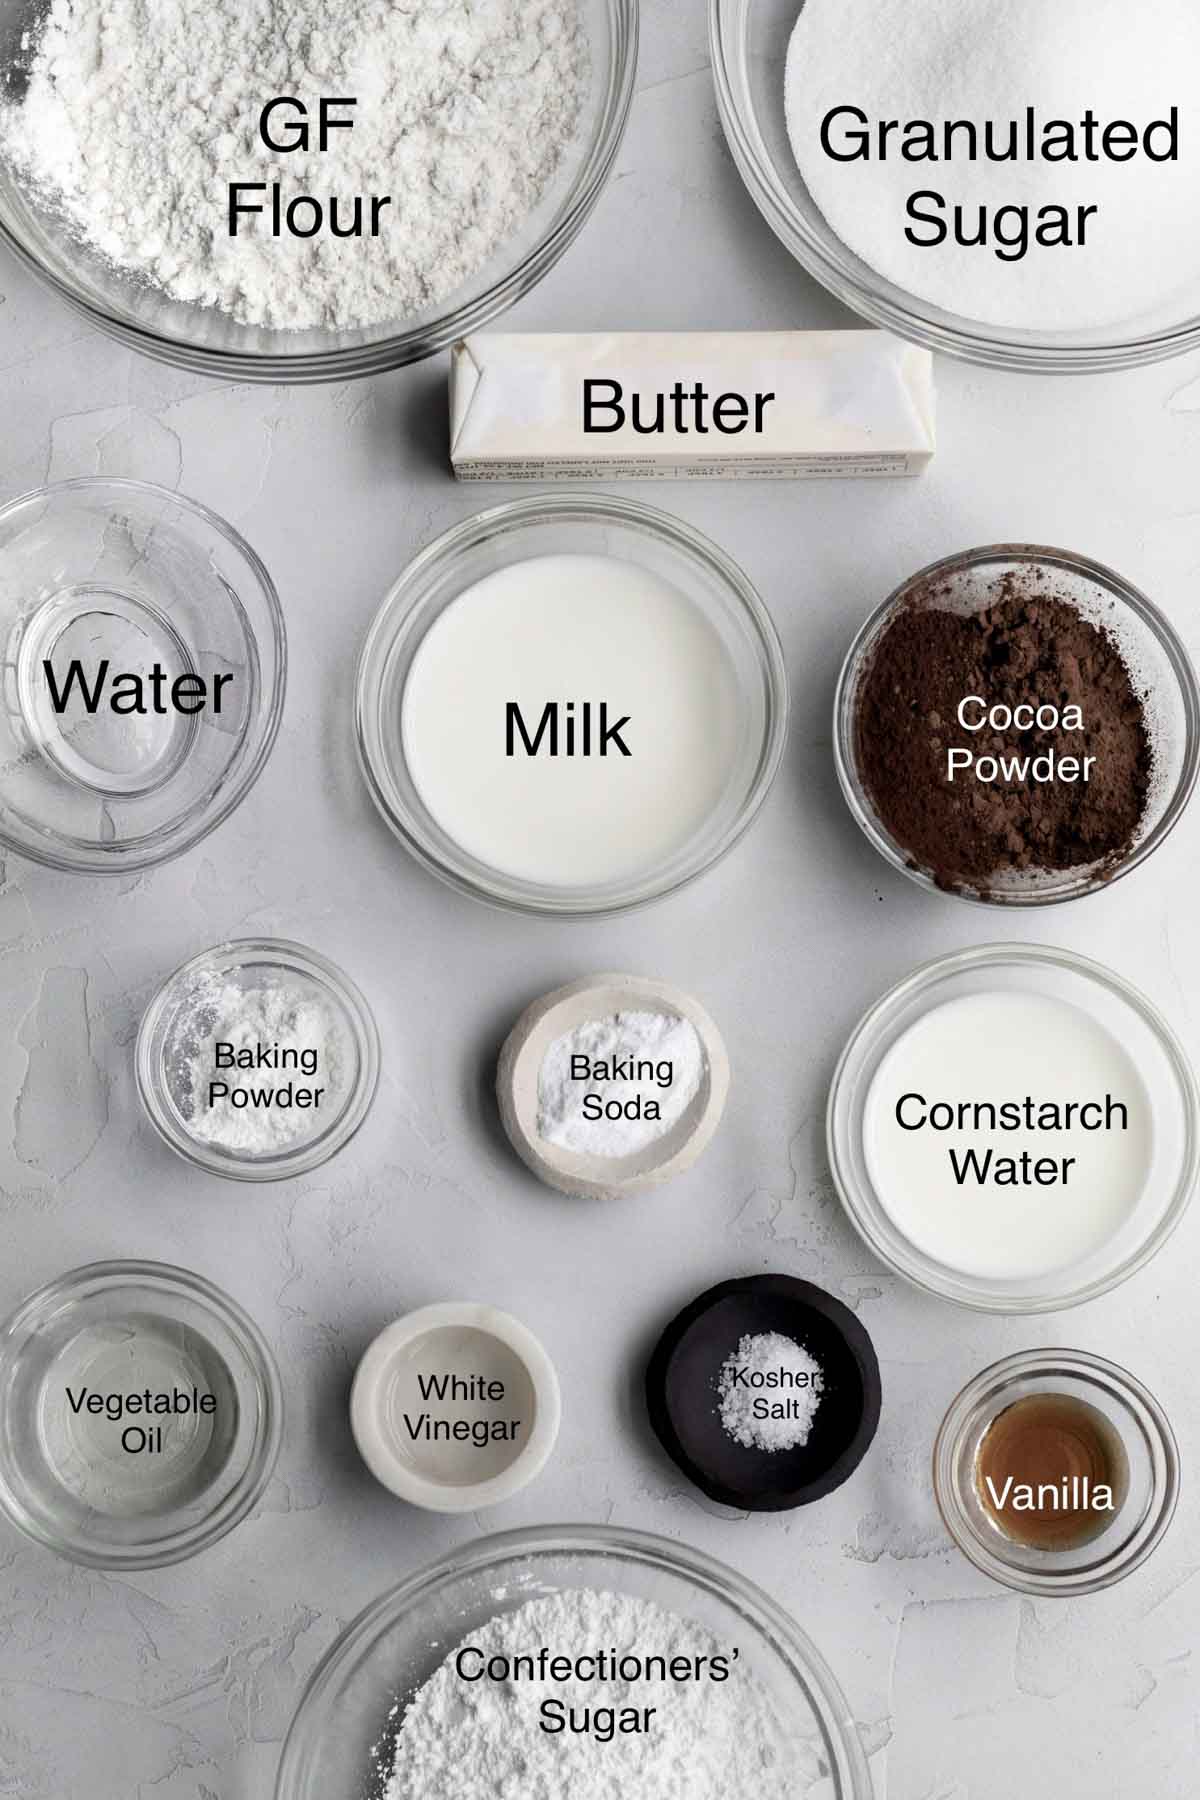
- Gluten Free Flour- If you also have nut allergies, make sure to use a brand that’s made in a nut free facility. I really love to use this gluten free flour because it’s free of the top 9 allergens. It also contains xanthan gum which really helps give baked goods their bounce and prevents them from falling apart.
- Cocoa Powders- I like to use two types to give the cookies a dark color, but if you only want to use one, use Dutch or Natural Unsweetened. Do not only use Dark.
- Milk- If there are no dairy allergies or if you’re not vegan, you can use regular whole milk. For non-dairy, use a dairy-free milk of your choosing.
- White Vinegar- We use this along with the milk to make a homemade buttermilk.
- Vegetable Oil- The cake of these cupcakes uses oil instead of butter/vegan baking stick to help it stay moist.
- Cornstarch Water- This helps bind everything together since the cupcakes are eggless.
- Vanilla- Make sure to only use pure vanilla extract otherwise the cupcakes can have a chemical flavor.
See my recipe card below for a complete list of the ingredients with measurements.
Substitutions and Variations
How to Make these into Vegan Cupcakes
- Use a gluten free flour that’s free from dairy.
- Make sure the brand of sugar you use is vegan.
- Use vegan baking sticks instead of butter in both frostings.
- Only use a non-dairy milk of choice.
How to Make this recipe with All Purpose Flour
- Use ¾ cup plus 2 tablespoon packed AP flour (126 grams plus 2 tablespoons).
- Make sure to use ¼ cup plus 2 tablespoons packed cocoa powder.
This recipe has not been tested with some of these substitutions and/or variations due to celiac disease and food allergies. If you change any of the ingredients, please let us know how the recipe turned out in the comments below!
How to Make Homemade Hostess Cupcakes
Here are the step by step instructions to make these homemade chocolate hostess cupcakes!
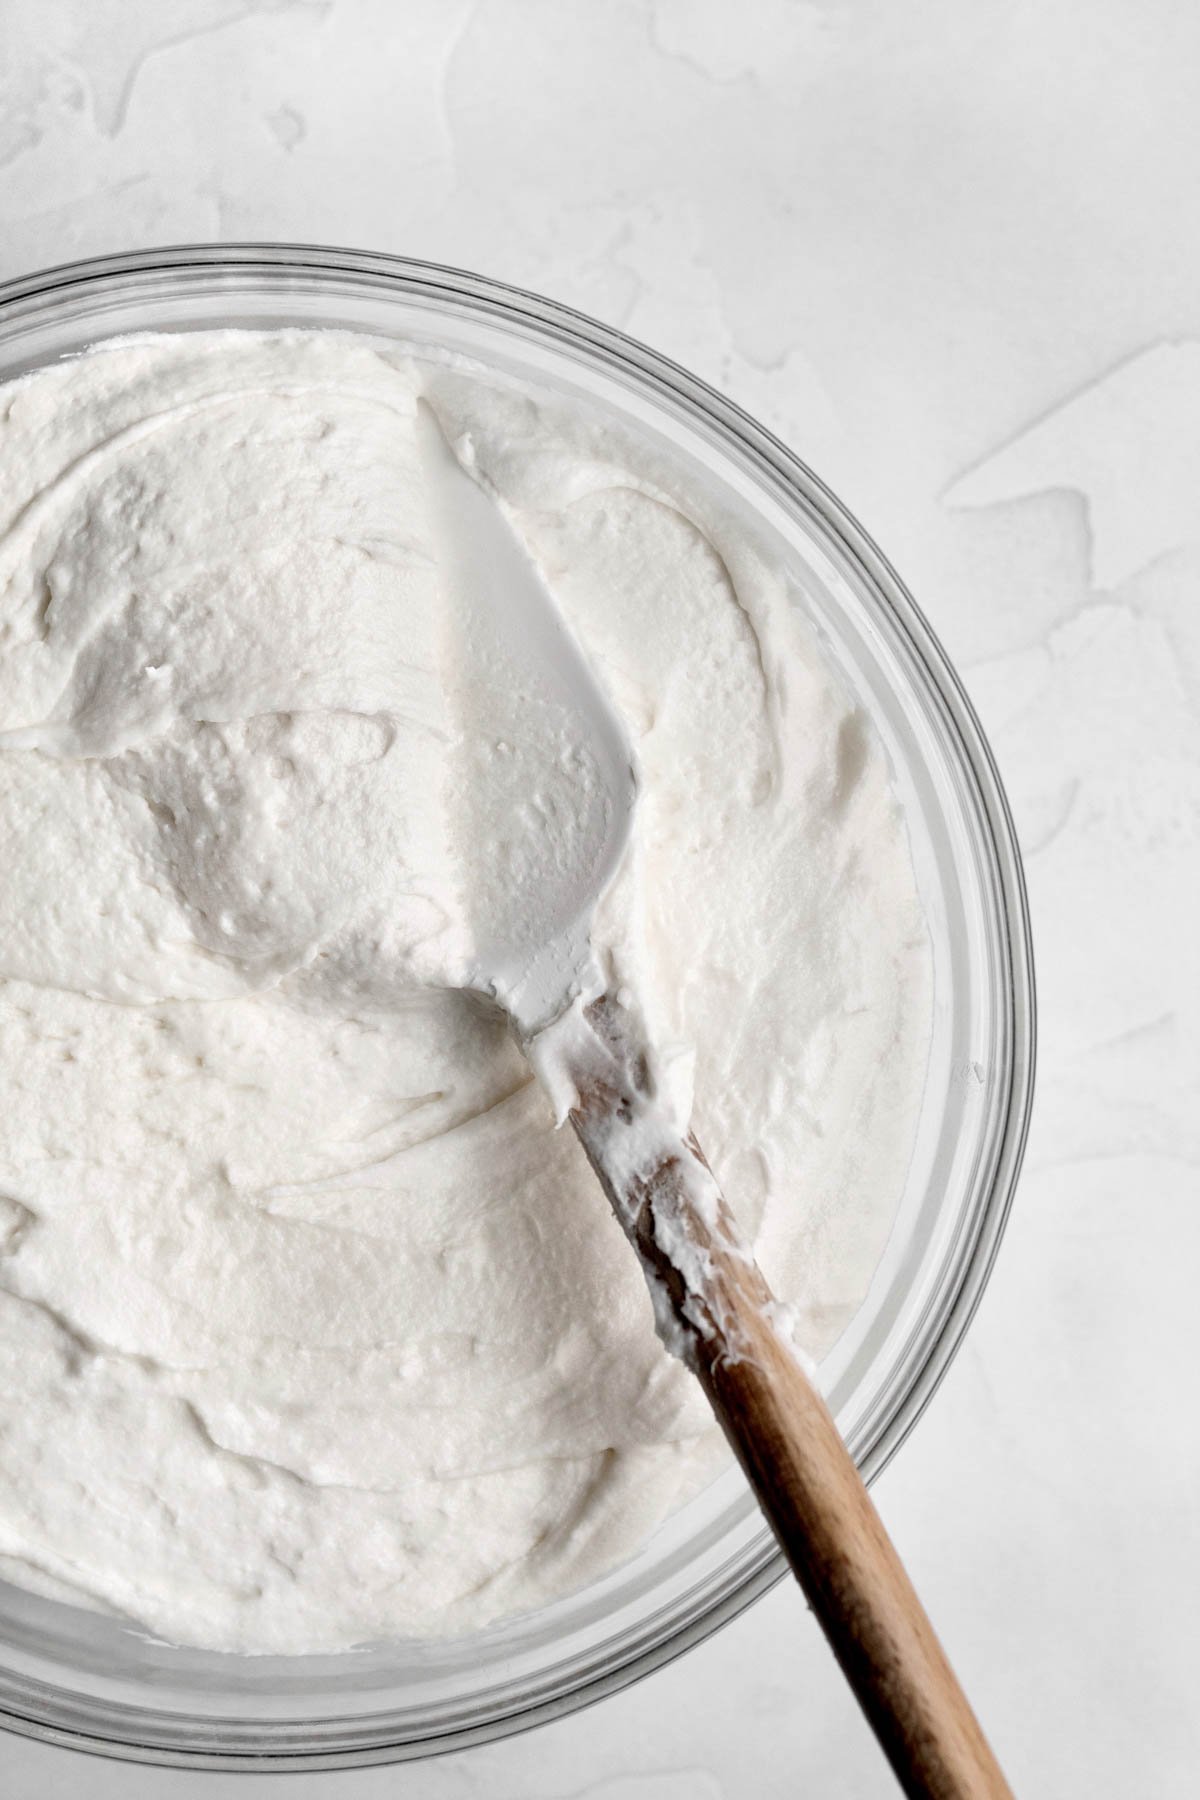
Step 1: Make the Vanilla Buttercream
Beat the butter until smooth; about 2 minutes.
Slowly beat in the confectioners' sugar and vanilla until combined.
Then slowly beat in the water a little at a time until you get the desired consistency. You may not need to use all the water.
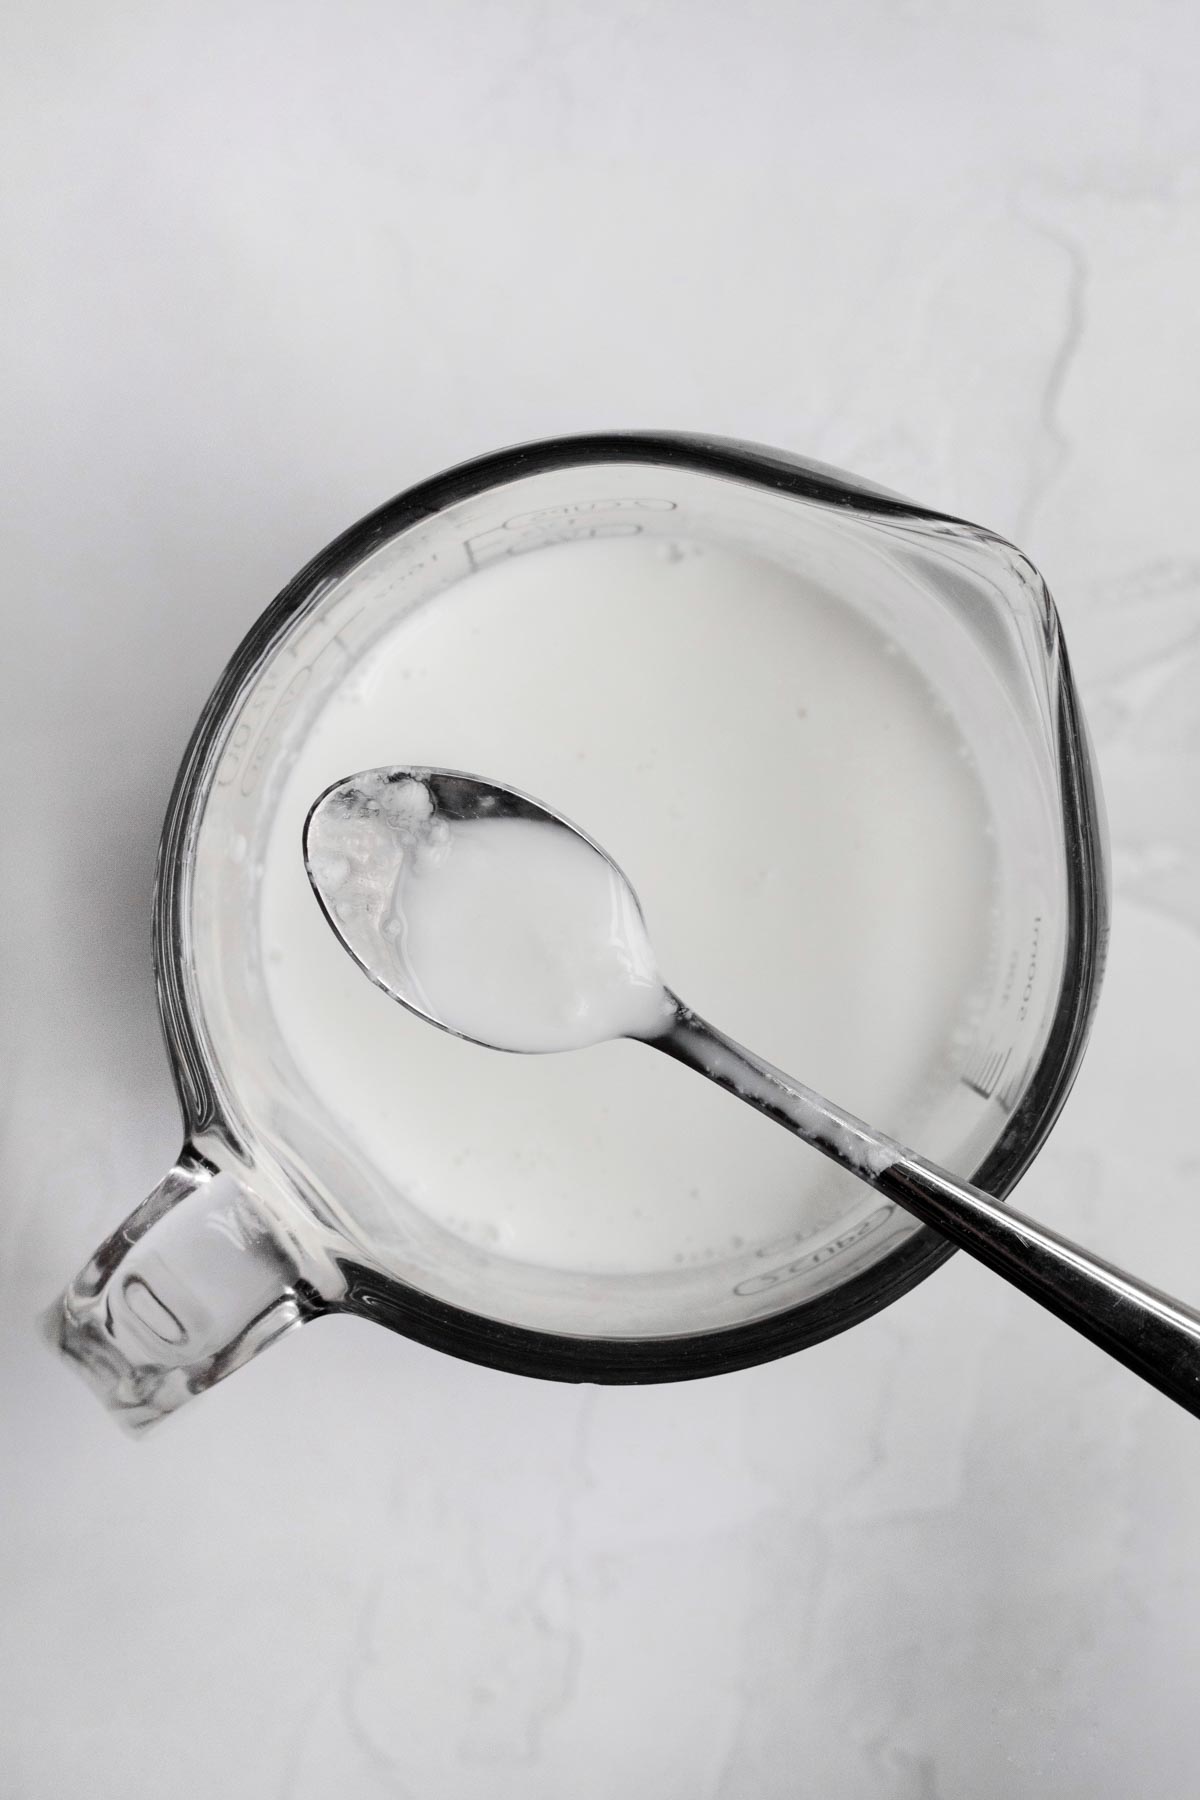
Step 2: Make the Homemade Buttermilk
In a large measuring cup, add the white vinegar to the milk. Stir, let sit 5 minutes and stir again.
The milk will appear chunky; that's normal.
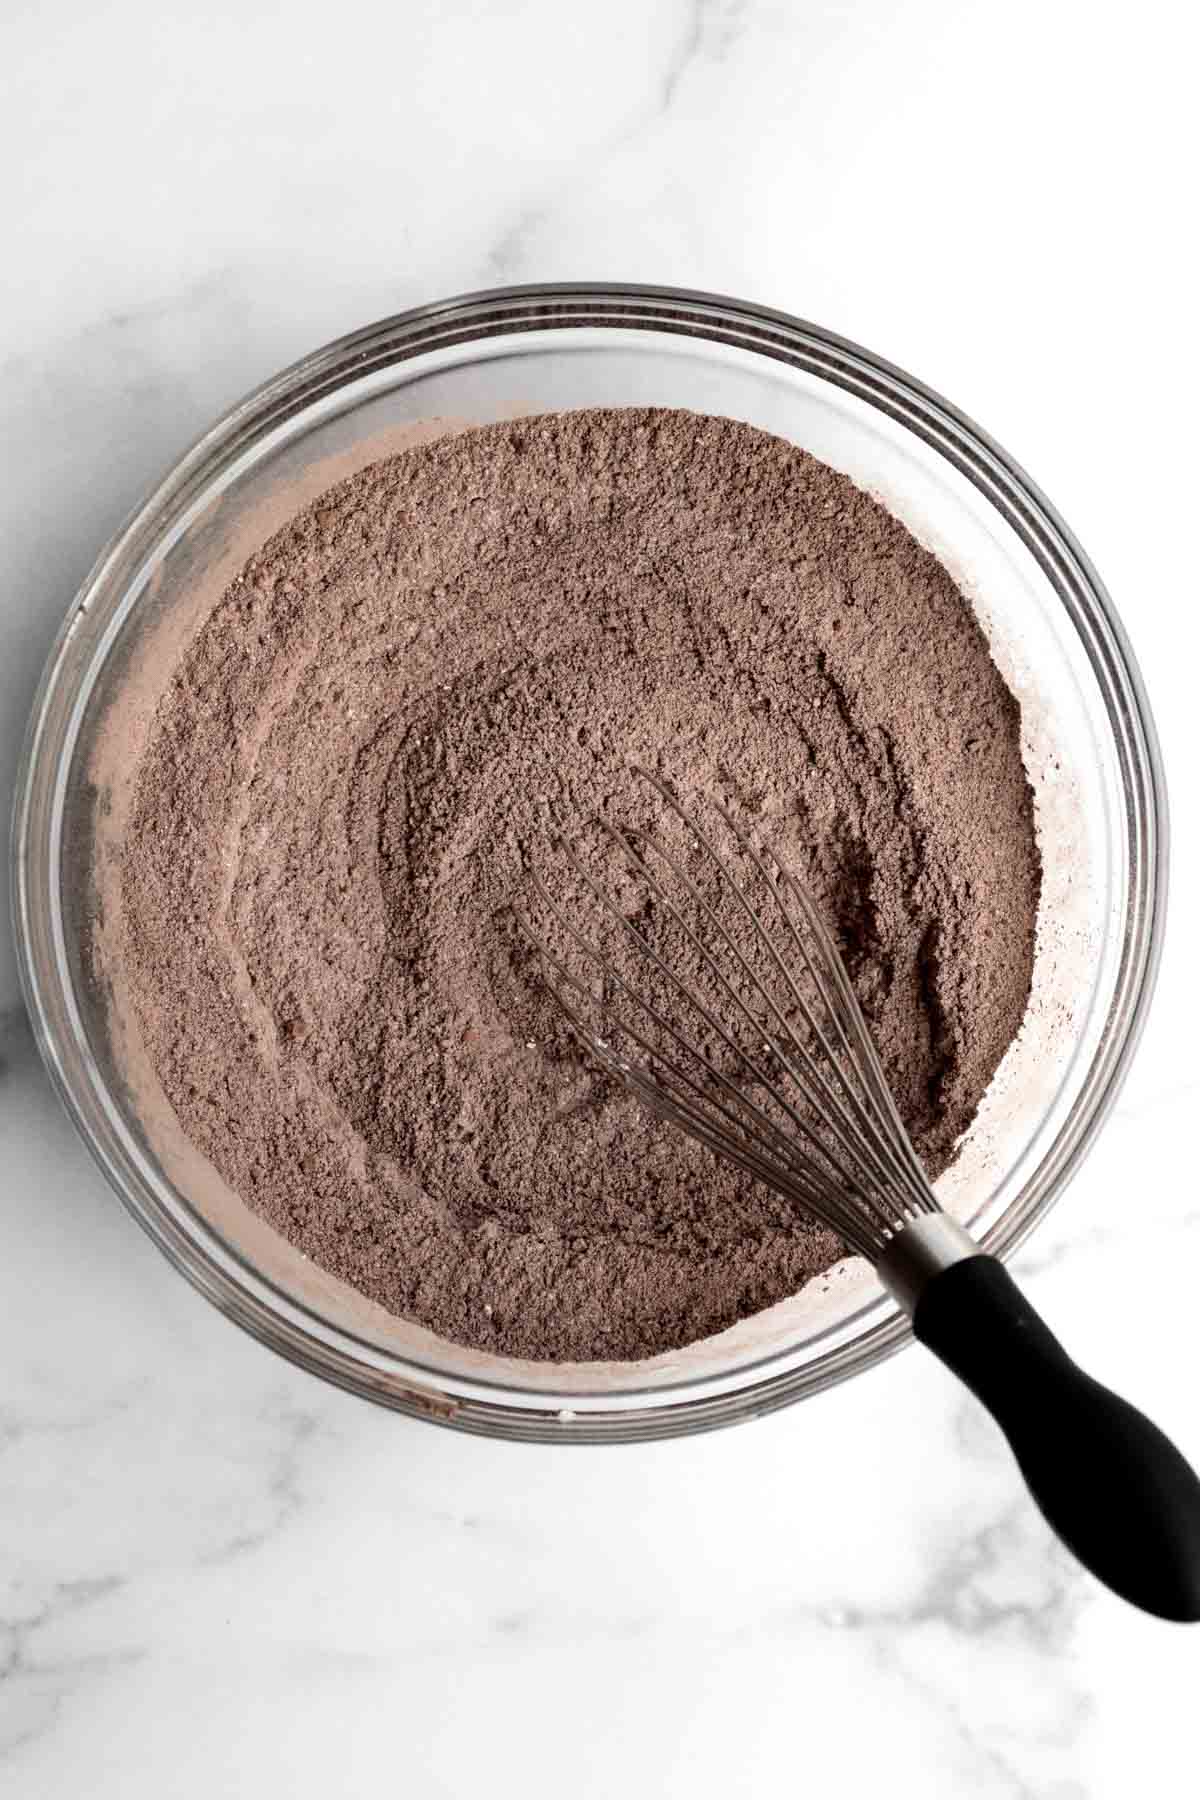
Step 3: Whisk Together All The Dry Ingredients
In a large bowl whisk together the gluten free flour, granulated sugar, cocoa powder, baking powder, baking soda and kosher salt until combined.
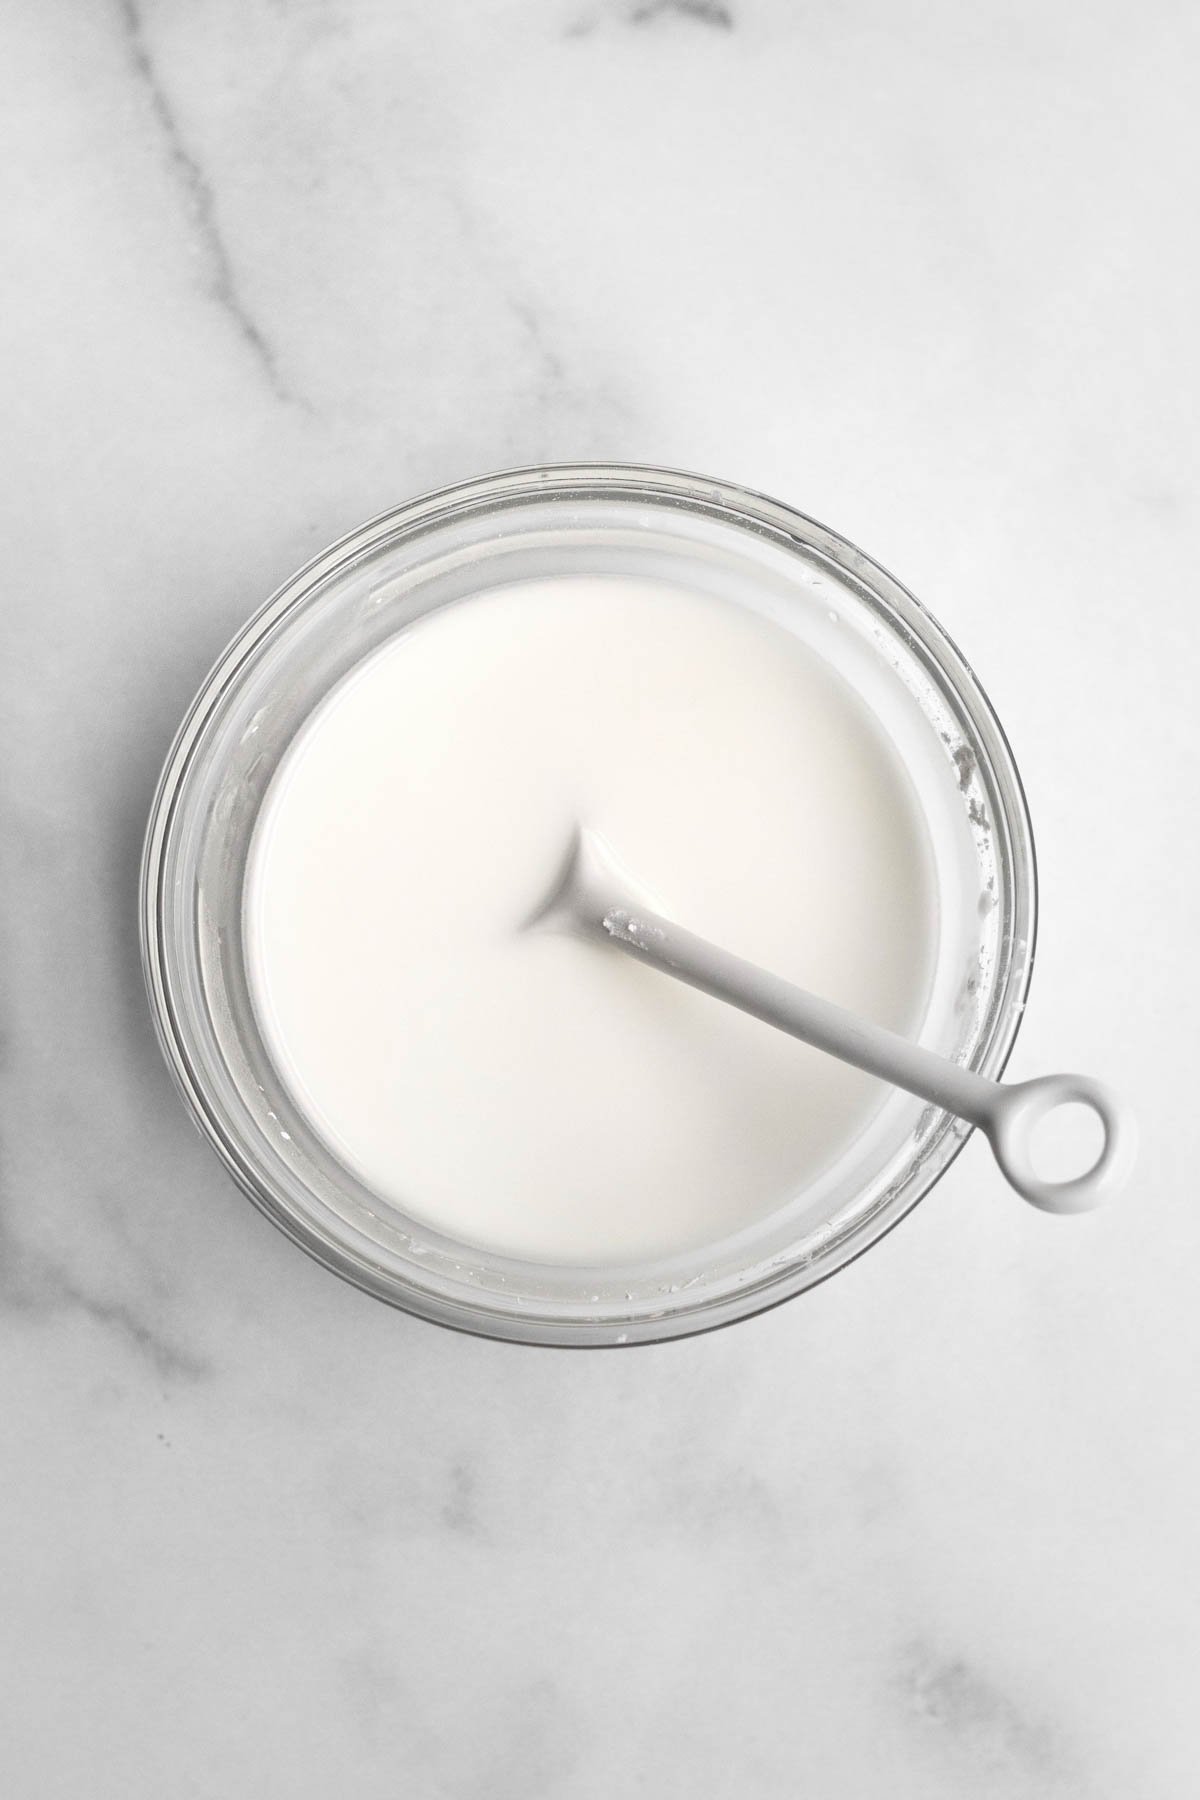
Step 4: Make the Cornstarch Water
In a small bowl, using a spoon, mix together the cornstarch and water until thin and watery. It will be thick and tacky at first.
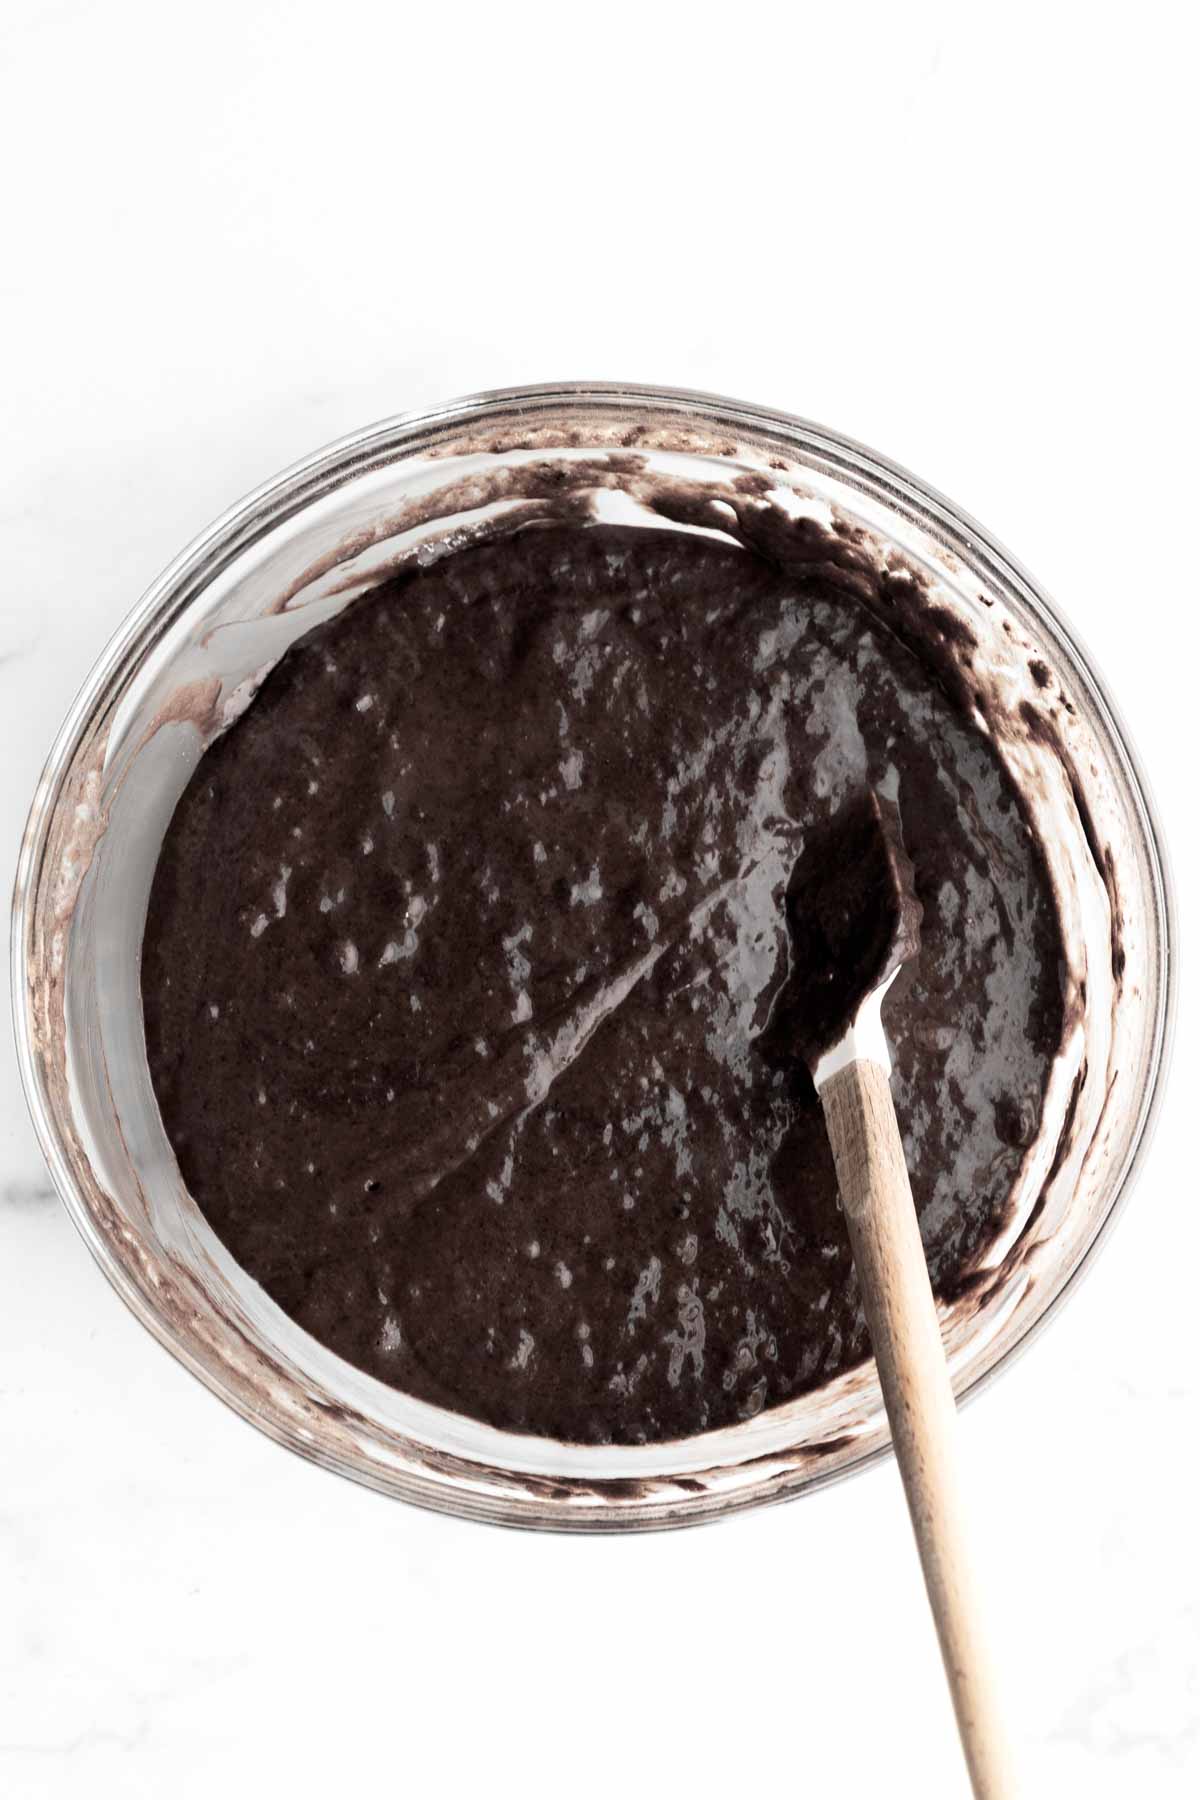
Step 5: Add the Liquid Ingredients
Make a well in the center of the dry ingredients. Add in the cornstarch water mixture, the homemade buttermilk, the warm water, vegetable oil and vanilla. Whisk until smooth and combined.
The batter may appear very thin and liquidy. If so, let it sit 10 minutes; it will start to thicken.

Step 6: Fill the Cupcake Tins
Use an ice cream scoop to fill the cupcake tins ¾ way to the top. Smooth the tops with a small knife.
You should have 12 regular size cupcake tins filled.
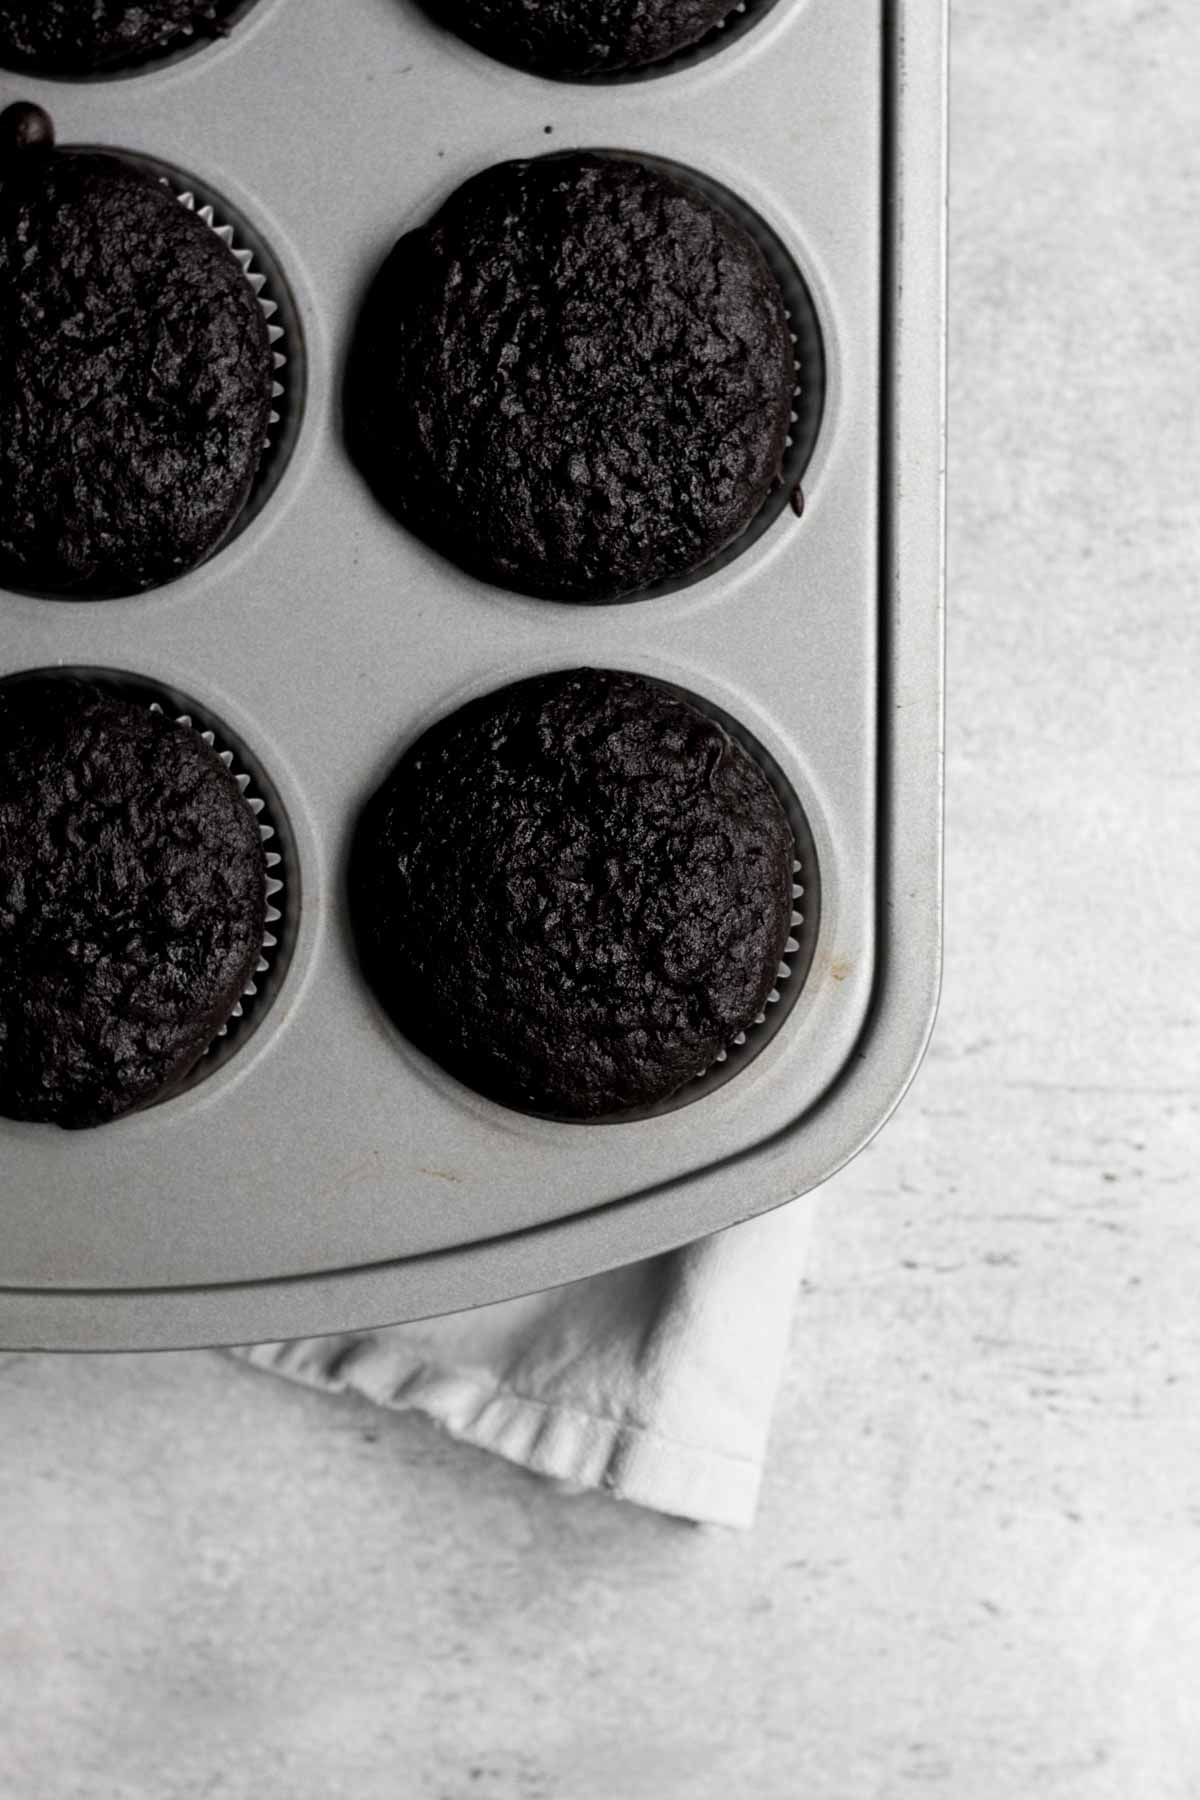
Step 7: Bake the Cupcakes and Cool
Bake the cupcakes at 350 degrees Fahrenheit for 24 minutes.
Let the cupcakes cool almost completely in the pan before trying to remove them.
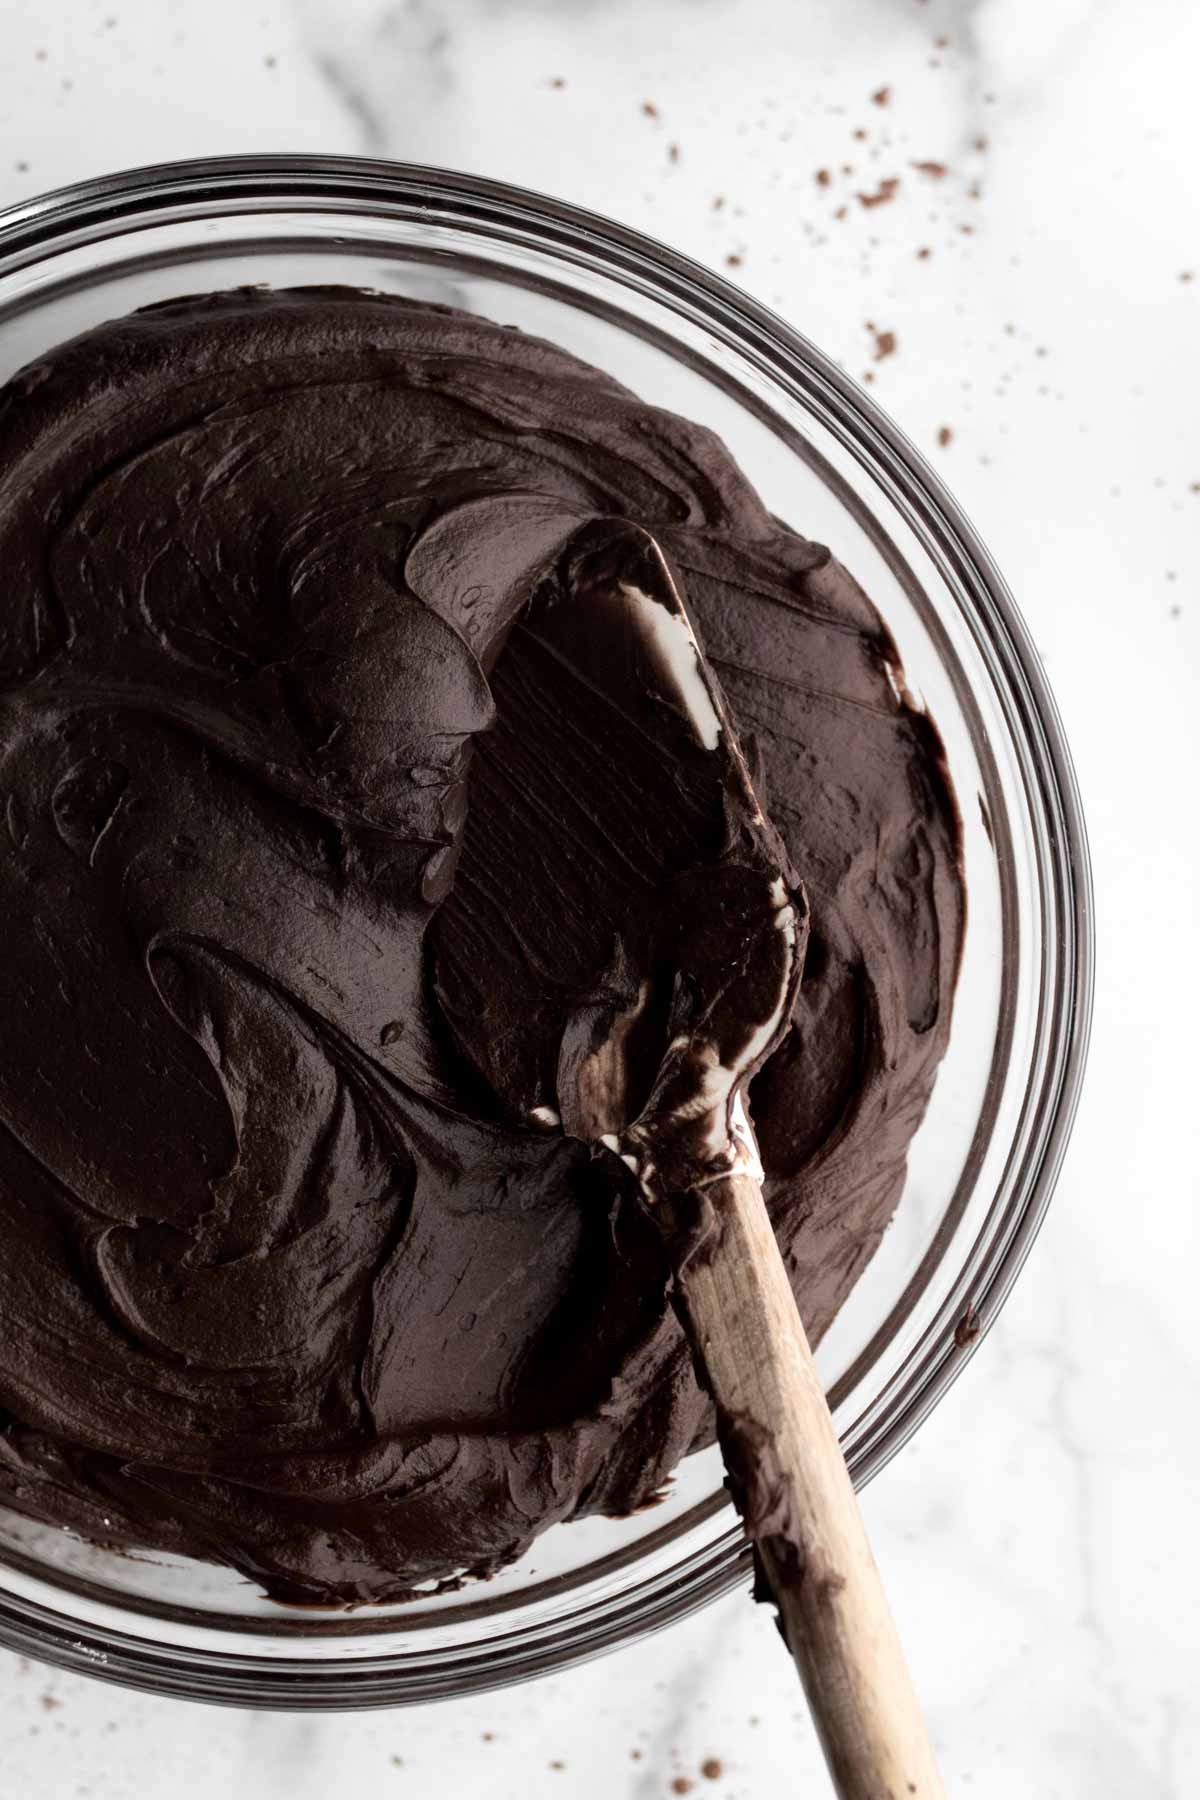
Step 8: Make the Chocolate Frosting
Beat the butter until smooth; about 2 minutes.
Slowly beat in the confectioners' sugar, cocoa powder and vanilla until combined.
Then slowly beat in the water a little at a time until you get the desired consistency. You may not need to use all the water.
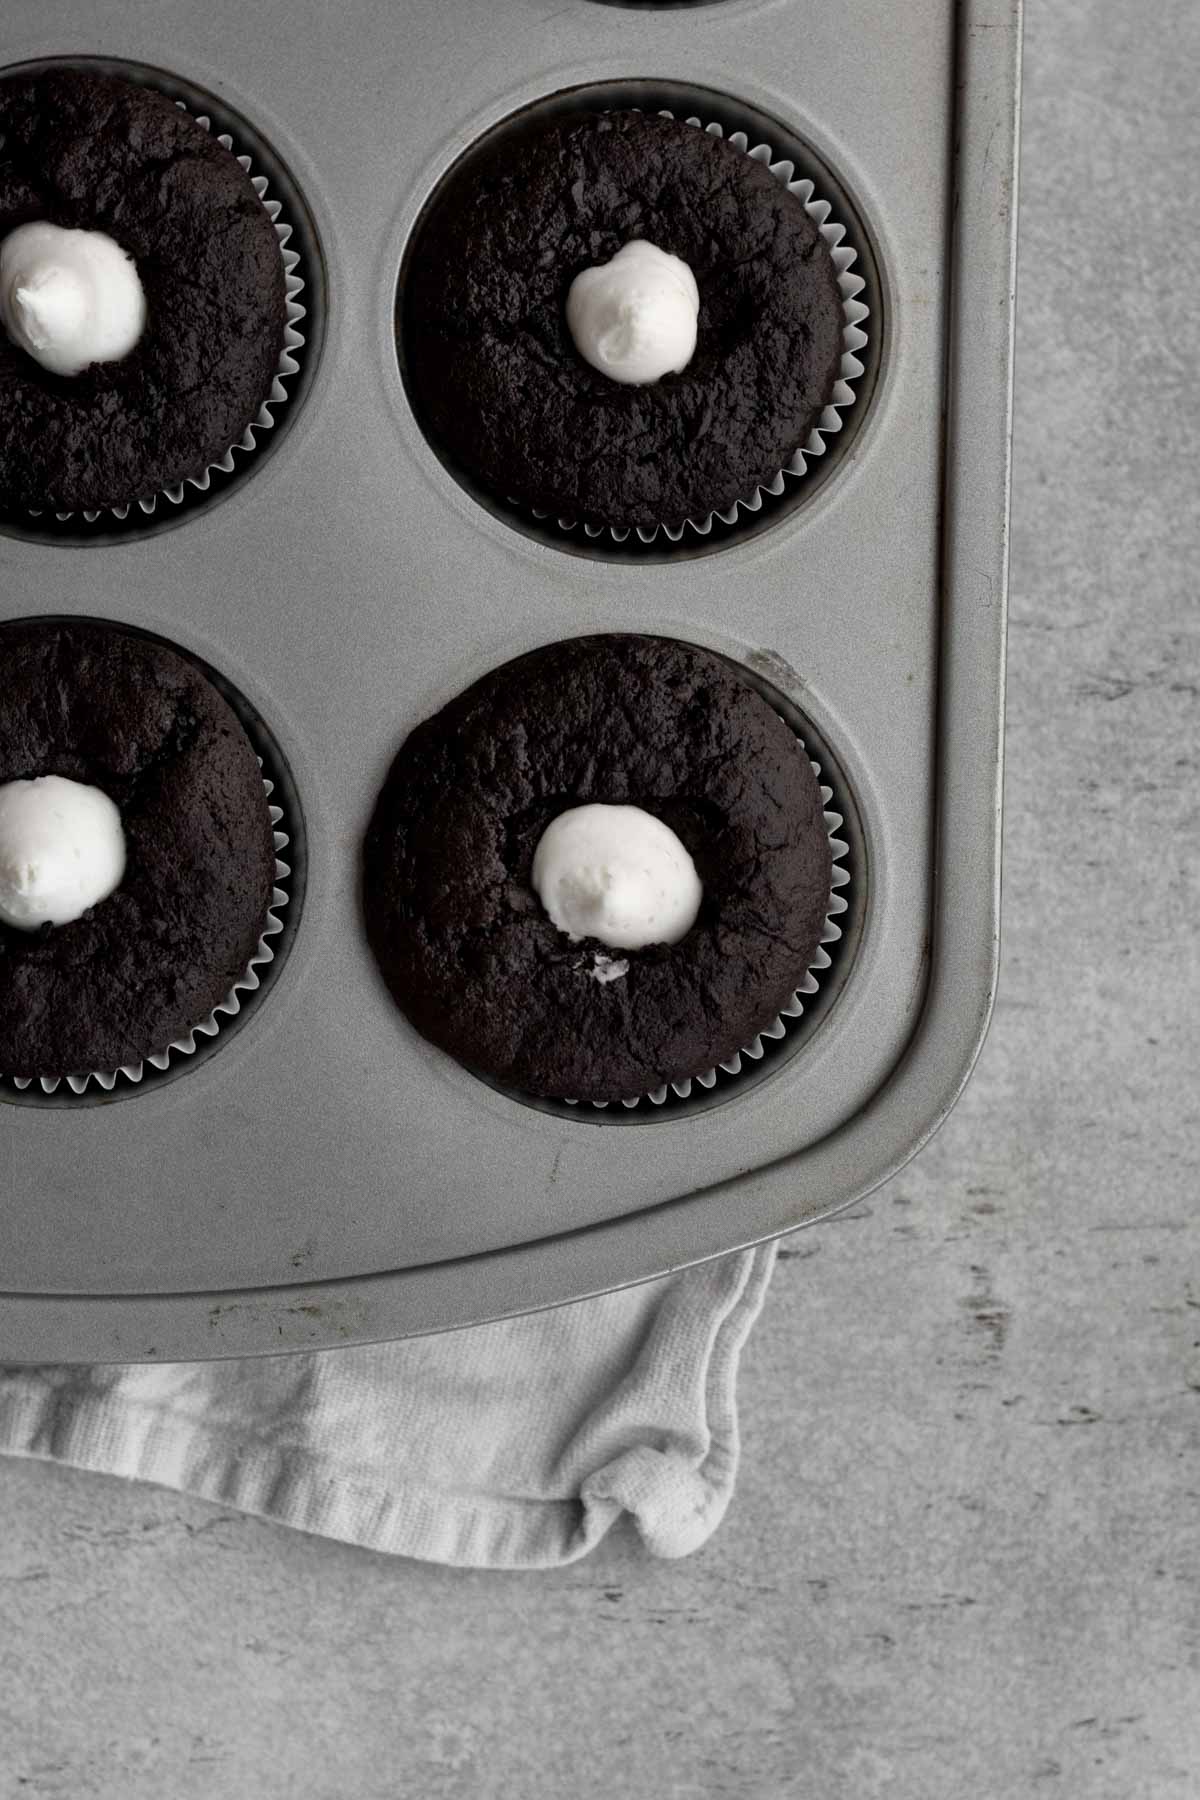
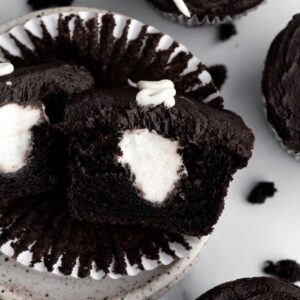
Step 9: Fill the Cupcakes
Once the cupcakes have cooled, make the holes for the vanilla frosting filling. Using a clean thumb, push down in the center of the cupcakes but not all the way to the bottom.
Using a piping bag, fill the holes with the vanilla buttercream, all the way to the top.
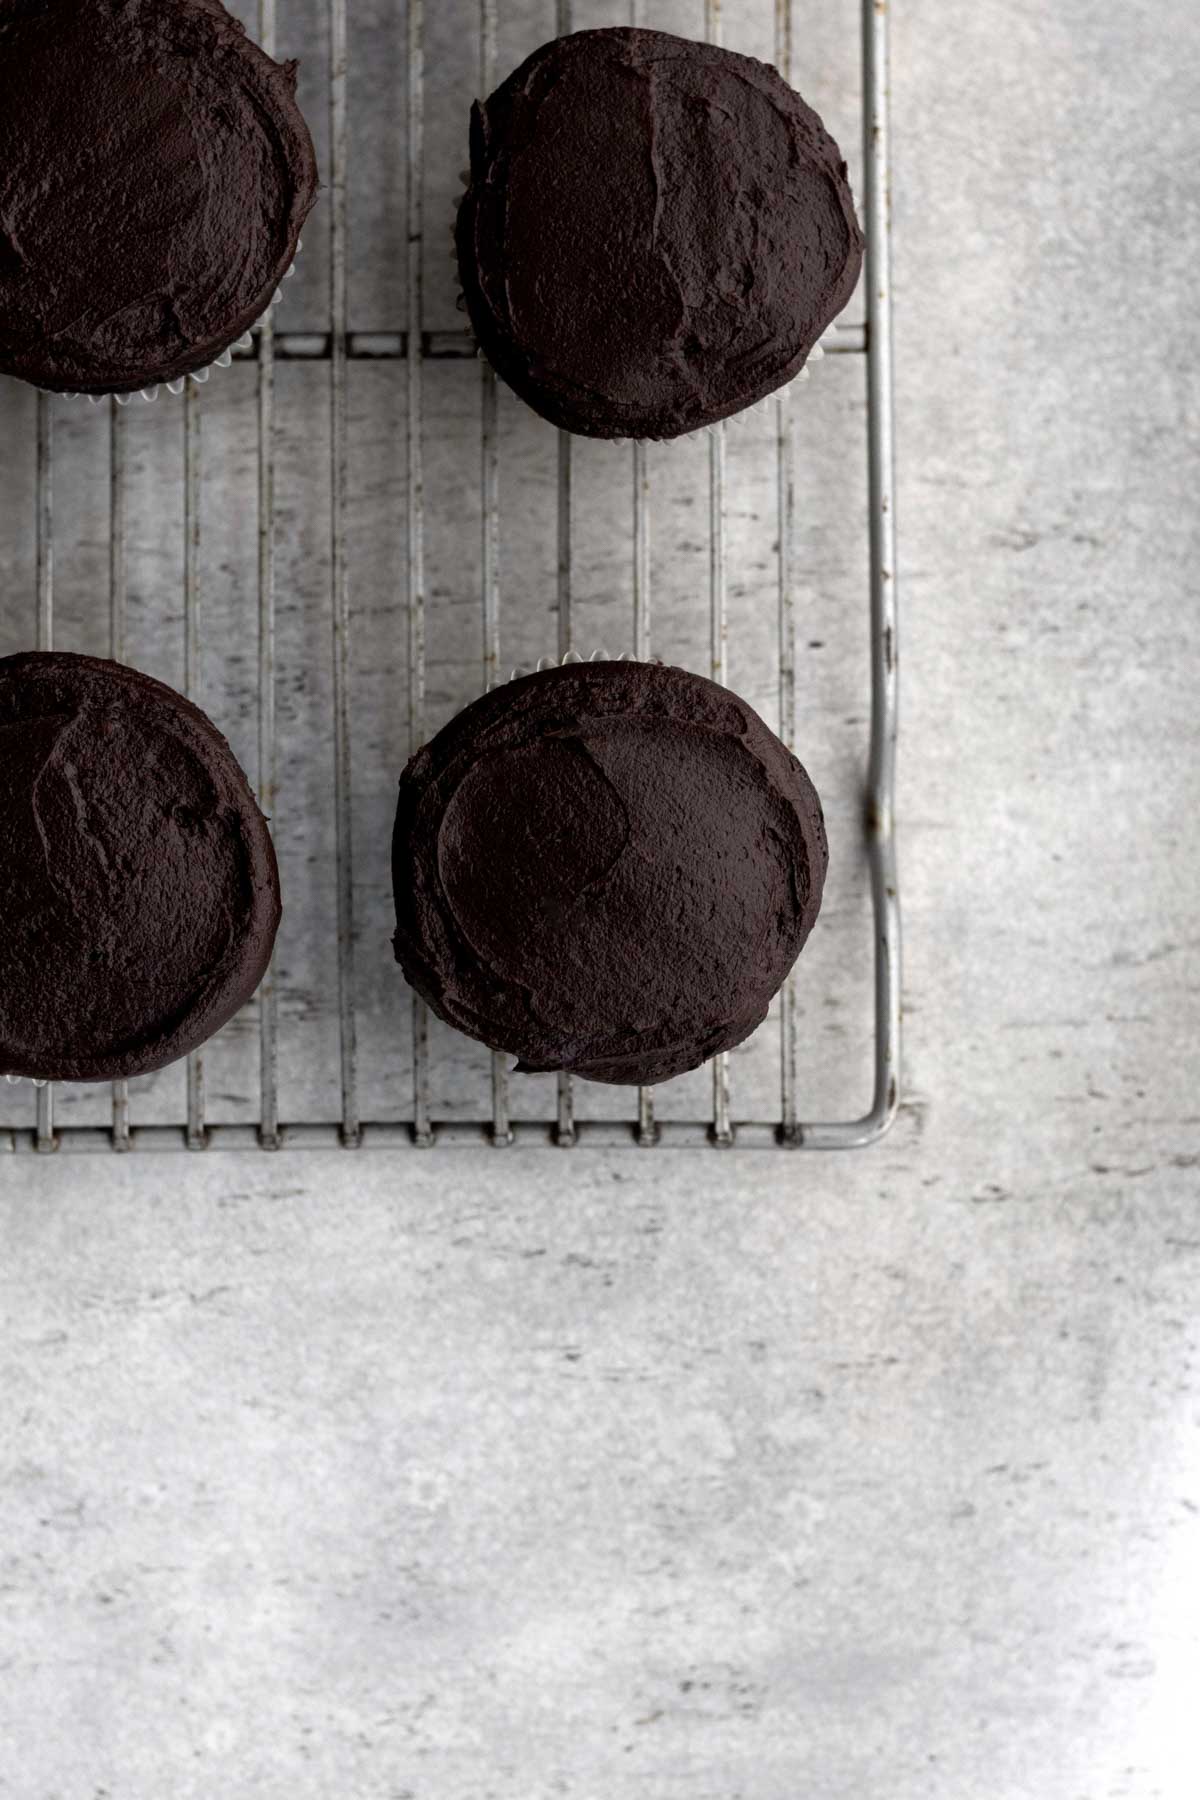
Step 10: Frost the Cupcakes
Pipe the chocolate frosting on top of each cupcake or frost with an icing spatula.
Use an icing spatula to smooth the chocolate frosting and make a flat top to pipe the vanilla swirl.
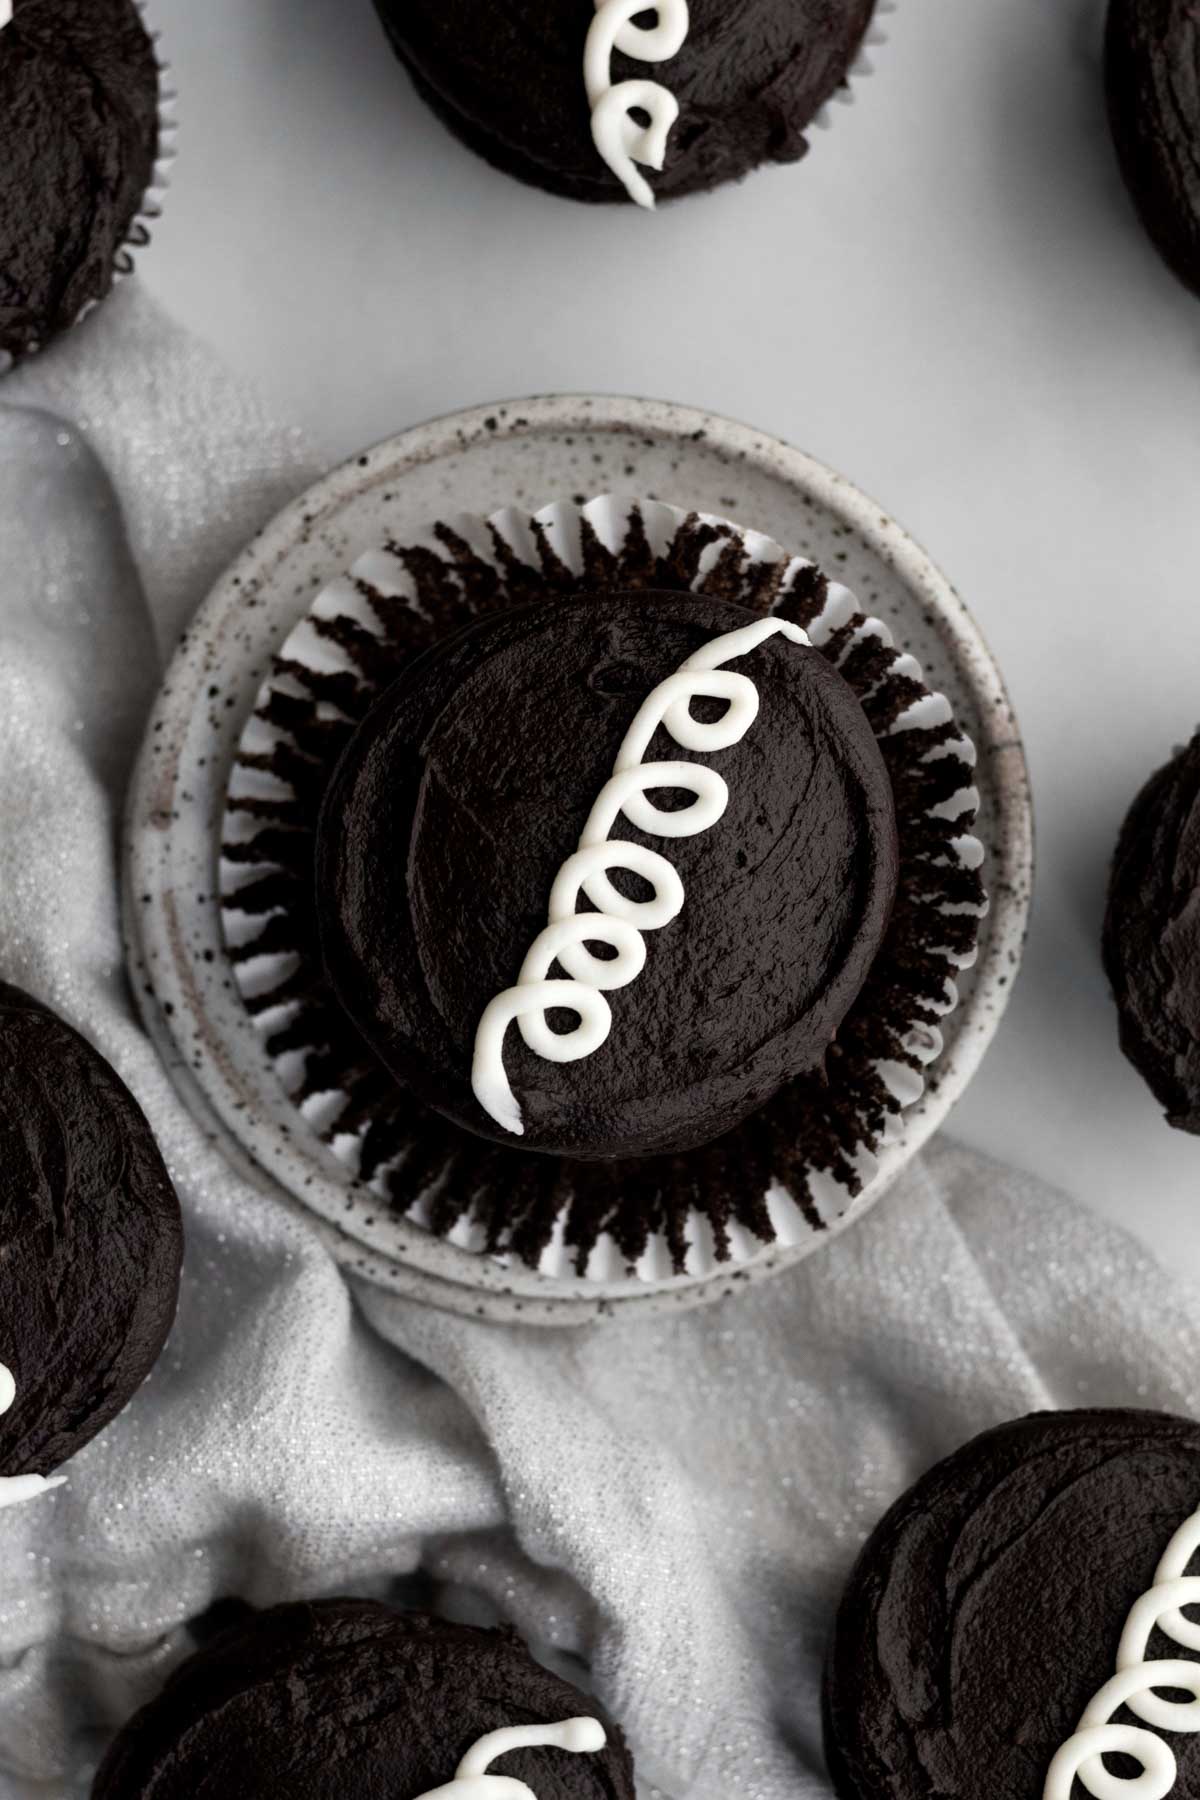
Step 11: Add the Vanilla Swirl
Immediately after finishing frosting the cupcakes with the chocolate frosting, pipe the swirl on top of the cupcakes. I like to use a wilton size 4 tip.
Expert Baking Tips
For the Cupcakes
- Use Packed Cups of Flour- Normally in baking we do not use packed cups however, when working with gluten free, I've found using packed cups works best to help the baked goods keep their shape. Or read the gram measurement.
- Use 2 Types of Cocoa Powder- The 2 types of cocoa powders give the cupcakes their dark hue. If you only have one type on hand, use natural unsweetened or dutch...just know their color will not be as dark as mine. Do not use dark alone; it will make your cupcakes and frosting too dry and bitter.
- Make the Homemade Buttermilk- Measure out ½ cup of milk of choice. Add in ½ tablespoon of white vinegar and stir to combine. Let it sit for 5-10 minutes and then stir again. It will appear chunky and that’s normal.
- Smooth the Batter- Many gluten free batters have a way of staying exactly as they are placed, when baked. When the batter is in the cupcake pan, gently smooth the tops with a butter knife prior to baking.
- Use Paper Muffin Liners- It will ensure you're able to get the cupcakes out of the tins. If you don't have any paper liners, grease each cupcake tin with vegetable oil prior to adding the batter.
- Cool the Cupcakes- Make sure the cupcakes have cooled completely prior to frosting them. If the cupcakes are even slightly warm, the frosting will become a liquid mess.
Frosting Tips
- Use 2 Types of Cocoa Powder- The 2 types of cocoa powders give the cupcake tops their dark hue. If you only have one type on hand, use natural unsweetened or dutch...just know the color will not be as dark as mine. Do not use dark alone; it will make your frosting too dry and bitter.
- Making The Frosting- If the frosting is too liquidy, add more confectioners’ sugar 1 tablespoon at a time until you reach the desired consistency. It should be thick enough to stay put on the cupcakes and not run off. If the frosting appears too thick, add a little water ¼ teaspoon at a time. Make sure your butter isn't too soft. It should be room temperature, not softened. If you're using vegan butter, make sure it is on the colder side.
Recipe FAQs
You can, but they are freshest the first day. If you need to make them ahead of time, make the night before and store them (already frosted) in an airtight container in the fridge.
If you refrigerate the cupcakes without frosting, the cupcakes can form a sticky later on the tops.
Yes you can! If making the frostings the night before, keep in bowls covered with plastic wrap in the fridge.
When ready to use, bring the frostings to room temperature and rewhip them to regain that creaminess.
Storing: Store the cupcakes in an airtight container or individually wrap each cupcake in aluminum foil for up to 2 days in the fridge. Try to create a teepee with the top of the foil so it isn't touching the top of the frosting as much.
Let each cupcake come to room temperature prior to serving to regain the soft cake texture.
Freezing: Once the frosting on the cupcakes has hardened a little (you may need to pop them in the fridge first), individually wrap each cupcake in aluminum foil. Try to create a teepee with the top of the foil so it isn't touching the top of the frosting as much.
Pop the wrapped cupcakes in a zip top bag and freeze the cupcakes for up to 30 days.
To defrost, put the cupcakes in the fridge the night before or leave them out on the counter for 2 hours prior to eating or until the cupcakes are room temperature and soft.
More Cupcake Recipes You'll Love
Did you try this recipe? Please leave me a ⭐ review below!
Don’t forget to tag me on Instagram @laneandgreyfare and follow along on Pinterest, Facebook and YouTube! Enjoy!!!
📖 Recipe
Homemade Hostess Chocolate Cupcakes
Ingredients
For the Vanilla Buttercream
- ¼ cup unsalted butter or vegan baking stick, room temperature
- 2 ¼ cups confectioners' sugar
- 1 teaspoon pure vanilla extract
- 2 tablespoons water , room temperature
For the Chocolate Cupcakes
- ¾ cup plus 2 tablespoons multipurpose gluten free flour (I use a multipurpose gluten flour with xanthan gum already in it)
- ¾ cup plus 2 tablespoons granulated sugar
- ¼ cup plus 2 tablespoons cocoa powder (I use 3 tablespoons dutch or natural unsweetened and 3 tablespoons dark)
- ¾ teaspoon baking soda
- ¼ teaspoon plus ⅛ teaspoon baking powder
- ¼ teaspoon plus ⅛ teaspoon kosher salt
- 2 rounded tablespoons cornstarch mixed with 3 tablespoons of water
- ½ cup milk
- ½ tablespoon white vinegar
- ½ cup warm water (Microwave it for about 30 seconds)
- 2 tablespoons vegetable oil
- ½ teaspoon pure vanilla extract
For The Chocolate Frosting
- ¾ cup unsalted butter or vegan baking sticks, room temperature
- 3 ½ cups confectioners' sugar
- 1 cup cocoa powder (I use ½ cup natural unsweetened or dutch and ½ cup dark)
- 2 teaspoons pure vanilla extract
- ½ cup water , room temperature
Instructions
For the Vanilla Buttercream
- In the large bowl of an electric mixer or using a hand held mixer, beat the ¼ cup unsalted butter until smooth and creamy. About 2 minutes.
- With the mixer on very low speed, slowly add in the 2 ¼ cups confectioners' sugar.
- Add in the 1 teaspoon pure vanilla extract and beat until combined.
- While the mixer is on, slowly add in the 2 tablespoons water a little at a time until you get the desired consistency. You may not need to use all the water.
- Once all the ingredients are combined, turn the mixer to medium high speed and really whip that frosting. I would do this for about 3 minutes or until the frosting is super soft, fluffy and creamy. Set aside.
Make the Cupcakes
- Preheat the oven to 350 degrees Fahrenheit and line a regular size 12 cupcake pan with cupcake liners. Set aside.
- In a large measuring cup, measure out ½ cup of milk. Add in ½ tablespoon of the white vinegar and stir. Let sit 5-10 minutes and stir again. The milk will appear chunky; that's normal.
- In a large bowl whisk together the ¾ cup plus 2 tablespoons gluten free flour, ¾ cup plus 2 tablespoons granulated sugar, ¼ cup cocoa powder, ¾ teaspoon baking soda, ¼ teaspoon plus ⅛ teaspoon baking powder and ¼ teaspoon plus ⅛ teaspoon kosher salt.
- In a small bowl, using a spoon, mix together the 2 rounded tablespoons cornstarch and 3 tablespoons water until thin and watery. It will be thick and tacky at first.
- Make a well in the center of the dry ingredients. Add in the cornstarch water mixture, the homemade buttermilk, the ½ cup warm water, 2 tablespoons vegetable oil and ½ teaspoon pure vanilla extract.Whisk until smooth and combined. If the batter appears very thin and liquidy, let it sit 10 minutes; it will start to thicken.
- Use an ice cream scoop to fill the cupcake tins ¾ way to the top. Smooth the tops with a small knife. You should have 12 regular size cupcake tins filled.
- Bake the cupcakes at 350 degrees Fahrenheit for 24 minutes or until the tops of the cupcakes spring back at you when carefully touched or when a toothpick inserted comes out clean.
- Let the cupcakes cool almost completely in the pan before trying to remove them.
Make the Chocolate Frosting
- In the large bowl of an electric mixer or using a hand held mixer, beat the ¾ cup unsalted butter or vegan baking stick until smooth and creamy. About 2 minutes.
- With the mixer on very low speed, slowly add in the 3.5 cups confectioners' sugar.
- With the mixer on low speed still, add in the 1 cup cocoa powder.
- Add in the 2 teaspoons pure vanilla extract and beat until combined.
- While the mixer is on, slowly add in the ½ cup water a little at a time until you get the desired consistency. You may not need to use all the water.
Assemble the Cupcakes
- Once the cupcakes have cooled, we are going to make the holes for the cream filling.If you have piping bags with tips, you can use that to make the holes.If not, using a clean thumb, simply push down in the center of the cupcakes but not all the way to the bottom.
- Fill the holes in the center of the cupcakes with the vanilla buttercream, all the way to the top.Easiest way to do this is to fill a piping bag with a tip with the vanilla frosting and pipe it into the hole. If you don’t have a piping bag, fill a zip top bag with the vanilla frosting and snip a small piece of the corner off.
- Once the cupcakes are filled, If you have piping bags, pipe the chocolate frosting on top of each cupcake.If you don’t have piping bags, put a thin layer of chocolate frosting on top of each cupcake.
- If you frosted the cupcakes by hand, pop the cupcakes in the fridge for 15 minutes to let that thin layer harden. This is your crumb layer so that when you frost the tops of the cupcakes, the vanilla frosting doesn’t ooze out and get all over the place. If you have a piping bag, you don’t need the crumb layer or this step.
- Use an icing spatula to smooth the chocolate frosting and make a flat top to pipe the vanilla swirl.
- Immediately after finishing frosting the cupcakes with the chocolate frosting, pipe the vanilla swirl on top of the cupcakes. I like to use a wilton size 4 tip.
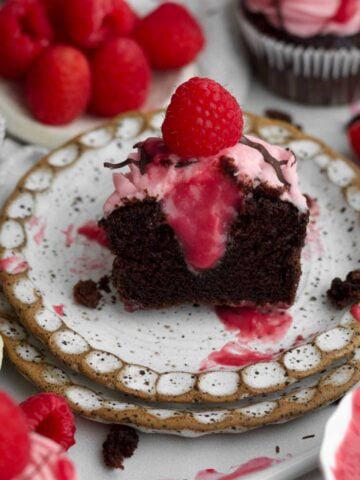
Anne says
I just made these and everyone (gf and not) were impressed. I have had to bake gf for 18 years and just baked this recipe for the first time. I found this to be the best tasting and best textured copycat recipe. Wow on the texture. Never would think that is is Gf. I really like that the cupcake cake portion also does not need a mixer-so if my allergic to eggs and wheat son wants to make the cupcake part at college, he can. The extra time beating the frosting was really worth it- I also beat on slow a lot longer because it seemed to take the confectioner sugar graininess away. I sifted also but not really necessary. My son suggested a filling of strained raspberry preserves so I added that to 3 tbs. of the white frosting and filled 4 of the cupcakes (used red cupcake paper cups). The rest were traditional hostess style. All were frosted like regular Hostess. For the reviewer asking about real buttermilk, I have done that with other Lane and Grey Fare recipes.The goodies come out a little heavier but still tasty. Gf/Egg free is definitely scientific baking. I stick to the recipe now (without buttermilk). I also tend to use Cup4cup for best texture but most mild flavored :1 commercial mixes works well, even homemade gf mixes with zanthum gum added. I also weigh. FYI 2 heaping tablespoons is 24 grams. I have made so many of L&GFare recipes and never been disappointed.
Lee says
Oh gosh thank you so so much! So glad you and your son like them!
Michelle says
I don't even have the words to describe how INCREDIBLE these are. I could not believe how much they smelled like the real thing. Everyone who ate them raved about how amazing they tasted.
I made them gluten free and vegan using Bob's Red Mill Gluten-Free 1-To-1 Baking Flour and vegan butter. My icing did not come out as dark, but the cupcakes definitely were the right color. They've kept well in the fridge when sealed in Tupperware.
Definitely follow the directions exactly if you can - I messed up a step and was able to (mostly) save it. They still turned out wonderful 🙂
Lee says
Thank you!!! So glad everyone liked them!
Amanda says
Can I use regular buttermilk instead of a mix of milk and vinegar?
Lee says
I have not made it with real buttermilk but that should work just fine!
Mags says
Absolutely delicious! So moist and decadent!
Lee says
Thanks so much!
Ginny says
These are delish and come out looking just like the originals. So great!
Anita Simoneaux says
I hate to be "that person" buuuuuut do you know if a 1:1 sub of tapioca starch or arrowroot powder would suffice to replace the corn starch? #notaskingforafriend 😊
Lee says
I haven't tried but many use equal amounts of arrowroot and say it works well!
Nancy says
These hostess cupcakes version with all natural ingredients came out amazing. It was a hit with my family. It brought back memories as a child.
Lee says
SO glad thank you!